How to Unclog a Bathroom Sink
Unclog a slow bathroom sink — usually hair and soap gunk — in about 30 quiet minutes. Remove the stopper, pull surface hair, seal the overflow, plunge with a water seal, snake if needed, then test drain speed. Read one step at a time. Start with the preflight. Plunger not moving the clog? See plunger and drain. Snake hits the trap with nothing on it? See P-trap removal.
Tips for reading this guide
- One step at a time. Read the green caption, the Why line, then the bullets.
- Move on when the green done line is true — then go to the next step.
- Seal the overflow. A wet rag over the overflow hole is what makes plunging work on a bathroom sink.
- Hot tap water, not boiling. Boiling water can damage PVC pipes under the sink.
- Plunger not working, or snake pulls nothing? Jump to the matching branch below.
- Need a helper? Ask someone you trust to hold the overflow rag, pass tools, or spot you under the cabinet.
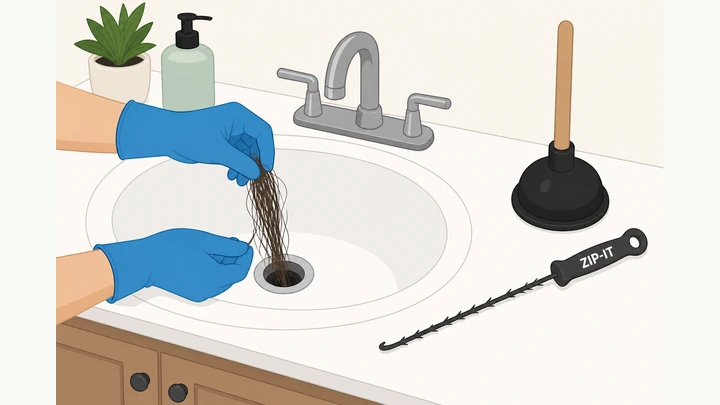
Things You'll Need
- Cup plunger sized for a sink drain — not a toilet flange plunger unless noted in the branch
- Zip-it drain tool or short hand-crank drain snake
- Rubber gloves
- Needle-nose pliers
- Bucket or bowl to catch drips under the sink if you open the trap
- Old towels for the vanity top and cabinet floor
- Wet rag or duct tape to seal the overflow hole while plunging
- About 30 quiet minutes; hot tap water from the faucet — not a kettle of boiling water
Where are you stuck?
Follow Start here for a full sink unclog. Jump to a branch if plunging fails despite a sealed overflow, or the snake hits the trap with nothing on it.
Start hereClear sink → remove stopper → pull hair → hot flush → seal overflow → plunge → snake → retest → reinstall stopper → full-basin test → clean up
Preflight — supplies, cleared sink, and cabinet access before you touch the drain.
Gloves · plunger · zip-it · bucket · towels · sink cleared · no chemical cleaner in the drain.
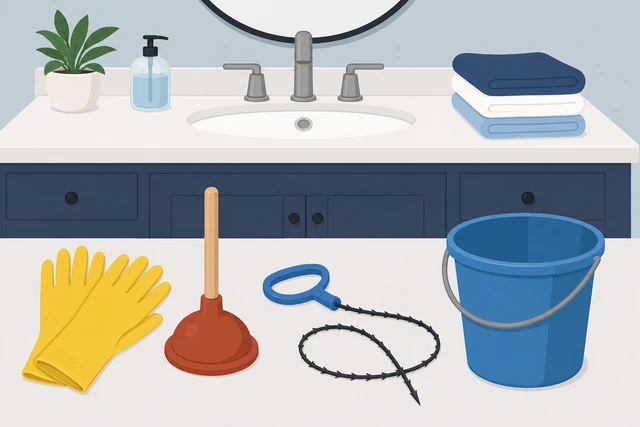
Chemical drain cleaner plus plunging causes caustic splash burns; clearing the basin first keeps hair and tools from falling down a half-open drain.
- Supplies gathered? Gloves, cup plunger, zip-it or short snake, bucket, and towels are within reach.
- Sink cleared? Remove toiletries and the drain cover if it lifts out separately.
- Cabinet access? Pull items from under the sink so you can reach the trap if needed later.
- No chemical cleaner? Skip gel or lye products today — or wait 24 hours before any plunging.
Supplies are ready, the sink is cleared, under-sink access is open, and no recent chemical drain cleaner was used.
Never pour chemical drain cleaner and then plunge — caustic splash causes burns. If you already used a gel or lye product, wait 24 hours or call a plumber instead of plunging. Already tried plunging without sealing the overflow? See Plunger and drain.
Remove the pop-up stopper or drain strainer.
Lift or unscrew stopper · expose drain mouth · do not yank linkage.
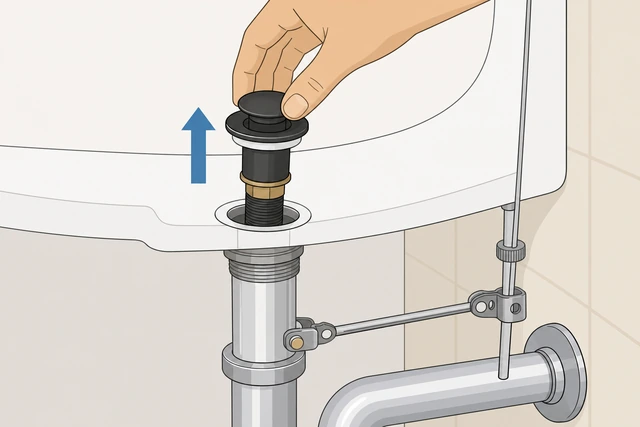
You cannot pull hair or seat a plunger on a closed drain — but yanking the stopper without freeing the pivot rod breaks the open/close mechanism.
- Lift a lift-out strainer straight up, or unscrew the stopper cap if it threads off.
- For a pivot-rod stopper, look underneath for the horizontal rod and loosen the nut before pulling up.
- Set the stopper aside on a towel — do not drop parts down the drain.
Drain opening is fully exposed and the stopper linkage is intact.
Pull visible hair and soap gunk from the drain opening.
Gloved fingers or pliers · drain mouth · discard on paper towel.
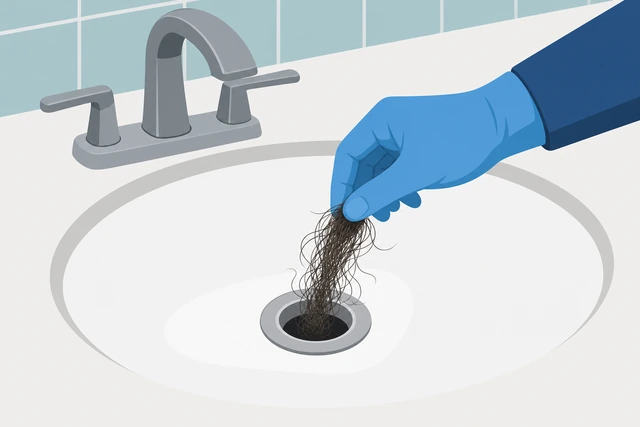
Most bathroom sink clogs are a hair mat right at the mouth — removing it by hand fixes slow drains without tools in half of cases.
- Reach into the drain mouth with gloved fingers and pull out hair clumps.
- Use needle-nose pliers for tight spots — grip and pull slowly, do not push deeper.
- Wipe debris onto a paper towel and throw it in the trash, not back into the drain.
Surface hair and soap gunk at the drain mouth are removed.
Run hot tap water for 30 to 60 seconds.
Hot tap only · 30–60 sec · note if flow improves or stays slow.
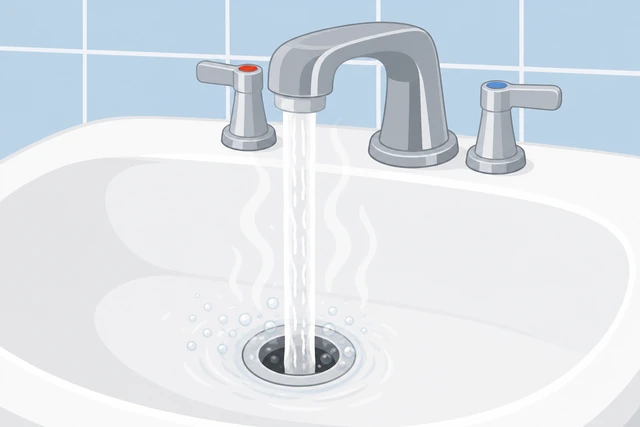
Hot tap water softens soap grease in the trap — but boiling water from a kettle can soften PVC plastic under the sink and cause leaks.
- Turn the faucet to hot and run water directly into the open drain for 30 to 60 seconds.
- Watch whether the basin drains faster or still pools and gurgles.
- Use hot tap water only — not boiling water from a kettle.
You ran hot tap water and know whether the drain improved or is still slow.
Use hot tap water only — not boiling water — on PVC trap pipes under the sink. Boiling water can soften plastic fittings and cause leaks.
Seal the overflow hole with a wet rag or tape.
Wet rag or duct tape · overflow hole · tight seal.
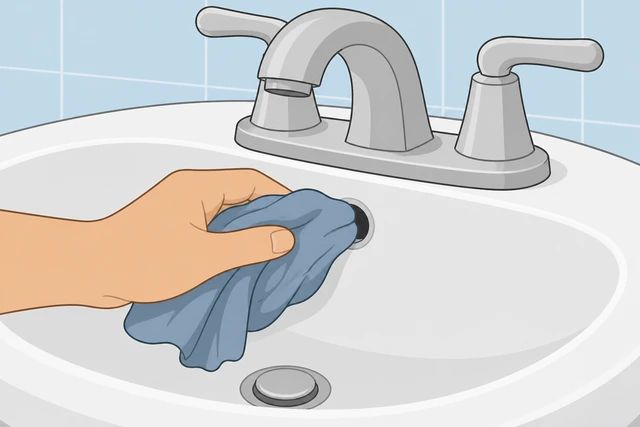
The overflow hole is an air escape route — if it stays open, plunging pushes water up the overflow instead of moving the clog in the trap.
- Locate the small overflow opening under the faucet rim, inside the basin.
- Wad a wet rag into the hole, or cover it firmly with duct tape.
- Press until no air leaks around the edges.
Overflow hole is sealed so plunge pressure cannot escape through it.
Seat the cup plunger over the drain with a water seal.
Water covers rubber cup · plunger centered · firm contact on drain.
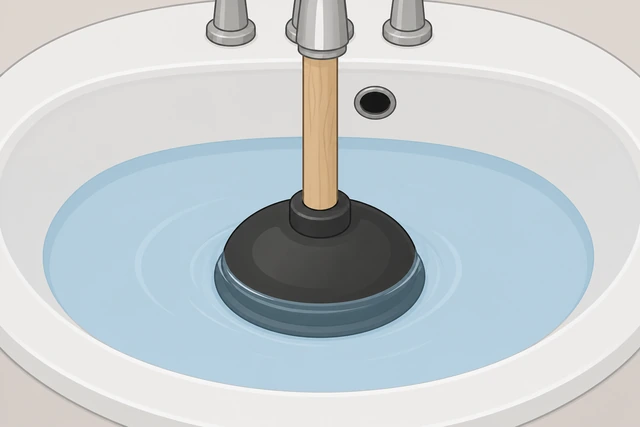
A dry plunger cup lets air bypass the seal — a few inches of standing water around the rubber is what transfers push force into the trap.
- If the basin is dry, add enough water to cover the plunger cup by an inch.
- Center the cup plunger directly over the drain opening.
- Press down gently to expel air and form a seal before the first plunge stroke.
Plunger is centered on the drain with water sealing the rubber cup.
Plunge 6 to 10 firm vertical strokes without breaking the seal.
Straight up-down · 6–10 strokes · keep overflow sealed.
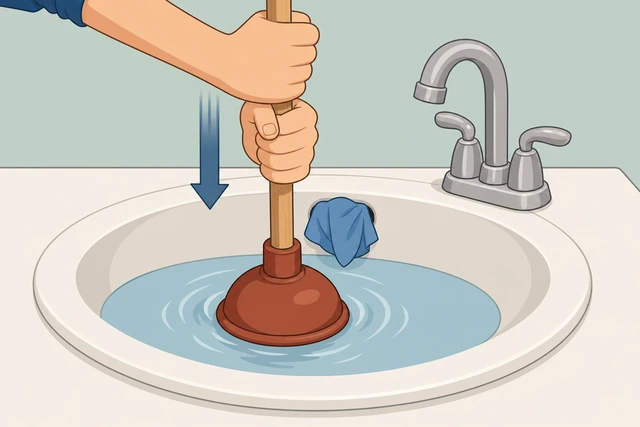
Short choppy strokes that break the seal waste effort — steady vertical pumps move the water column that dislodges the hair plug.
- Push straight down, then pull up without lifting the cup off the drain.
- Complete 6 to 10 firm strokes while the overflow stays sealed.
- Stop if water rises dangerously close to the overflow — see the plunger branch.
You finished one full plunge cycle with the seal intact.
Water backs up during plunging? → Plunger and drain.
Remove the plunger and overflow seal; flush hot tap water.
Remove rag · hot tap flush · watch for debris and speed.
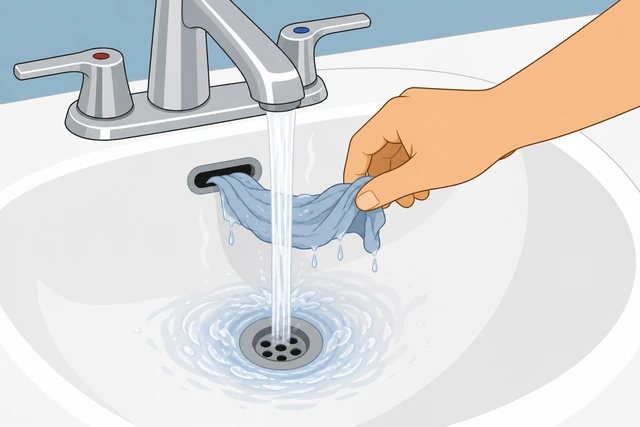
The first plunge often pushes a partial clog loose — flushing immediately clears what rose and shows whether a second round or a snake is needed.
- Lift the plunger off the drain and remove the overflow rag or tape.
- Run hot tap water for 30 seconds into the open drain.
- Note whether hair or gunk rose and whether water drains faster.
Overflow seal is off, hot water flushed, and you know if drain speed improved.
Feed a zip-it or hand snake into the drain if still slow.
Zip-it or short snake · gentle feed · stop at resistance.
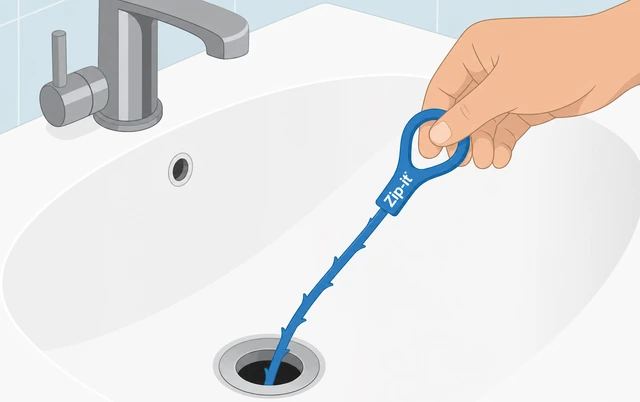
Hair often wraps around the trap bend where a plunger cannot reach — a flexible zip-it catches it without opening pipes under the cabinet.
- Insert the zip-it teeth-down or the snake tip into the drain opening.
- Feed slowly until you feel gentle resistance — do not force past a hard stop.
- Hold the tool steady at that depth for the next step.
Snake or zip-it is inserted to resistance without forcing.
Tool hits a hard stop with nothing on it when pulled? → P-trap removal.
Pull the snake slowly with a slight twist; discard debris.
Slow pull · slight twist · debris on paper towel · trash.
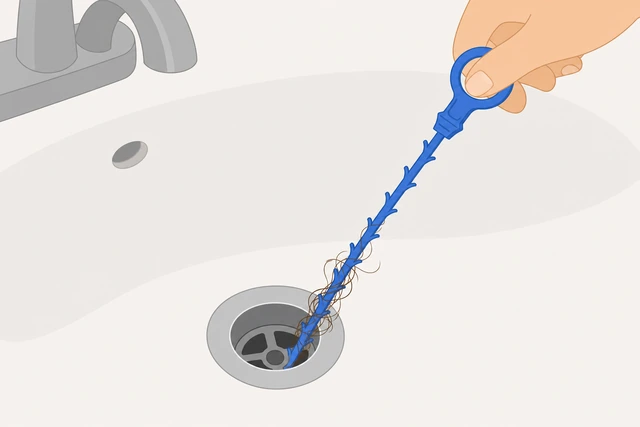
Yanking the tool out fast leaves hair in the pipe — a slow pull with a twist lets the barbs or auger tip carry the clog out.
- Pull the tool out slowly while giving it a slight twist.
- Wipe captured hair and gunk onto a paper towel.
- Throw debris in the trash — do not flush hair down the drain.
Tool is out, debris is in the trash, and the drain mouth looks clearer.
Flush again with hot tap water and check drain speed.
Hot tap flush · watch drain rate · gurgle or stall noted.
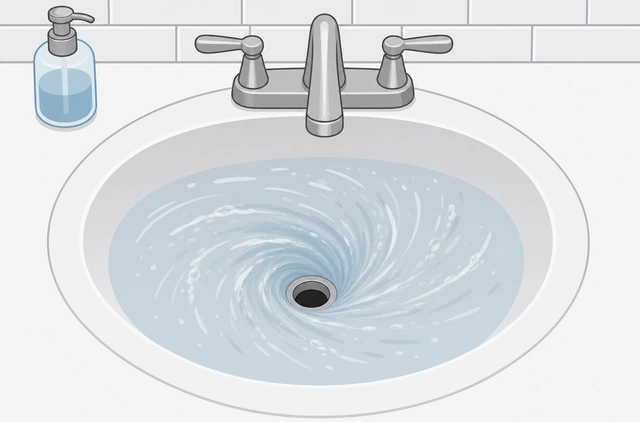
A second hot flush confirms the snake cleared the trap path — if water still pools, the clog may sit in the P-trap itself.
- Run hot tap water for 30 to 60 seconds.
- Watch whether the basin drains in seconds or still gurgles and stalls.
- If speed is normal, skip ahead to reinstall the stopper.
You know whether the drain runs freely or still needs the P-trap branch.
Still slow after two snake passes? → P-trap removal.
Reinstall the pop-up stopper and test with a full basin.
Stopper back in · fill basin · release · time drain.
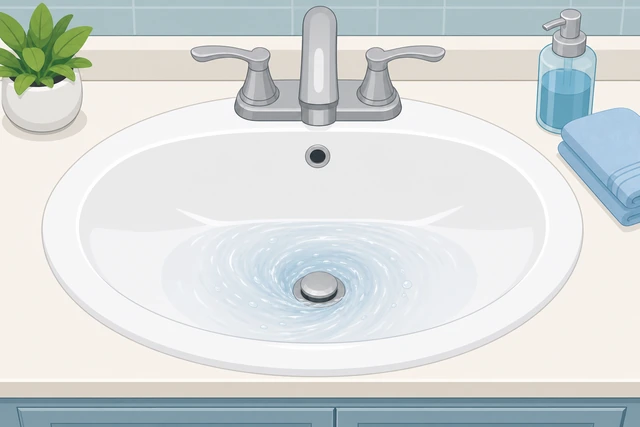
Reassembly checks that linkage still works and a full volume of water proves the clog is gone — not just a trickle test.
- Reinstall the stopper or strainer the same way it came out.
- Close the stopper, fill the basin, then open it and watch the drain.
- A clear drain empties a full basin in a few seconds without backup.
Stopper works correctly and a full basin drains in seconds.
Wipe the basin, dry the cabinet floor, and add a mesh strainer if missing.
Wipe vanity · dry cabinet · mesh strainer · store tools.
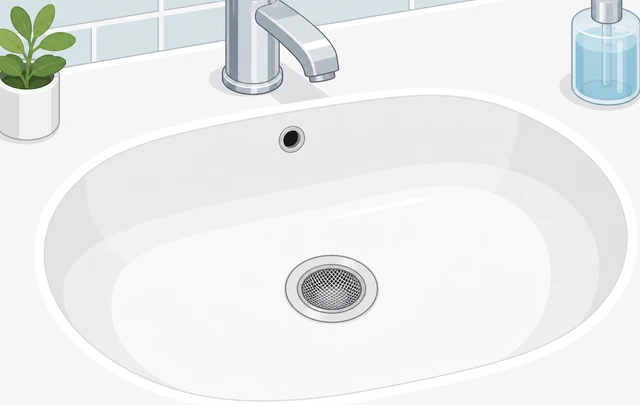
Hair left on the vanity gets rinsed back down — a mesh strainer catches the next clog before it reaches the trap.
- Wipe the basin and vanity top with a damp cloth.
- Dry any drips on the cabinet floor from plunging or snaking.
- Install a mesh drain strainer if the sink does not have one.
Sink is clean, cabinet floor is dry, tools stored, and a strainer is in place if needed.
Plunger and drainPlunging shows no improvement or water rises in the basin during strokes
Re-check overflow seal and add standing water to cover the cup.
Wet rag tight · 2–3 inches water · cup fully submerged at rim.
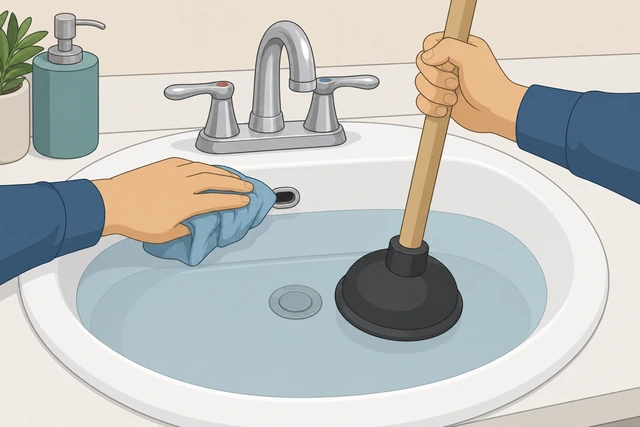
A leaky overflow seal or dry cup rim is the top reason plunging fails on bathroom sinks — fix the seal before blaming the clog.
- Re-wet the rag and press firmly into the overflow until no air hisses.
- Add water until the plunger cup is submerged by at least an inch.
- Confirm the drain opening is centered under the cup before plunging again.
Overflow is tightly sealed and standing water covers the plunger cup.
Never pour chemical drain cleaner and then plunge — caustic splash causes burns. If you already used a gel or lye product, wait 24 hours or call a plumber instead of plunging.
Smear petroleum jelly on the cup rim; plunge again, then flush.
Petroleum jelly on rim · 6–10 strokes · hot tap flush.
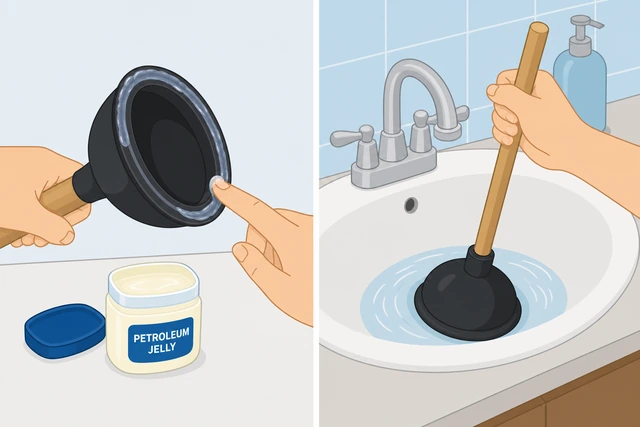
Petroleum jelly fills micro-gaps between the rubber and the basin — the extra seal often moves clogs that a bare cup cannot budge.
- Smear a thin ring of petroleum jelly around the plunger cup rim.
- Plunge 6 to 10 firm vertical strokes without breaking the seal.
- Remove the plunger, take out the overflow seal, and flush with hot tap water.
Second sealed plunge cycle is done and hot water flushed — drain improved or ready for P-trap branch.
Still no improvement after lubed plunger and two full cycles? → P-trap removal. Never add chemical drain cleaner and then plunge.
P-trap removalSnake hits the trap with no debris, or standing water will not clear
Place a bucket under the P-trap and loosen slip nuts by hand.
Bucket under curved trap · hand-loosen slip nuts · photo if first time.
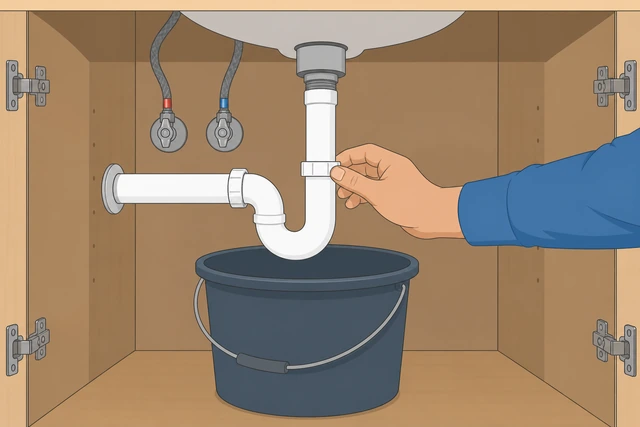
The P-trap holds water that will spill the moment nuts loosen — the bucket catches it and keeps the cabinet floor dry.
- Locate the U-shaped P-trap directly under the sink drain.
- Set a bucket or bowl under the lowest curve of the trap.
- Turn slip nuts by hand counterclockwise — use pliers only if stuck, gripping the nut not the pipe.
Bucket is in place and slip nuts are loosened by hand without stripping.
Remove the trap, clear the clog, and reassemble with a leak check.
Remove trap · clear clog · new washers if worn · hand-tight plus quarter turn.
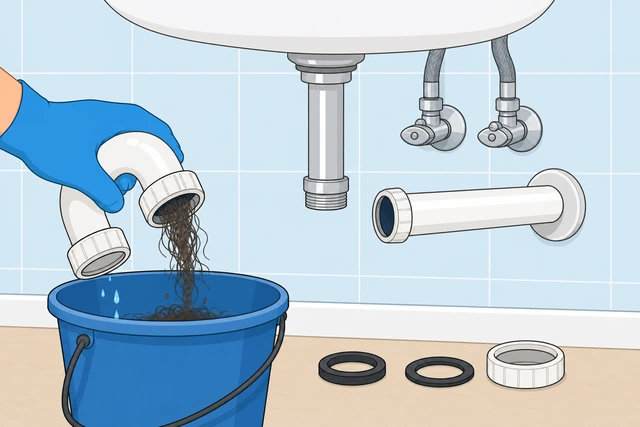
Most bathroom sink clogs sit in the trap bend itself — removing it lets you pull the hair mat directly instead of guessing with a snake.
- Lower the trap into the bucket and pull out hair or gunk with a gloved hand or bottle brush.
- Replace rubber washers if they look flat or cracked.
- Reassemble hand-tight plus a quarter turn, run water 5 minutes, and check for drips.
Trap is reinstalled, water runs with no leaks, and the drain is clear — or you stopped because nuts cracked or multiple fixtures still back up.
Slip nuts crack, threads strip, leak persists after reassembly, or toilet/shower also back up? Call a plumber — that points to a main line clog, not the sink trap alone.
When to get help
- Ask a trusted person to hold the overflow rag, pass tools, or spot you while you work under the cabinet.
- Multiple fixtures (toilet, shower, tub) backing up together? Call a plumber — that is likely a main line clog.
- Chemical drain cleaner already in the drain and you cannot wait 24 hours? Call a plumber — do not plunge.
- Slip nuts crack, threads strip, or trap still leaks after reassembly? Call a plumber for replacement parts.
- Clogs return every week despite a strainer? Ask a plumber about vent blockage or a camera inspection.
When This Doesn't Work
- Multiple fixtures backing up at once. Toilet, shower, and sink all slow or gurgling points to a main line or vent issue — call a plumber, not more sink plunging.
- Chemical drain cleaner already in the drain. Wait 24 hours or call a pro — plunging caustic gel causes burns.
- Repeated clogs every few weeks. Hair strainer missing, vent blockage, or line damage — a pro camera inspection beats repeated trap pulls.
- Leaks from slip nuts after P-trap work. Cracked plastic nuts or stripped threads need replacement parts or a plumber — do not over-tighten.
- Pop-up linkage broken during removal. Stop and reinstall what you can; a plumber or hardware store pivot kit fixes broken rods cheaply.
- No access under wall-mounted or pedestal sink. Some sinks hide the trap in the wall — call a plumber rather than forcing tools blindly.
Warnings
- Never plunge after pouring chemical drain cleaner. Caustic splash causes serious burns — wait 24 hours or call a plumber.
- Do not use boiling water on PVC traps. Hot tap water is safe; boiling water from a kettle can soften plastic fittings and cause leaks.
- Do not force a snake past a hard stop — you can puncture thin trap walls or push the clog deeper into the main line.
- Do not over-tighten P-trap slip nuts — hand-tight plus a quarter turn is enough; gorilla tight cracks plastic nuts.
- Do not yank a pop-up stopper without freeing the pivot rod — you can break the open/close linkage.
- Do not flush removed hair back down the drain — it reforms the clog immediately.
Tips
- Seal the overflow with a wet rag every time — it is the difference between plunging that works and plunging that does nothing.
- Keep a zip-it tool in the vanity — one slow pull monthly prevents full clogs.
- Install a mesh drain strainer after clearing the clog — it catches hair before it reaches the trap.
- Petroleum jelly on the plunger cup rim helps on older basins with uneven drain seating.
- Photo the P-trap slip-nut orientation before your first removal — reassembly is faster with a reference.
FAQ
Why will my bathroom sink not drain even after plunging?
Usually the overflow hole was not sealed, the plunger cup had no water seal, or the clog sits in the P-trap bend where a plunger cannot reach. Seal the overflow, add standing water, and try again — see the plunger branch. If still stuck, remove the P-trap.
Can I use boiling water to unclog a bathroom sink?
Use hot tap water only. Boiling water from a kettle can soften PVC plastic traps under the sink and cause leaks. Hot tap water is enough to soften soap grease.
Is it safe to use chemical drain cleaner?
We do not recommend chemical cleaner followed by plunging — caustic splash causes burns. Mechanical methods (hair removal, plunger, zip-it, P-trap) are safer for most bathroom hair clogs.
What is a zip-it tool?
A thin flexible plastic strip with barbed edges that catches hair when inserted and pulled from a drain. It works well on bathroom sinks without opening pipes under the cabinet.
When should I call a plumber instead?
Call a pro if multiple fixtures back up together, slip nuts crack or leak after trap work, clogs return weekly, or you already used chemical drain cleaner and cannot wait 24 hours.
Comments
Questions, corrections, and what worked for you. Comments are reviewed before they appear.