How to Silence a Squeaky Door Hinge
Silence a squeaky door hinge in about 25 quiet minutes. Support the door, remove the pin, clean the barrel, apply a thin coat of lubricant, reseat the pin, and swing-test. Read one step at a time. Start with the preflight. Pin will not budge after light taps? See rust-frozen pin. Squeak persists or door rubs the frame? See door misalignment.
Tips for reading this guide
- One step at a time. Read the green caption, the Why line, then the bullets.
- Move on when the green done line is true — then go to the next step.
- Support the door first. A cardboard shim under the latch-side bottom edge keeps hinges from bending when a pin is out.
- Remove the pin — do not just spray. Outside-only spray is temporary; cleaning and oiling inside the barrel lasts.
- Pin stuck or door still rubs the frame? Jump to the matching branch below.
- Need a helper? Ask someone you trust to hold the door steady or pass tools while you work the hinge.
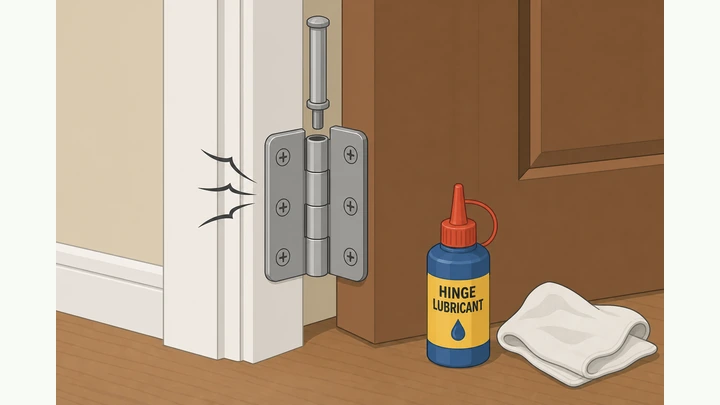
Things You'll Need
- Lithium grease or 3-in-1 household oil — not WD-40 alone for a lasting fix
- Small hammer
- Nail punch or large nail to drive the pin upward
- Clean rag
- Folded cardboard shim to support door weight at the latch-side bottom edge
- Light steel wool for tarnished or rusty pin shanks
- Phillips or flat screwdriver if you need the alignment branch later
- Penetrating oil such as PB Blaster or Liquid Wrench — only if the pin is rust-frozen
- About 25 quiet minutes; clear the door swing path before you start
Where are you stuck?
Follow Start here for a full hinge lubrication. Jump to a branch if the pin is rust-frozen, or the door still rubs the frame after lubrication.
- I want to silence the hinge from scratch Identify hinge · support door · remove pin · clean · lube · test
- Pin stuck or orange rust on the hinge Penetrating oil · 15-minute soak · wiggle · steel wool
- Door rubs the frame or still squeaks after lube Tighten screws · pack stripped holes · shim hinge leaf
Start hereIdentify hinge → support door → pin access → tap pin up → pull pin → clean → lubricate → reinsert → swing test → wipe → other hinges → latch test
Preflight — lubricant, hammer, punch, rag, and door shim before you touch a hinge.
Lithium grease or 3-in-1 oil · hammer · nail punch · rag · cardboard shim · door path clear.
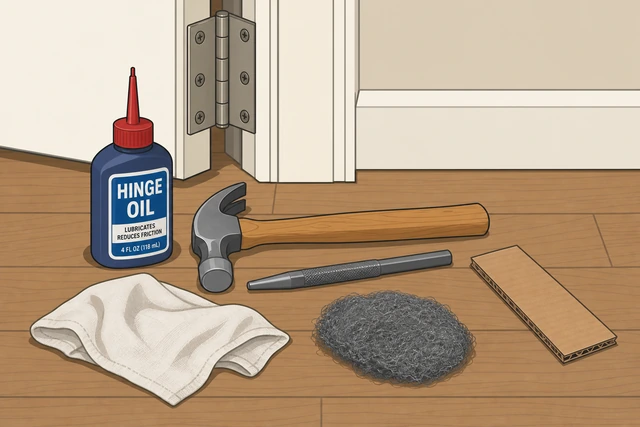
Removing a pin without support bends hinge leaves on a heavy door; outside-only spray leaves grit in the barrel and the squeak returns within days.
- Supplies gathered? Lubricant, hammer, nail punch, rag, and folded cardboard shim are within reach.
- Door path clear? Move rugs, furniture, and anything the door could hit during swings.
- Which hinge squeaks? Swing the door slowly once and note top, middle, or bottom hinge.
- Door supported? Plan to slide the cardboard shim under the latch-side bottom edge before pin removal.
Supplies are ready, the door swing path is clear, and you know which hinge squeaks.
Spraying lubricant on the outside without removing the pin is a temporary fix — grit stays in the barrel and the squeak returns within days. Pin already stuck after light taps? See Rust-frozen pin.
Open the door and identify which hinge squeaks during a slow swing.
Slow swing · listen · note top, middle, or bottom hinge.
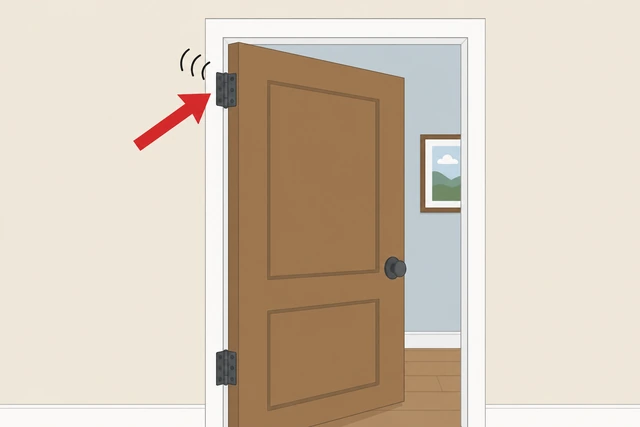
A door has three hinges — lubricating the wrong one wastes time and leaves the squeak; the noisy hinge often shifts weight during the swing arc.
- Open the door to about 90 degrees and swing it slowly by hand.
- Listen for the squeak — note whether it comes from the top, middle, or bottom hinge.
- Mark the noisy hinge mentally or with a small piece of tape on the door edge.
You know which hinge squeaks during a slow swing.
Support door weight with a cardboard shim under the latch-side bottom edge.
Cardboard shim · latch-side bottom · door does not sag.
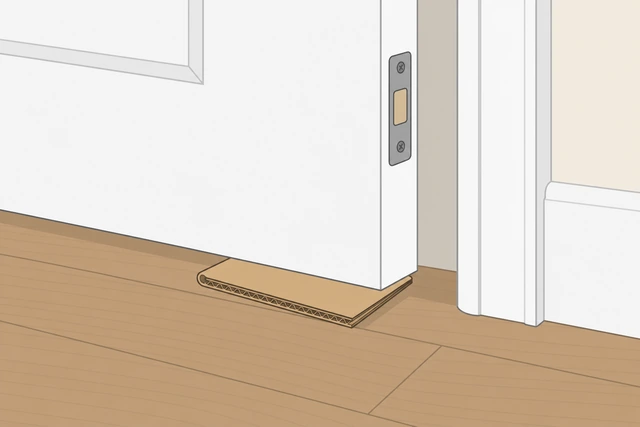
A hinge pin carries part of the door weight — without support, removing one pin bends the hinge leaves and can strip screws or worsen alignment.
- Fold a piece of cardboard to about half an inch thick.
- Slide it under the door bottom near the latch side — opposite the hinge side.
- Press down lightly on the door top to confirm it no longer sags toward the hinges.
Door weight rests on the shim and does not sag toward the hinges.
Never remove a hinge pin on an unsupported door — the weight bends hinge leaves and can worsen alignment or strip screws.
Position the door slightly open so the hinge pin head is reachable.
Slightly open · pin head visible · punch can reach pin bottom.
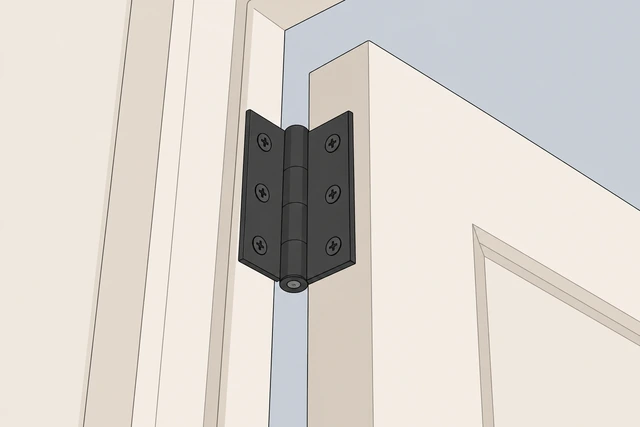
The pin must be driven upward from below — if the door angle hides the pin head, you cannot tap it out without stressing the hinge barrel.
- Adjust the door angle until the pin head on the noisy hinge is visible.
- Check that you can reach the pin bottom with the nail punch from below.
- Keep the cardboard shim in place — do not remove support during positioning.
Pin head is visible and the nail punch can reach the pin bottom.
Tap the hinge pin upward with a nail punch and light hammer blows.
Nail punch on pin bottom · light taps · pin rises about 1/4 inch.
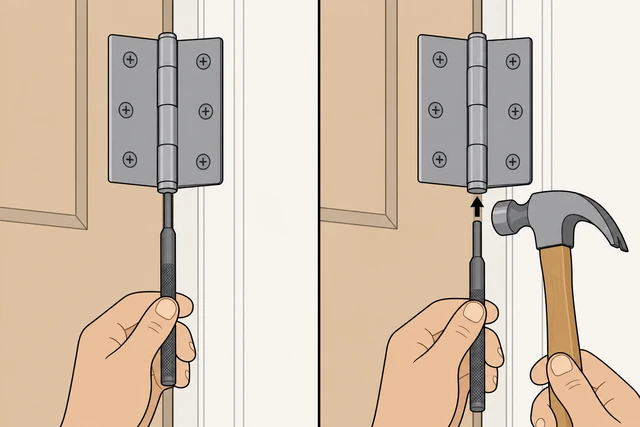
Light upward taps loosen the pin without mushrooming the head — heavy blows on a rust-frozen pin damage the head and make removal harder.
- Set the nail punch on the bottom end of the hinge pin.
- Tap the punch lightly with the hammer — two or three gentle blows.
- Stop when the pin head rises about a quarter inch above the hinge leaf.
Pin head has risen about a quarter inch without bending or mushrooming.
Pin will not move after light taps? → Rust-frozen pin.
Pull the hinge pin out by hand when it is loose enough.
Grip pin head · pull straight out · barrel holes visible.
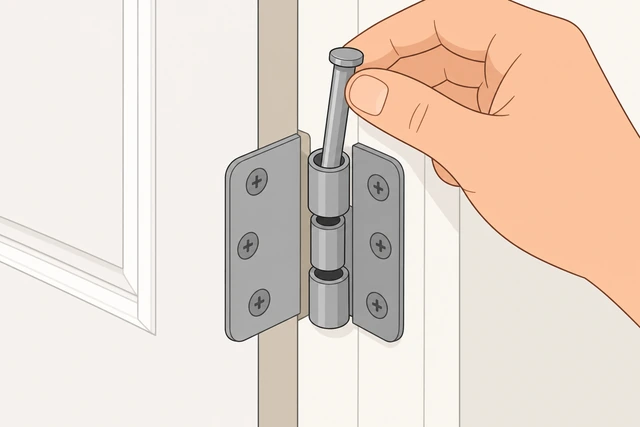
Pulling the pin lets you clean grit from the barrel — surface spray never reaches the friction point between pin shank and barrel wall.
- Grip the raised pin head with your fingers or pliers if tight.
- Pull straight out slowly — wiggle gently side to side if stuck.
- Set the pin on a clean rag; the barrel holes in both hinge leaves are now exposed.
Hinge pin is fully removed and barrel holes are visible.
Wipe the pin and hinge barrel with a rag; use light steel wool if tarnished.
Rag wipe · steel wool if tarnished · no grit on rag.
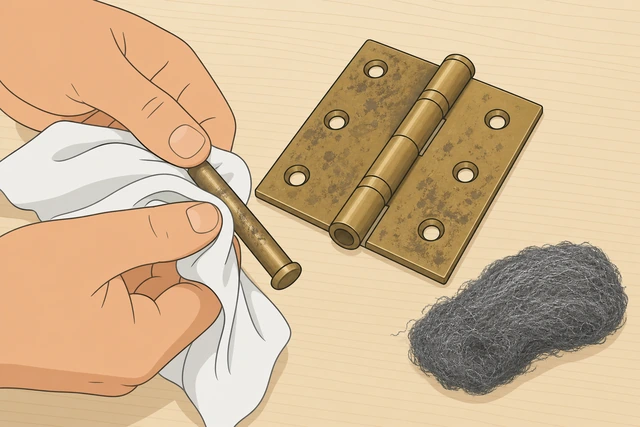
Grit and rust dust inside the barrel act like sandpaper every swing — wiping them out is what makes lubrication last longer than a quick spray.
- Wipe the full pin shank with a clean rag until no black dust remains.
- Wrap the rag around a finger and wipe inside both barrel holes.
- Use light steel wool on tarnished spots — do not scour a plated pin down to bare metal.
Pin shank and barrel are clean — the rag shows no grit or rust dust.
Apply a thin coat of lithium grease or 3-in-1 oil to the pin shank and barrel.
Thin coat on shank and barrel · shines but does not drip.
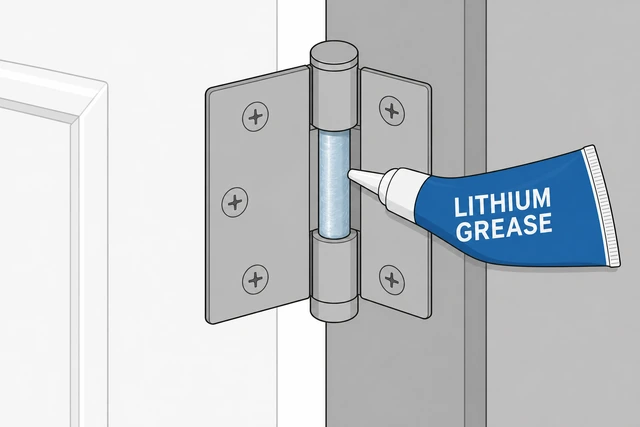
Lithium grease and light household oil stay inside the barrel — dry graphite works on exterior hinges but can stain interior doors and carpets.
- Apply a pea-sized amount of grease or a few drops of oil to the pin shank.
- Coat the inside of both barrel holes with a thin film on your rag finger.
- Check that lubricant shines on metal but does not drip or pool.
Pin shank and barrel have a thin lubricant coat with no drips.
A thin coat inside the barrel is enough — excess oil drips on carpet, attracts dust, and re-squeaks within a week.
Reinsert the pin and tap down until flush with the hinge top.
Slide pin in · tap gently · pin head flush with hinge leaf.
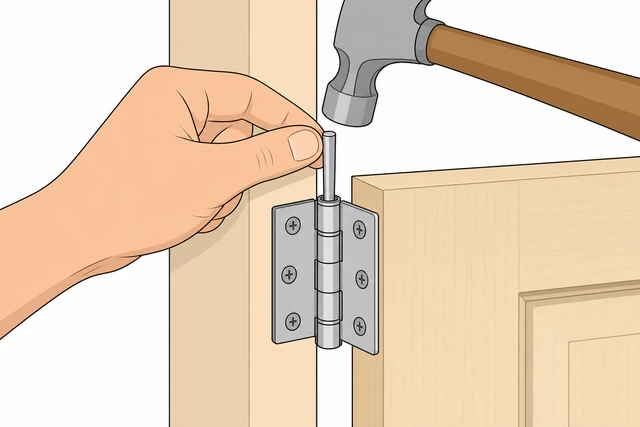
A pin left proud of the hinge leaf catches clothing and binds the swing — seating it flush restores smooth rotation.
- Slide the lubricated pin straight down into the barrel holes.
- Tap the pin head gently with the hammer until it sits level with the hinge leaf.
- Confirm both hinge leaves align and the pin head is not sticking up.
Pin is fully seated and flush with the hinge leaf; leaves are aligned.
Swing the door slowly five times through a full open and close arc.
Five slow swings · full arc · listen for squeak.
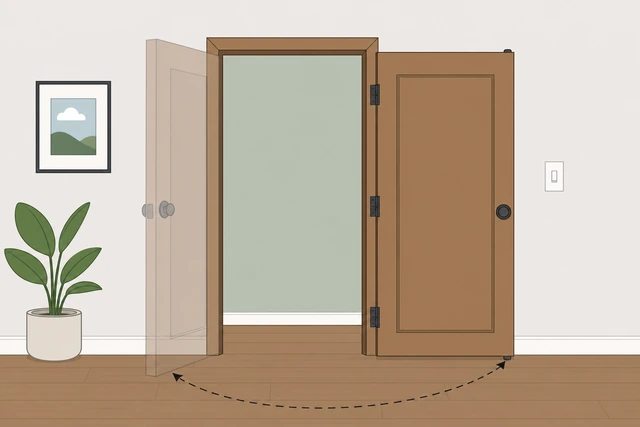
Fresh lubricant needs a few cycles to spread inside the barrel — five full swings also confirm whether the squeak was pin friction or door misalignment.
- Remove the cardboard shim briefly or swing carefully with it still in place.
- Open and close the door five times at normal speed through the full arc.
- Listen at the serviced hinge — squeak should be gone or greatly reduced.
You swung the door five times and the squeak is gone or greatly reduced.
Squeak persists or door rubs the frame? → Door misalignment.
Wipe excess lubricant from hinge plates and the pin head.
Rag over plates and pin head · no drips on door or floor.
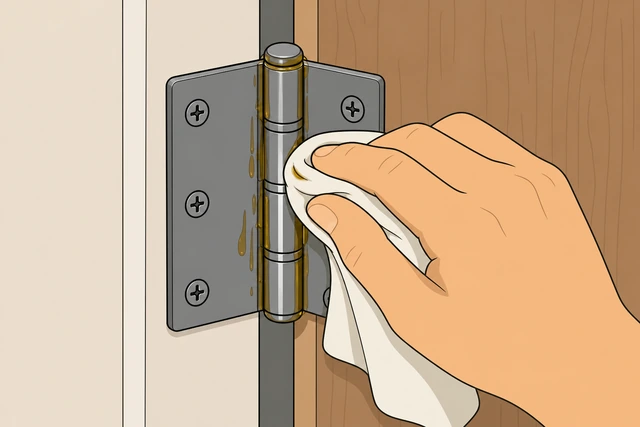
Excess oil attracts dust that forms a gritty paste — wiping it off prevents carpet stains and stops the squeak from returning within a week.
- Run a clean rag over both hinge plates and the pin head.
- Wipe any oil smears from the door edge and frame nearby.
- Check the floor and carpet below — no drips remain.
Hinge plates and pin head are wiped dry with no oil drips on door or floor.
Repeat pin removal and lubrication on other hinges if squeak persists.
One hinge at a time · same pin cycle · shim stays in place.
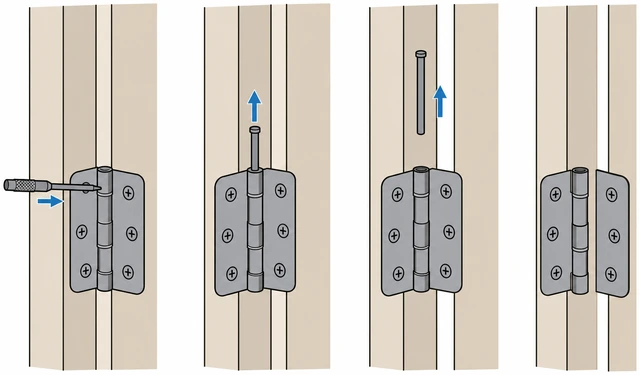
Sometimes a second hinge carries load after the first is fixed — servicing each remaining hinge rules out multiple friction points.
- If squeak continues, identify the next noisy hinge with a slow swing.
- Keep the cardboard shim in place and repeat steps 3 through 10 on that hinge.
- Service only one pin at a time — never remove two pins on the same door at once.
Each remaining noisy hinge has been serviced one pin at a time, or only one hinge was noisy.
Pin stuck on another hinge? → Rust-frozen pin. Door rubs frame? → Door misalignment.
Test quiet close and latch catch alignment.
Gentle close · latch catches · no rub or slam.
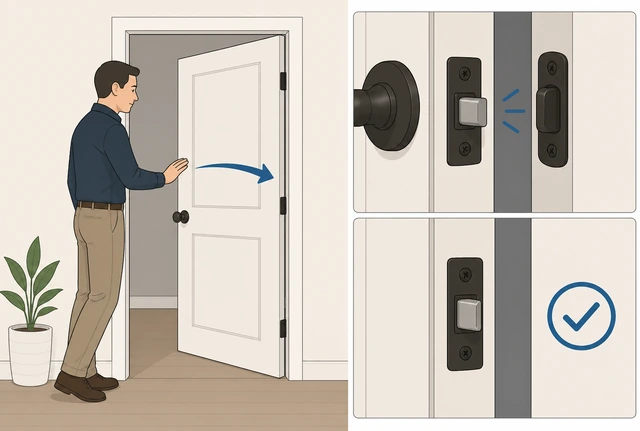
A quiet hinge means nothing if the door binds on the frame or misses the strike plate — the latch test confirms alignment was not disturbed during pin work.
- Remove the cardboard shim and let the door hang on its hinges.
- Close the door gently from halfway — it should latch without slamming.
- Check the gap along the hinge side and top — no rubbing or binding at the frame.
Door closes quietly, latches cleanly, and does not rub the frame.
Rust-frozen pinPin will not budge, orange rust visible, or light hammer blows do not move the pin
Apply penetrating oil to the barrel gap; wait 15 minutes.
Penetrating oil in barrel gap · 15-minute soak · wipe overspray.
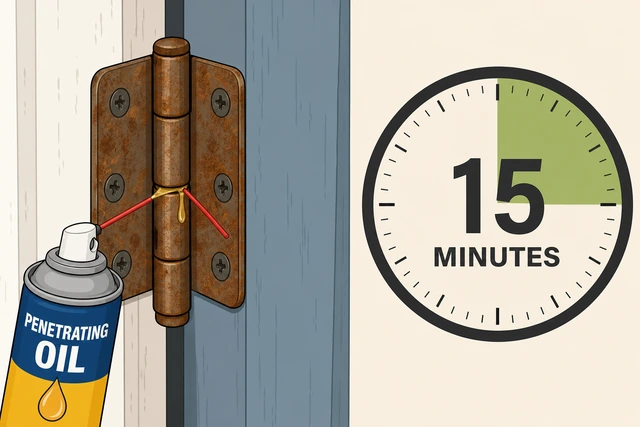
Rust bonds the pin to the barrel wall — penetrating oil creeps into the gap and breaks the bond without the heavy blows that mushroom the pin head.
- Apply penetrating oil where the pin meets the barrel — top and bottom gaps.
- Wait 15 minutes; tap the pin bottom lightly every few minutes to work oil in.
- Wipe overspray from the door and floor so it does not stain paint or carpet.
Penetrating oil has soaked 15 minutes and you retested light taps on the pin.
Do not use heavy hammer blows — mushroomed pin heads may need a hardware-store replacement pin.
Tap pin up, wiggle side to side, steel-wool rust off; replace pin if pitted.
Light taps · side wiggle · steel wool · new pin if pitted or bent.
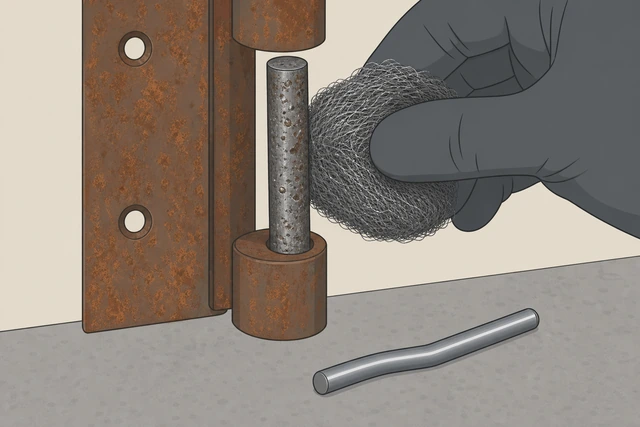
A pitted or bent pin will re-squeak even after cleaning — hardware stores sell standard replacement pins cheaply when the old one is damaged.
- Tap the pin up an eighth inch, wiggle gently side to side, and apply more oil if needed.
- Pull the pin when loose; scrub rust with steel wool until the shank is smooth.
- If the pin is bent, mushroomed, or pitted, buy a matching replacement pin at the hardware store.
Pin is out and smooth, or a replacement pin is ready — return to step 6 on the main path.
Pin head mushrooms, barrel cracks, or pin breaks inside barrel? Call a handyman for hinge replacement — do not drill or chisel the pin.
Door misalignmentSqueak persists after lubrication, or door rubs frame top or latch side
Tighten all hinge screws with a driver — top screws first on sagging doors.
Driver on hinge screws · top hinge first if door sags · snug not stripped.
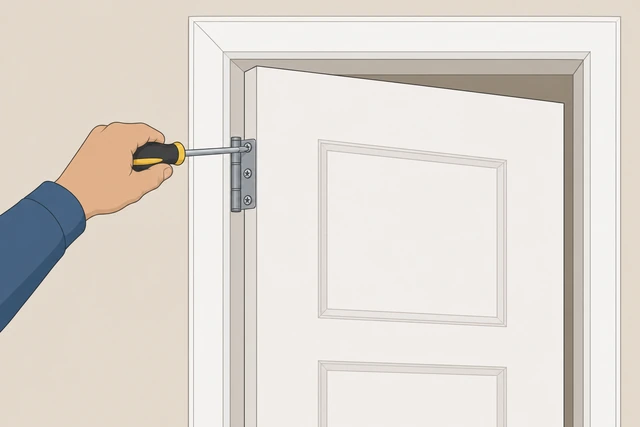
A sagging door binds at the top corner of the frame — tightening the top hinge screws first often lifts the latch side enough to stop rubbing without shims.
- Open the door and check which edge rubs — top, latch side, or hinge side gap.
- Tighten the top hinge screws first if the door sags toward the latch side.
- Snug each screw firmly — stop if the screw spins without gripping; see step 2.
All hinge screws are snug and you noted which edge was rubbing.
Pack stripped holes with toothpicks and wood glue; drive a longer #8 screw.
Toothpick and glue pack · longer number-8 screw · shim if still binds.
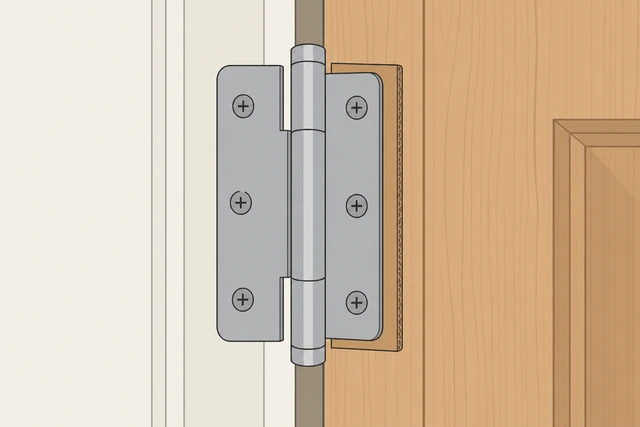
Stripped screw holes let the hinge leaf pull away from the jamb — packed toothpicks give fresh wood for threads; a longer screw bites into solid framing behind the jamb.
- Remove a stripped screw, pack the hole with wood glue and toothpicks, and let dry 30 minutes.
- Drive a longer number-8 screw through the same hinge hole into solid wood.
- If the door still binds at the top, slip a thin cardboard shim behind the middle hinge leaf.
Stripped holes are packed, longer screws are seated, and the door swings without rubbing — or binding persists.
Door still binds after screw and shim work, jamb looks twisted, or floor clearance changed? Call a carpenter — the frame may need re-hanging.
When to get help
- Ask a trusted person to hold the door steady or pass tools while you work the hinge.
- Pin head mushrooms, pin breaks inside the barrel, or hinge barrel cracks? Call a handyman for hinge replacement.
- Door still binds after screw tightening and shimming? Call a carpenter — the jamb may need re-hanging.
- All hinge screw holes stripped and screws spin freely? A carpenter can repair the jamb or install new hinge plates.
- Spring-loaded or fire-rated self-closing hinge? Call a hardware specialist — pins may not be removable like standard hinges.
When This Doesn't Work
- Squeak returns within a few days after lubrication. Grit may still be in the barrel, or the pin is pitted — remove the pin again, clean thoroughly, or replace the pin.
- Pin head mushrooms or pin breaks inside barrel. Stop hammering — call a handyman for hinge replacement rather than drilling the pin out.
- Door still binds after screw tightening and shimming. The jamb may be twisted or the house may have settled — a carpenter can re-hang the door.
- Stripped screws spin in every hinge hole. All three hinge leaves may be pulling loose — packed holes and longer screws help; if the jamb is cracked, call a pro.
- Exterior door hinge is seized solid. Rusted exterior hinges may need full replacement rather than pin removal — exterior-rated hinges resist weather better.
- Spring-loaded self-closing hinge. Some fire doors use spring hinges that cannot be disassembled like standard pins — call a hardware specialist.
Warnings
- Support the door before removing any pin. An unsupported heavy door bends hinge leaves and can strip screws.
- Do not use heavy hammer blows on a rust-frozen pin. Light taps only — mushroomed heads are hard to remove and may crack the barrel.
- Do not remove two hinge pins at once. The door can fall off the frame or tear hinge screws from the jamb.
- Do not over-apply lubricant. Excess oil drips on carpet and attracts dust that re-squeaks within a week.
- Do not use WD-40 alone as a permanent fix — it is a penetrant, not a lasting barrel lubricant for interior hinges.
- Do not drill or chisel a stuck pin — you can crack the hinge barrel or damage the door jamb.
Tips
- Remove and clean the pin instead of spraying from outside — it lasts months instead of days.
- Keep a nail punch and small hammer in a kitchen drawer — most squeaks take under 15 minutes once you have done it once.
- Lithium grease lasts longer than light oil on frequently used doors — either works on interior hinges.
- Tighten top hinge screws first on a sagging door before assuming the squeak needs more lubricant.
- Photo the hinge pin orientation before your first removal — some pins have a knurled section that must face a certain direction.
FAQ
Can I just spray WD-40 on the hinge without removing the pin?
That is a temporary fix. Grit stays inside the barrel and the squeak usually returns within days. Remove the pin, wipe the barrel, apply lithium grease or 3-in-1 oil, and reseat the pin for a lasting fix.
Why does my door still squeak after I oiled the hinge?
The pin may still be dirty, the pin is pitted and needs replacement, or the door is misaligned and rubbing the frame. Clean the barrel again, check other hinges, or see the door misalignment branch.
What lubricant is best for door hinges?
Lithium grease or 3-in-1 household oil on interior hinges. Dry graphite works on exterior gate hinges but can stain interior doors and carpet.
The hinge pin will not come out — what do I do?
Apply penetrating oil to the barrel gap, wait 15 minutes, and use light taps — see the rust-frozen pin branch. Do not use heavy blows that mushroom the pin head.
When should I call a carpenter instead?
Call a pro if the door still binds after screw tightening and shimming, the jamb looks twisted, a pin breaks inside the barrel, or hinge barrels are cracked.
Comments
Questions, corrections, and what worked for you. Comments are reviewed before they appear.