How to Caulk a Bathtub
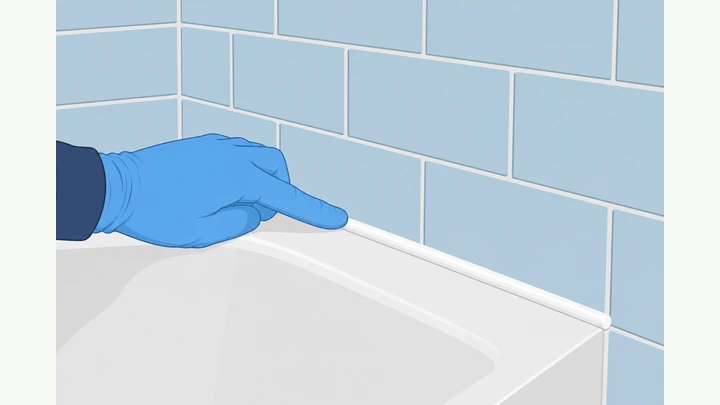
Caulk a bathtub-to-wall joint in about two hours of hands-on work plus a 24-hour cure. Strip old caulk, dry the joint, tape, apply a silicone bead, smooth, peel tape, then let it cure. Read one step at a time. Start with the preflight. Mold on the old bead? See Moldy old caulk. Joint still damp? See Wet surface.
Tips for reading this guide
- One step at a time. Read the green caption, the Why line, then the bullets.
- Move on when the green done line is true — then go to the next step.
- Dry joint first. Silicone will not stick to a damp tub-to-wall joint — wait 24 hours after your last shower.
- 100% silicone in wet zones. Tub-and-tile or 100% silicone caulk — not acrylic latex for shower joints.
- Mold or damp tissue test? Jump to the matching branch below before applying new caulk.
- Need a helper? Ask someone you trust to hold the tape end, pass tools, or run the bath fan while you work.
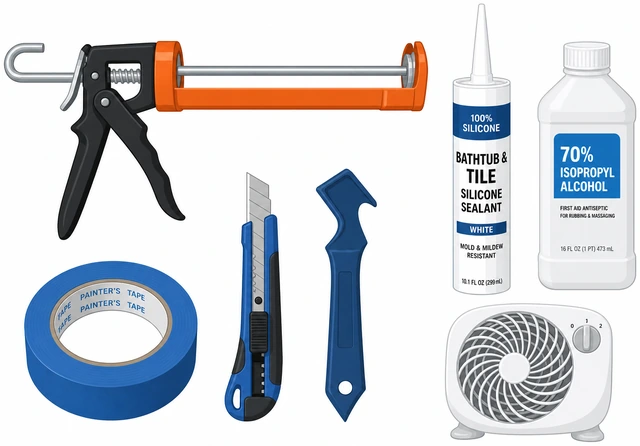
Things You'll Need
- 100% silicone or tub-and-tile caulk — not acrylic latex for shower joints
- Caulk gun sized for standard 10-ounce tubes
- Utility knife or dedicated caulk removal tool
- Stiff plastic putty knife — avoid metal scrapers on acrylic tubs
- Painter's tape (blue or green masking tape)
- Isopropyl alcohol (70% or higher) and lint-free rags or paper towels
- Caulk finishing tool or a small cup of soapy water for a wet finger
- Rubber gloves and eye protection
- Bathroom exhaust fan on or window open for ventilation
- About 2 hours hands-on plus 24 hours cure with no shower use
Where are you stuck?
Follow Start here for a full tub recaulk. Jump to a branch if mold covers the old bead or the joint will not pass a dry tissue test.
Start hereInspect → score → strip → alcohol dry → tape → cut nozzle → load gun → apply bead → smooth → peel tape → cure 24 hr → inspect
Preflight — supplies, ventilation, and a dry tub joint before you strip old caulk.
Silicone caulk · gun · tape · knife · alcohol · fan on · tub dry 24+ hr after last shower.
Silicone bonds only to clean dry surfaces — working over a damp joint or wrong caulk type fails within weeks.
- Supplies gathered? Silicone caulk, gun, tape, removal tool, alcohol, rags, and gloves are ready.
- Tub dry 24+ hours? No shower since yesterday — joint feels dry to the touch.
- Fan on or window open? Ventilation reduces fumes during strip and cure.
- Right caulk type? 100% silicone or tub-and-tile label — not acrylic latex.
Supplies are ready, the bathroom is ventilated, and the tub joint has been dry at least 24 hours since the last shower.
Silicone will not bond to a damp joint — new bead pulls away or traps mold under old residue. If you showered within 24 hours or the tissue test shows dampness, see Wet surface before taping. Use 100% silicone or tub-and-tile labeled caulk in wet zones — acrylic latex peels within weeks when shower water hits the joint daily.
Inspect the existing caulk bead for mold, gaps, and peeling.
Full joint run · mold · gaps · loose edges noted.
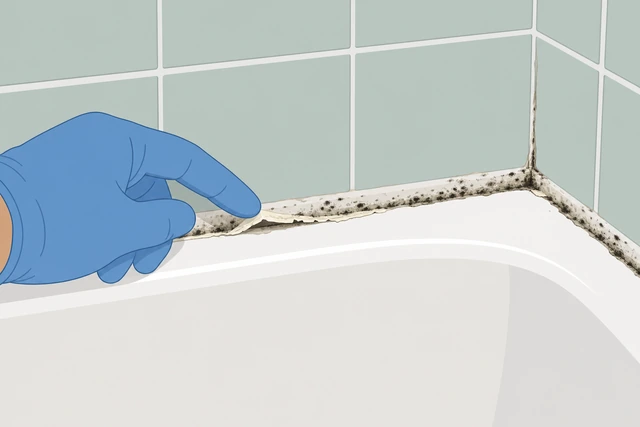
Knowing whether mold or grout failure hides under the bead tells you if the main path is enough or the mold branch is required first.
- Stand at one end of the tub and scan the full tub-to-wall joint in good light.
- Note black, green, or fuzzy spots, gaps where water could enter, and edges lifting away.
- Press gently on loose sections — if caulk peels easily, the full strip path is confirmed.
You know whether mold, gaps, or peeling are present along the full joint run.
Black, green, or fuzzy mold on old caulk means the bead failed — do not caulk over it. See Moldy old caulk before stripping.
Score the old caulk bead on both sides with a utility knife.
Blade on tub side · blade on wall side · cut through bead only.
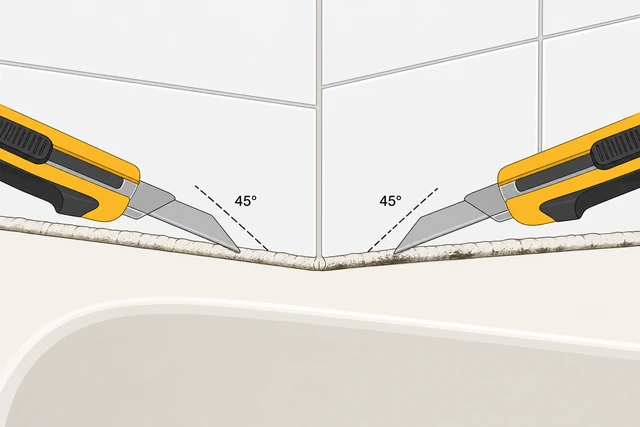
Scoring frees the old bead from tile and tub so stripping does not tear finish surfaces or leave hidden residue.
- Hold the blade flat against the tub surface and cut along the bottom edge of the old bead.
- Repeat on the wall-tile side, cutting along the top edge of the old bead.
- Work in short 6-inch passes — do not dig the blade into acrylic or fiberglass.
Old caulk is scored on both tub and wall sides without scratching finish surfaces.
Do not scrape acrylic or fiberglass tubs with metal blades — use plastic removal tools and score gently so you do not gouge the tub surface.
Pry and strip old caulk with a removal tool or stiff putty knife.
Plastic tool · pry scored bead · all old material in trash.
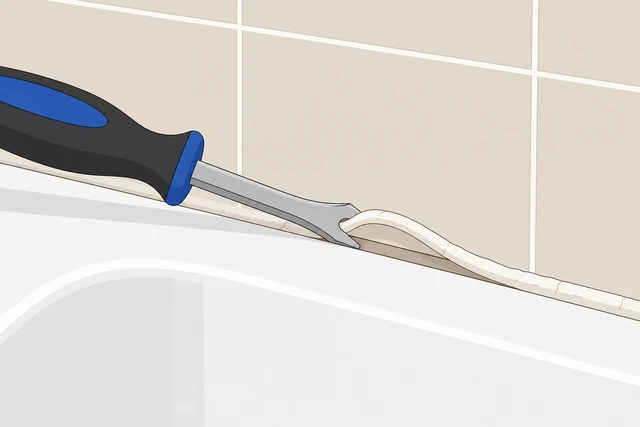
Any old caulk left in the gap prevents the new bead from bonding and traps moisture that grows mold under the fresh line.
- Hook a plastic caulk removal tool or putty knife under the scored bead and lift it out.
- Pull the full length into the trash — do not drop strips into the tub drain.
- Check the gap — no gray or discolored caulk should remain in the joint.
Old caulk is fully removed and the bare joint gap is visible along the full run.
Scrub the joint with isopropyl alcohol and dry completely.
Alcohol on rag · scrub gap · tissue test must read dry.
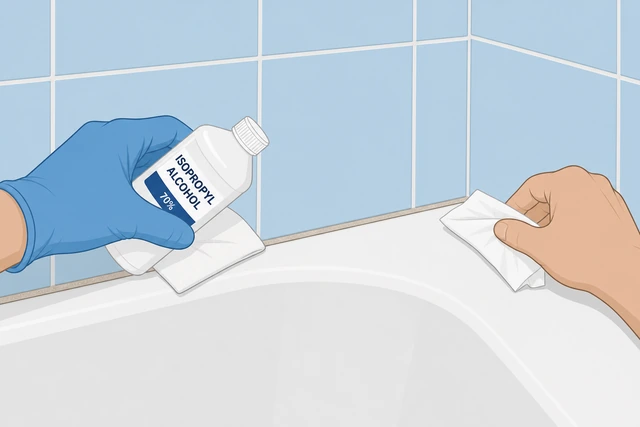
Soap film and shower residue block silicone adhesion — alcohol cuts grease and the tissue test confirms the joint is truly dry.
- Soak a lint-free rag with isopropyl alcohol and scrub the full joint gap and 1 inch on each side.
- Wipe with a dry rag, then press a fresh tissue against the joint for 10 seconds.
- Tissue must come away dry — if it picks up moisture, stop and use the wet-surface branch.
Joint is free of soap film and a dry tissue pressed to the gap comes away with no damp mark.
Tissue shows damp or joint fogged after a recent shower? → Wet surface.
Apply painter's tape 1/8 inch from the joint on tub and wall sides.
Tape on tub lip · tape on wall tile · joint gap exposed.
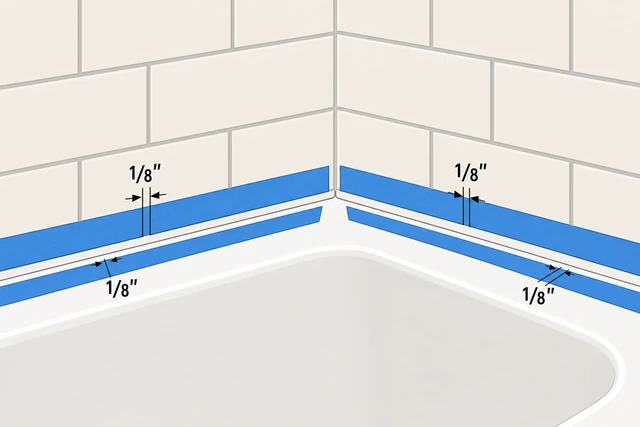
Tape defines a clean bead edge — without it, silicone smears on tile and tub and leaves a ragged line that peels first.
- Run painter's tape along the tub side about 1/8 inch below the joint gap.
- Run a second tape line on the wall tile about 1/8 inch above the gap.
- Press tape edges firmly so caulk cannot seep underneath during application.
Straight tape lines border the joint on tub and wall sides with the gap fully exposed.
Cut the silicone tube nozzle at 45 degrees to match bead width.
45-degree snip · opening matches gap · pierce foil seal.
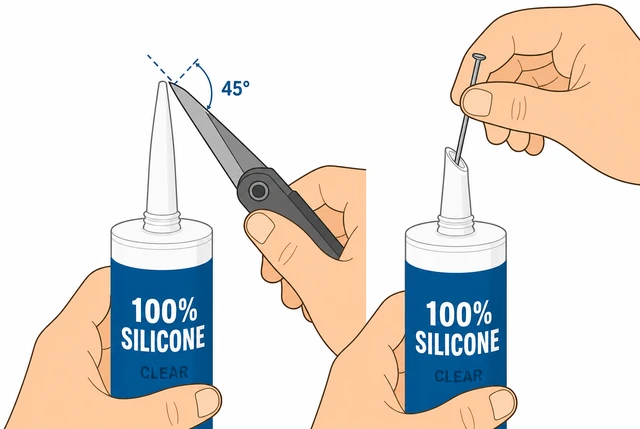
A nozzle opening too wide lays a fat messy bead; too narrow leaves hollow pinholes that let water behind the tile.
- Snip the nozzle tip at a 45-degree angle — start small; you can trim again if needed.
- Match the opening width to the joint gap — usually 1/8 to 1/4 inch for tub joints.
- Pierce the inner foil seal with the gun plunger rod or a stiff wire.
Nozzle is cut to match gap width and the inner seal is pierced so caulk can flow.
Load the tube in the caulk gun and squeeze until bead appears at the tip.
Tube seated in gun · plunger engaged · caulk at nozzle tip.
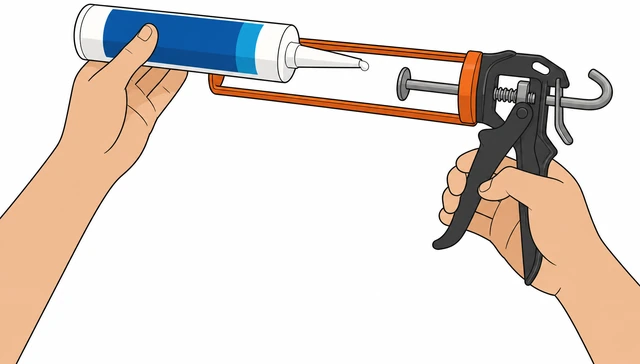
A tube not fully seated in the gun skips and leaves gaps in the bead — priming the tip confirms smooth flow before the joint pass.
- Cut the tube base foil if present, then drop the tube into the caulk gun cradle.
- Turn the plunger ratchet and push until the plunger plate contacts the tube bottom.
- Squeeze the trigger slowly until a small bead appears at the nozzle tip, then wipe the excess.
Tube is loaded, plunger engaged, and caulk flows cleanly from the nozzle tip.
Apply a steady continuous bead along the tub-to-wall joint.
Even gun speed · fill gap fully · one pass where possible.
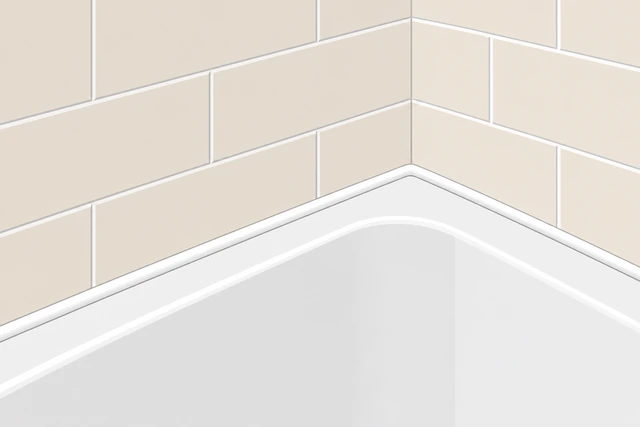
A bead that does not fully fill the gap leaves hollow channels — water travels behind tile through pinholes you cannot see from the surface.
- Place the nozzle at the far end of the joint and squeeze as you pull the gun toward you.
- Keep speed steady so the bead fills the gap without voids or thin spots.
- Overlap the start and end slightly if you must pause — you will smooth joins in the next step.
A continuous bead runs the full tub-to-wall joint with no large voids or bare gaps.
Fresh bead pulls away or will not stick to the surface? → Wet surface.
Smooth the bead with a wet finger or caulk finishing tool.
Concave profile · one light pass · no smears outside tape.
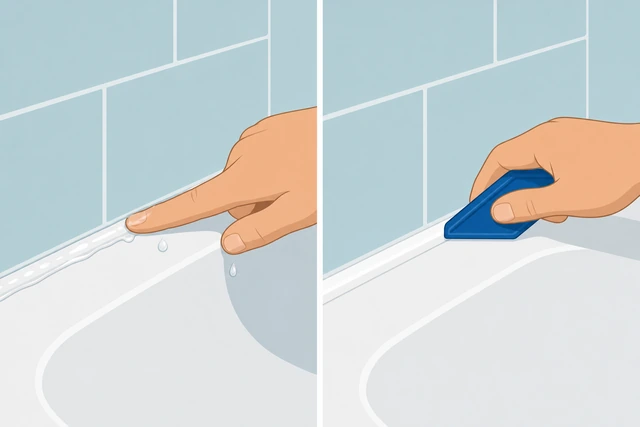
Tooling sets the concave profile that flexes with tub movement — an untooled bead is too proud and peels at the edges first.
- Dip a finger in soapy water or use a caulk finishing tool at a shallow angle.
- Draw along the bead in one light pass to form a concave profile.
- Wipe any smears on tape immediately with a dry rag — do not spread caulk onto tile.
Bead has an even concave profile with no drag marks or smears on tub or tile.
Peel tape outward at 45 degrees while the bead is still wet.
Pull away from joint · 45-degree angle · before skin forms.
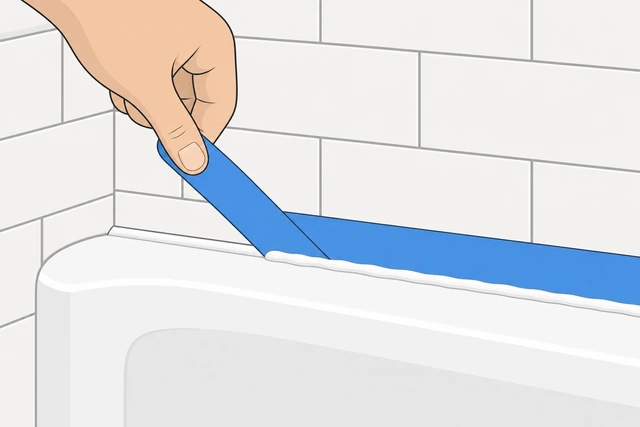
Tape pulled after the bead skins tears the edge — peeling while wet leaves a crisp line that resists peeling in shower use.
- Start at one end and pull tape away from the joint at a 45-degree angle.
- Peel the tub-side tape first, then the wall-side tape in the same direction.
- Do not drag tape through the wet bead — lift outward in one smooth motion.
Tape is off both sides and bead edges are clean with no caulk bridges across the tape lines.
Let cure 24 hours undisturbed and keep the area dry.
No shower 24 hr · fan running · do not touch bead.
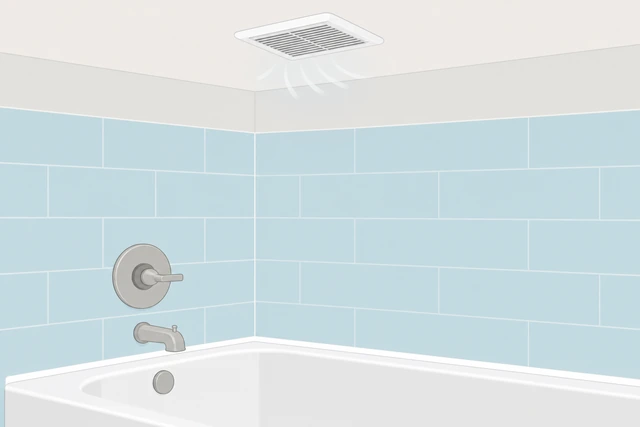
Silicone reaches full waterproof strength only after the full cure window — shower use too early washes uncured caulk away or softens the profile.
- Keep the bathroom fan running or the window cracked for the full cure period.
- Do not shower or splash the joint for at least 24 hours.
- Avoid touching or wiping the bead — it should feel firm and rubbery when cure is complete.
Joint stayed dry for 24 hours and the bead feels firm and rubbery to a light touch.
Inspect for gaps or thin spots and touch up if needed.
Full run check · pinholes · thin areas filled.
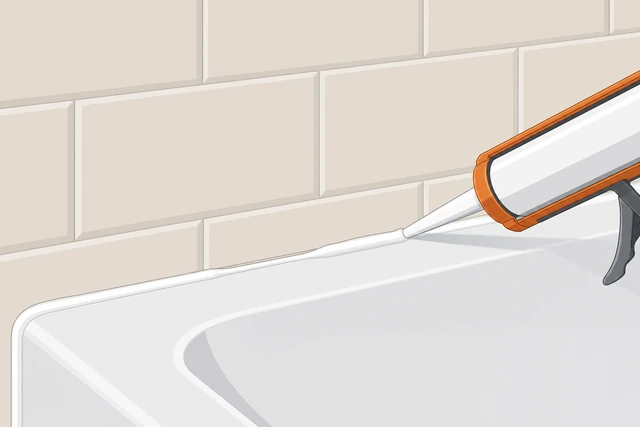
A single pinhole or thin stretch lets water behind tile — a quick touch-up now prevents a full redo in a few months.
- Scan the full joint in bright light for pinholes, thin spots, or missed sections.
- Apply a small fresh bead to any gaps and smooth with a wet finger.
- Allow touch-up areas the same 24-hour cure before using the shower.
Continuous seal runs the full joint length with no visible gaps or thin spots.
Moldy old caulkBlack, green, or fuzzy mold on old caulk or musty smell when scoring
Scrub moldy caulk and 2 inches beyond with a 1:3 bleach solution; rinse and dry.
1 part bleach · 3 parts water · scrub 2 in beyond · rinse dry.
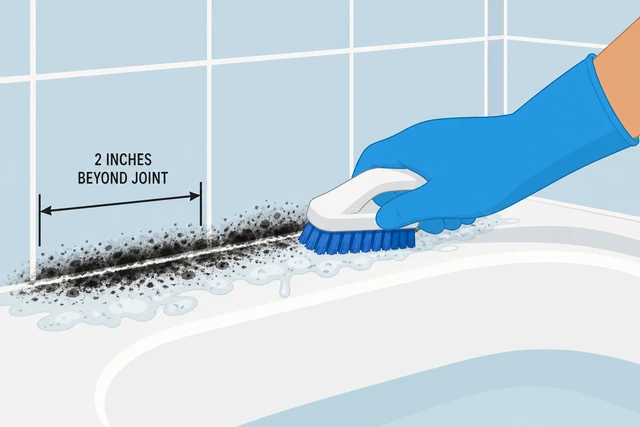
Surface mold on top of the bead hides spores in the joint — bleach kills what you can reach before you cut out the failed bead.
- Mix 1 part household bleach with 3 parts water in a cup — wear gloves and ventilate.
- Scrub moldy caulk and 2 inches of tile and tub on each side with a stiff brush.
- Rinse with clean water, wipe dry, and let the area air-dry 30 minutes before cutting.
Moldy areas are bleached, rinsed, and surface-dry before you strip the old bead.
Wear gloves and eye protection — never mix bleach with ammonia or other cleaners.
Cut out discolored caulk, alcohol-scrub, and verify tissue-dry before taping.
Remove all stained caulk · alcohol scrub · tissue dry · wait if needed.
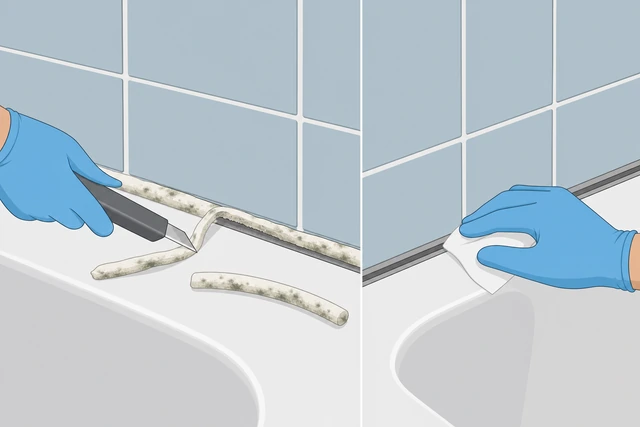
Mold stains mean the old bead failed and water sat behind it — any discolored material left under a new bead brings mold back within weeks.
- Score and strip every discolored section — not just the fuzzy top layer.
- Scrub the bare gap with isopropyl alcohol and wipe with a dry rag.
- Press a tissue to the joint — if dry, return to Step 5 on the main path; if damp, wait 48 hours.
All discolored caulk is out, joint is alcohol-clean, and tissue test reads dry — ready to tape.
Mold returns after bleach, grout crumbles behind caulk, or wallboard feels soft? Call a mold remediation pro — do not caulk over active mold.
Wet surfaceTissue test shows dampness, joint fogged after shower, or fresh bead will not stick
Run bath fan 24 hours, wipe the joint, and skip showers until done.
Fan 24 hr · wipe joint · no showers until caulk cures.
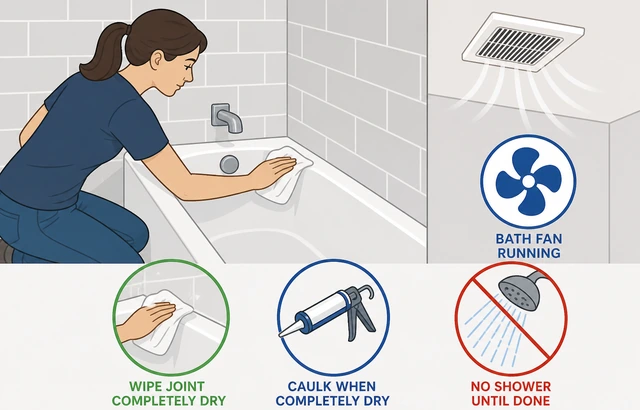
Porous grout holds shower moisture for hours — active drying time beats rushing a bead onto a joint that only feels dry on the surface.
- Turn on the bathroom exhaust fan and leave it running continuously.
- Wipe the joint with a dry rag every few hours — no showers until caulk is applied and cured.
- Keep the bathroom door open so air circulates around the tub wall.
Fan has run at least 24 hours, joint is wiped dry, and no new shower moisture has hit the gap.
Use low heat from a hair dryer 2 minutes at a time; re-test with dry tissue.
Hair dryer low · 2 min bursts · tissue test · wait 24 hr if still damp.
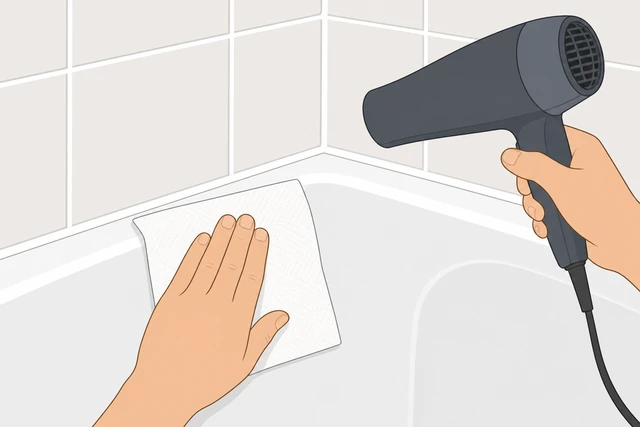
Gentle warm air pulls residual moisture from grout without overheating acrylic tub surfaces that warp under sustained high heat.
- Set a hair dryer to low heat and hold it 6 inches from the joint for 2 minutes.
- Let the area cool 5 minutes, then press a dry tissue to the gap for 10 seconds.
- If tissue is dry, return to Step 5 on the main path — if still damp, wait another 24 hours.
Tissue test reads dry after drying cycles — or you confirmed the joint never dries and need a pro.
Joint never dries after 48 hours of fan and gentle heat? Call a plumber or tile pro — likely a leak behind tile or weeping grout.
When to get help
- Ask a trusted person to hold the tape end, pass tools, or keep the bath fan running while you work.
- Mold returns after full removal, grout crumbles behind the caulk, or wallboard feels soft? Call a mold remediation pro.
- Joint never dries after 48 hours of fan and gentle heat? Call a plumber or tile pro — likely a leak behind tile.
- Gap wider than 1/2 inch with no backer rod? Ask a tile pro about backer rod and the right caulk fill depth.
- Acrylic tub deeply gouged during removal? Ask a pro about tub refinishing before caulking over damaged finish.
When This Doesn't Work
- Active mold behind tile or soft wallboard. Bleach and new caulk do not fix hidden mold in the wall — call a mold remediation pro.
- Crumbling grout behind the caulk line. Water bypasses failing grout even with a perfect bead — grout must be sound before sealing the joint.
- Joint never dries after 48 hours of fan and gentle heat. Points to a leak behind tile or weeping grout — call a plumber or tile pro.
- Acrylic tub gouged during removal. Deep scratches hold dirt and moisture — stop scraping and use plastic tools only, or ask a pro about tub refinishing.
- Gap wider than 1/2 inch or missing backer rod. Large gaps need foam backer rod before caulk — a bead alone will crack and fall out.
- Repeated mold return within weeks. Ventilation or a hidden leak may be the cause — a pro inspection beats repeated caulk jobs.
Warnings
- Do not caulk over moldy or damp old caulk. New silicone bonds to failure and mold returns within weeks.
- Use 100% silicone or tub-and-tile caulk in wet zones. Acrylic latex peels when daily shower water hits the joint.
- Do not scrape acrylic or fiberglass tubs with metal tools. Metal blades gouge the finish and hold future mold.
- Do not shower on fresh caulk before 24-hour cure. Water washes uncured silicone away or softens the bead profile.
- Ventilate when using bleach or silicone. Run the bath fan and avoid mixing bleach with ammonia or other cleaners.
- Do not leave painter's tape on until the bead skins. Pull tape while wet — late removal tears the edge.
Tips
- Wait 24 hours after your last shower before stripping — a truly dry joint is the top reason caulk jobs last.
- Blue or green painter's tape pulls cleaner than tan masking tape on glossy tub surfaces.
- Cut the nozzle small first — you can always trim wider; an oversized opening makes a messy bead.
- A finishing tool gives a more even concave profile than a finger on long tub runs.
- Photo the joint before stripping — useful reference if you need to match an unusual tile edge profile.
FAQ
How long should I wait after a shower before caulking?
At least 24 hours with the fan running. Porous grout holds moisture longer than the tub surface feels dry. Use the tissue test in Step 4 — if it picks up dampness, see the wet-surface branch.
Can I caulk over old caulk instead of removing it?
No. New silicone does not bond reliably to old failed caulk, and mold trapped underneath returns quickly. Strip all old material, alcohol-scrub, and dry before applying a new bead.
What type of caulk should I use on a bathtub?
100% silicone or a product labeled tub-and-tile. Avoid acrylic latex in shower joints — it peels within weeks when hit by daily water.
When should I pull the painter's tape?
Immediately after tooling the bead, while it is still wet. Waiting until a skin forms tears the edge and leaves a ragged line that peels first.
When should I call a pro instead of DIY caulking?
Call a mold remediation pro if mold returns after full removal, grout crumbles, or wallboard feels soft. Call a plumber or tile pro if the joint never dries after 48 hours of fan and gentle heat.
Comments
Questions, corrections, and what worked for you. Comments are reviewed before they appear.