How to Tie a Tie
Tie a everyday four-in-hand necktie: drape with the wide end on your right, set length, cross, wrap, dress the front loop, tighten, optional dimple, then check the tip at your belt buckle. Read one step at a time. Start with preflight. Wrong length? Wrong length. Crooked knot? Crooked knot. Will not tighten? Will not tighten.
Tips for reading this guide
- One step at a time. Read the green caption, the Why line, then the bullets.
- Move on when the green done line is true — then go to the next step.
- Use a mirror and keep the wide end on your right as you face it.
- Wrong length? Wrong length.
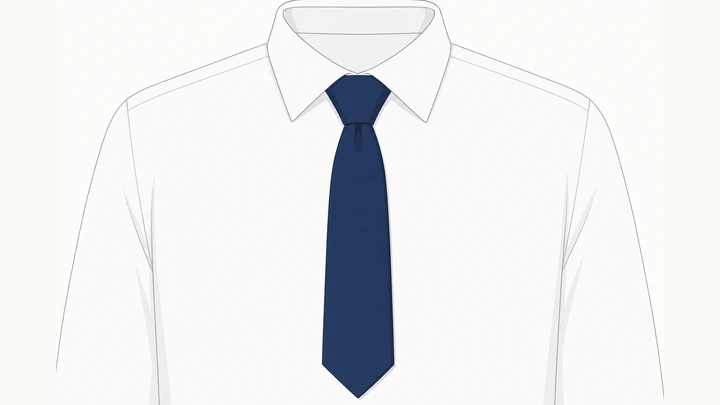
Things You'll Need
- Necktie (standard length)
- Button-front dress shirt
- Mirror
- Belt (for length check)
Where are you stuck?
Follow Start here to tie a four-in-hand. Jump to a branch for length, crooked knots, or knots that will not tighten.
Start hereDrape → length → cross → wrap → front loop → tighten → dimple → buckle check
Preflight — collar up, top shirt button closed, necktie, mirror.
Collar up · top button closed · tie + mirror ready.
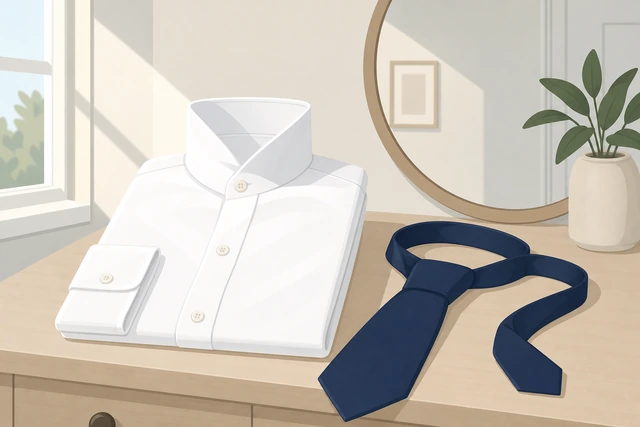
You need a fastened collar band and a mirror so left/right stay consistent.
- Raise the shirt collar.
- Fasten the top shirt button.
- Have a standard necktie and a mirror.
- Stand where you can see your neck clearly.
Collar is up, top button is closed, and you can see yourself in a mirror.
Drape the tie around your neck with the wide end on your right (as you face the mirror).
Wide end on your right · narrow end on your left.
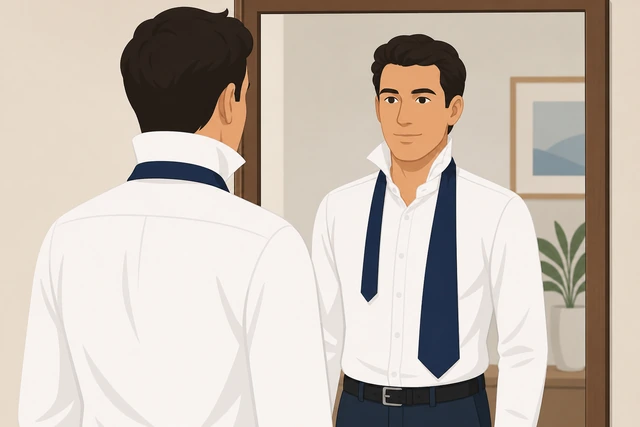
Four-in-hand instructions assume this mirror-facing starting side.
- Face the mirror.
- Place the tie around your neck under the raised collar.
- Wide blade hangs on your right; narrow on your left.
- Seams face your chest / correct side out.
Wide end is on your right and narrow end is on your left in the mirror.
Set starting length — hang the wide end much lower than the narrow end.
Wide end hangs much lower · tip near mid-thigh to start.
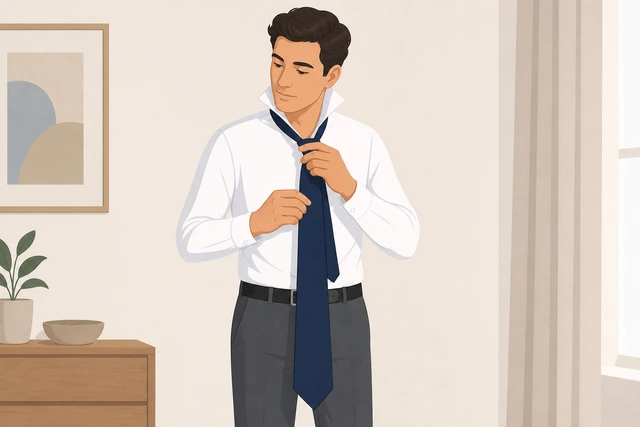
Most length errors come from starting with the wide end too short.
- Pull the wide end down until it hangs clearly longer.
- A common start: wide tip near mid-thigh (adjust for your height and tie).
- Keep the narrow end higher on the left.
- Wrong after knotting? → Wrong length.
Wide end hangs substantially lower than the narrow end before any knotting.
Cross the wide end over the narrow end.
Wide crosses over narrow · X at the collar.
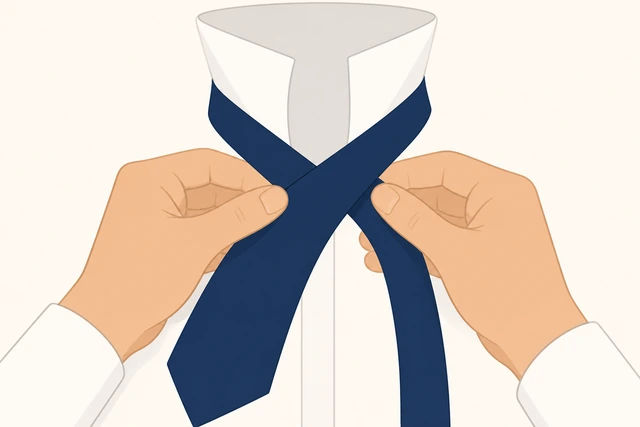
The cross creates the front face of the four-in-hand.
- Hold the crossing point near the collar.
- Wide blade crosses on top of the narrow blade.
- Keep both blades flat — no twist.
Wide end lies crossed over the narrow end near the collar.
Bring the wide end up through the neck loop from below.
Wide end up through the neck loop from underneath.
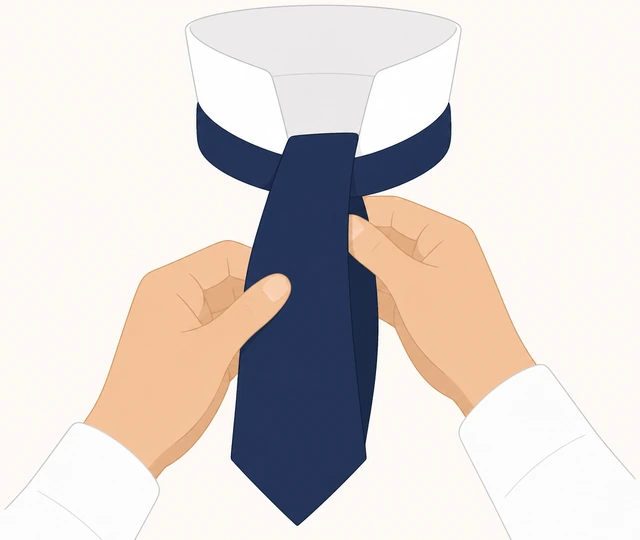
This wrap locks the knot against the collar band.
- Lift the wide end.
- Pass it up through the loop around your neck from below.
- Bring it back to the front.
- Keep the crossing point from sliding down.
Wide end has come up through the neck loop and is back in front.
Pass the wide end down through the front knot loop.
Form the front loop · thread wide end down through it.
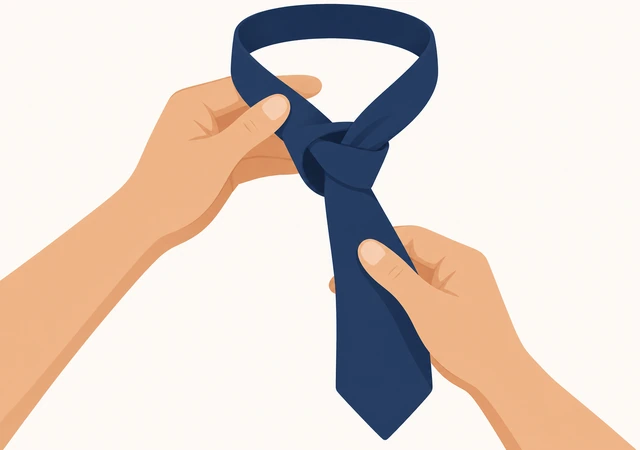
The front loop is the visible knot face — missing it leaves a limp knot.
- Use a finger to hold a front loop open if needed.
- Pass the wide tip down through that front loop.
- Pull gently so the knot starts to form.
- Will not form? → Will not tighten.
Wide end is threaded down through the front loop and a knot shape is visible.
Hold the knot and pull the wide end to tighten.
Hold knot · pull wide end down to cinch.
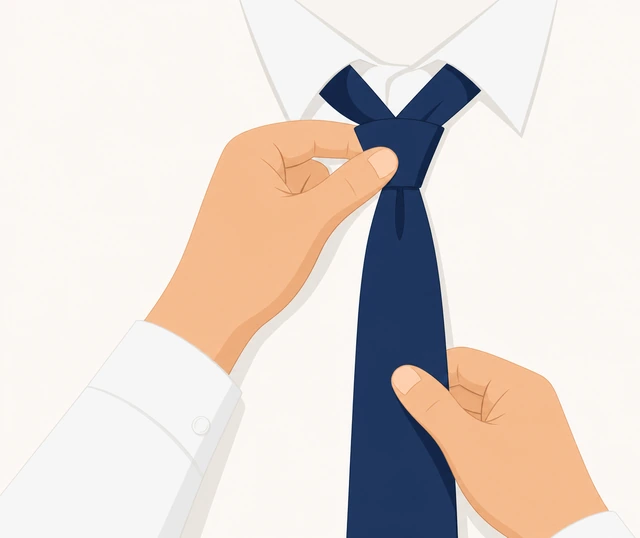
Holding the knot stops it from collapsing while you tighten.
- Pinch the knot lightly with one hand.
- Pull the wide end straight down with the other.
- Cinch until snug — not choking.
- Crooked already? → Crooked knot.
The knot is snug and holds shape when you let go briefly.
Slide the knot up to the collar using the narrow end.
Slide knot to collar · keep it centered.
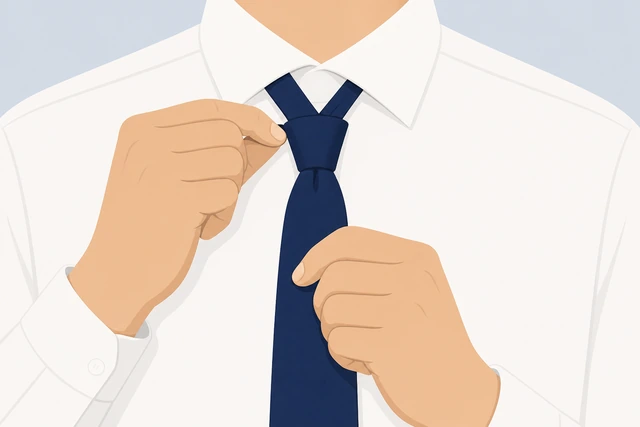
The narrow end is the adjuster that seats the knot against the shirt.
- Hold the knot.
- Pull the narrow end gently so the knot rises.
- Seat it against the collar button area.
- Center it between the collar points.
Knot sits against the collar and looks roughly centered.
Shape a small dimple under the knot (optional but recommended).
Pinch a soft vertical dimple just under the knot.
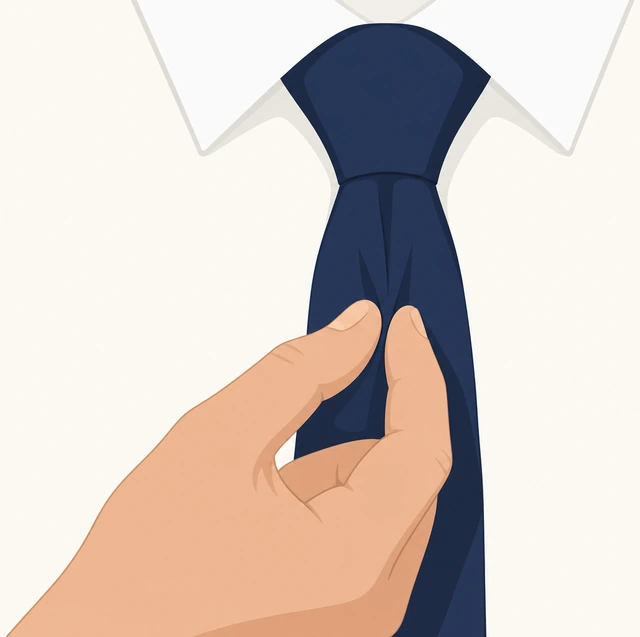
A dimple makes the knot look intentional instead of flat and puffy.
- While the knot is snug, pinch the wide blade just below the knot.
- Create a soft vertical crease (dimple).
- Smooth the sides of the blade.
- Do not crease the entire length of the tie.
A small dimple sits under the knot (or you consciously skipped it).
Check length — the wide tip should reach near your belt buckle.
Tip near belt buckle · within about an inch.
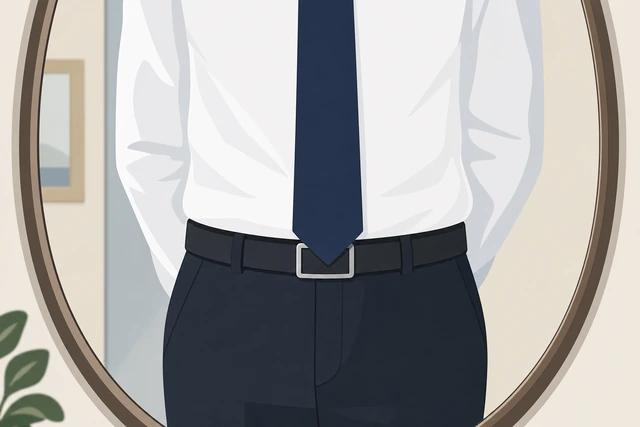
Belt-buckle length is the everyday dress standard.
- Look in the mirror at the wide tip.
- Aim for the tip near the belt buckle (± about 1 inch).
- Too short or long? → Wrong length.
Wide tip ends near the belt buckle.
Slip the narrow end through the keeper loop on the back of the wide blade.
Narrow end through the keeper loop · no flapping tail.
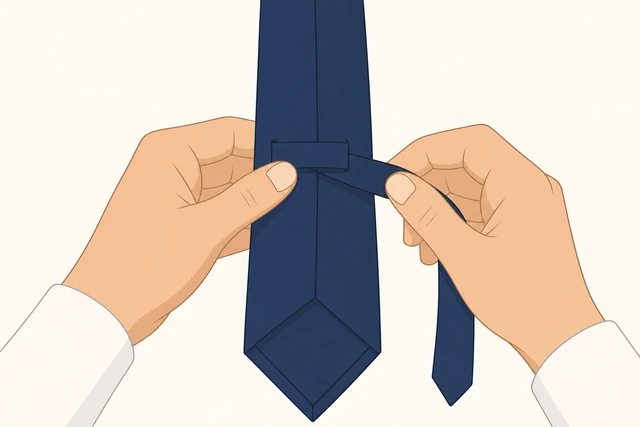
The keeper loop stops the back blade from swinging free.
- Flip the wide blade gently to find the label/keeper loop.
- Feed the narrow end through the loop.
- If there is no loop, tuck neatly behind and note for next tie.
Narrow end is held by the keeper loop (or neatly tucked if no loop).
Fold the collar back down and smooth the front.
Collar down over knot edges · front smooth.

The collar frames the knot and hides the neck loop.
- Fold both collar wings down.
- Make sure collar points sit evenly.
- Smooth the shirt front and tie blade.
Collar lies flat and covers the sides of the knot cleanly.
Final mirror check — center, tightness, no twist.
Centered · snug · no twist · ready to wear.

A 5-second check catches crooked knots before you leave.
- Confirm the knot is centered.
- Confirm it is snug but comfortable.
- Confirm the wide blade is flat with no spiral twist.
- Adjust dimple once more if needed.
You would wear this tie out the door.
Wrong lengthWhen the tip is far above or below the belt after knotting
Untie completely — do not just yank the narrow end harder.
Full untie · restart length · do not force.
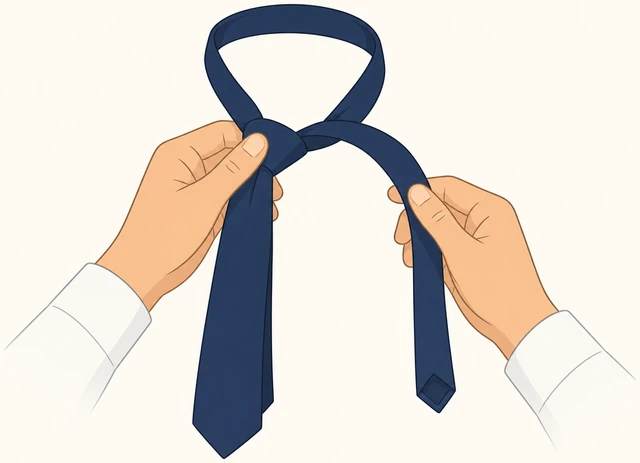
Forcing a finished knot rarely fixes starting length.
- Loosen and untie the knot.
- Return to the draped starting position.
Tie is fully untied and draped again.
Change the wide-end starting drop by 1–2 inches.
Move wide start 1–2 in · longer start if tip was short.

Small starting changes become big tip changes after the knot.
- If the tip was too short, start with the wide end hanging lower.
- If the tip was too long, start with the wide end a bit higher.
- Change about 1–2 inches at a time.
Starting wide-end length is clearly different from the failed attempt.
Retie the same four-in-hand steps.
Retie the same knot · do not invent a new wrap.
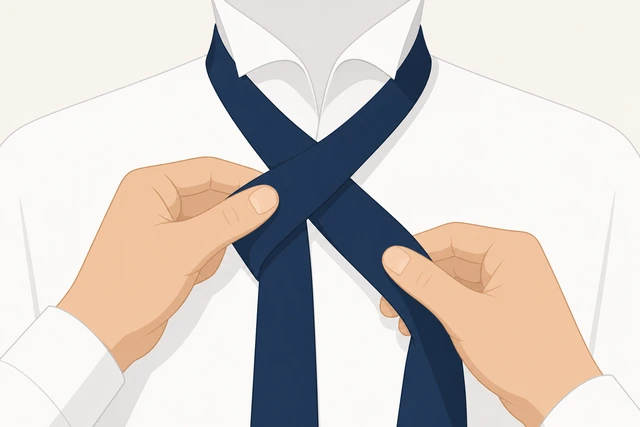
Consistency lets you learn which start length works for this tie.
- Cross, wrap, front loop, tighten, slide up.
- Use the same method as Start here.
Knot is tied again with the new starting length.
Recheck the tip at the belt buckle.
Tip near buckle · repeat one more 1-inch tweak if needed.
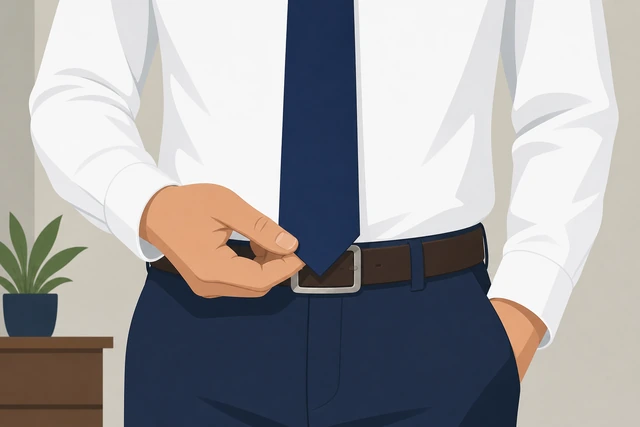
One controlled retie is faster than endless mid-knot yanking.
- Check tip vs buckle.
- If still off, untie and nudge start length once more.
Tip is near the buckle or you have a clear next 1-inch adjustment.
If three resets still fail, switch ties or use a different knot/clip-on for the event.
Different tie length · or clip-on for the event · stop endless retries.
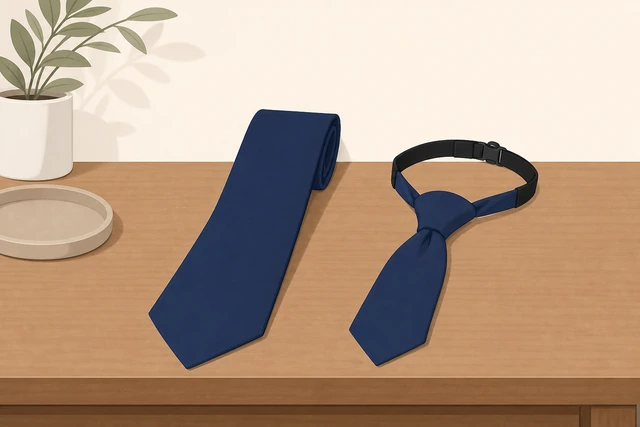
Some ties are cut short/long for certain torso lengths.
- Try another necktie.
- For a fixed event, a clip-on is a valid backup.
- Later, learn your start mark for each favorite tie.
You have a wearable backup instead of more failed retries.
Crooked knotWhen the knot leans or the blade is twisted
Loosen the knot without fully undoing if it only leans slightly.
Loosen · keep structure · prepare to center.
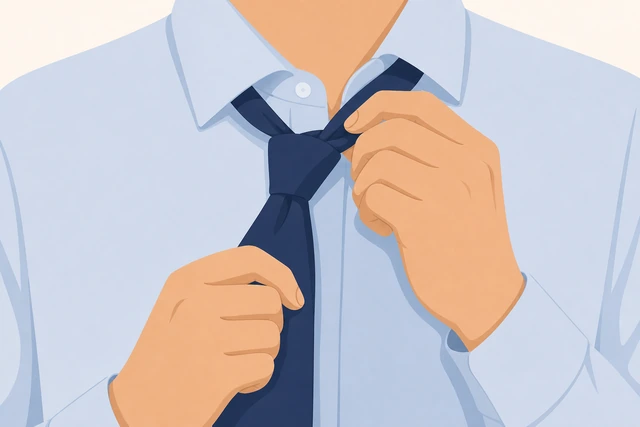
Small leans can be corrected without a full restart.
- Pinch the knot.
- Ease it looser.
- Keep the front loop intact if possible.
Knot is loose enough to recenter.
Untwist the wide and narrow blades so seams face correctly.
Untwist blades · correct face out · no spiral.
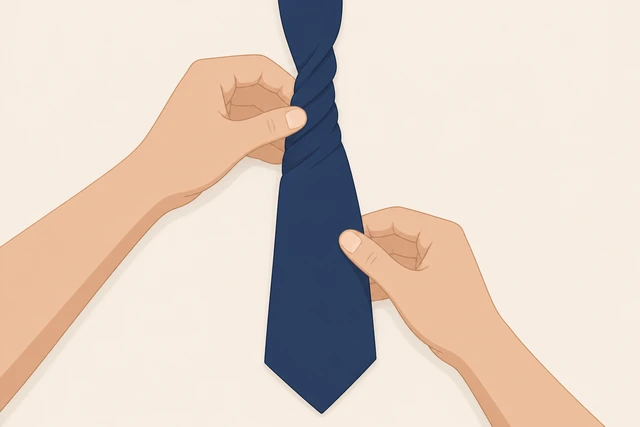
A spiral blade makes every knot look crooked.
- Check the wide blade for a spiral.
- Rotate it flat.
- Check the narrow blade too.
Both blades lie flat without a spiral twist.
Center the knot between the collar points and retighten evenly.
Center between collar points · pull evenly.

Even pull keeps the knot from walking to one side.
- Align the knot under the chin center.
- Pull the wide end straight down.
- Slide up with the narrow end carefully.
Knot sits centered under the chin.
Re-shape the dimple and lower the collar to check symmetry.
Dimple again · collar down · check left/right balance.
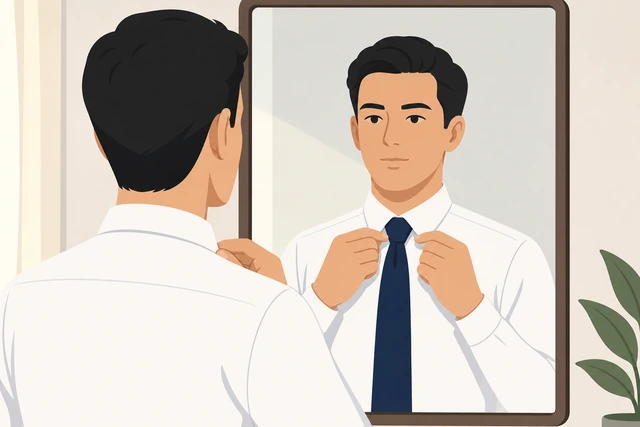
The collar reveals whether the knot is truly centered.
- Pinch the dimple.
- Fold the collar down.
- Compare left and right collar gaps.
Left and right sides look balanced in the mirror.
If the fabric is too thick for four-in-hand, switch to a half-Windsor or a thinner tie.
Thick lined ties may need a different knot · or a thinner tie.
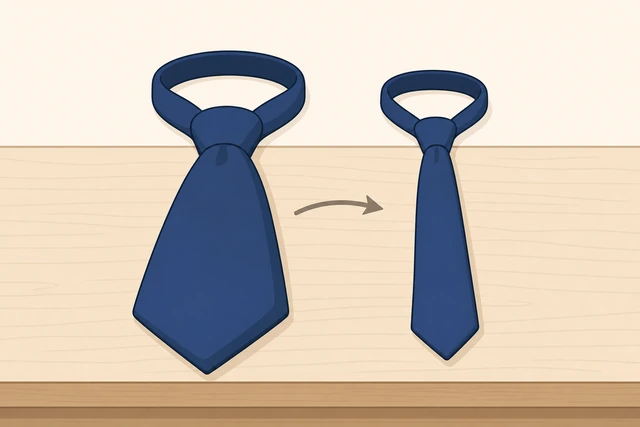
Four-in-hand can look stubby on very thick ties.
- Try a thinner tie.
- Or learn a half-Windsor for thicker cloth.
- Do not keep yanking a puffy knot flatter.
You chose a better knot/tie match instead of forcing it.
Will not tightenWhen the front loop collapses or the knot stays loose
Undo and remake the front loop carefully.
Undo · remake front loop · do not skip the wrap.
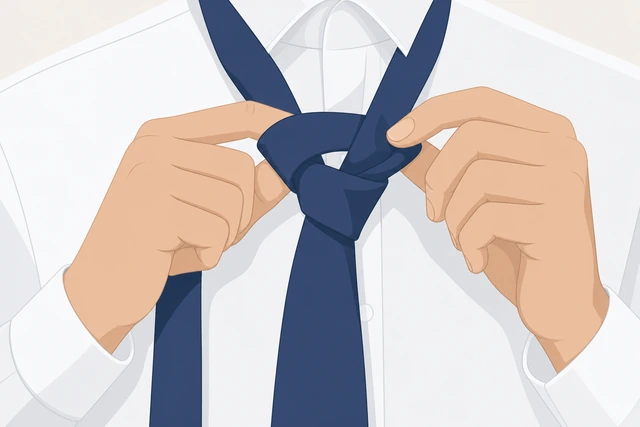
A missing or collapsed front loop cannot cinch.
- Untie the failed knot.
- Recross wide over narrow.
- Bring wide up through the neck loop again.
You are back at the front-loop stage with a clear wrap.
Keep a finger in the front loop while you dress the wide end through it.
Finger holds loop open · wide tip goes through cleanly.
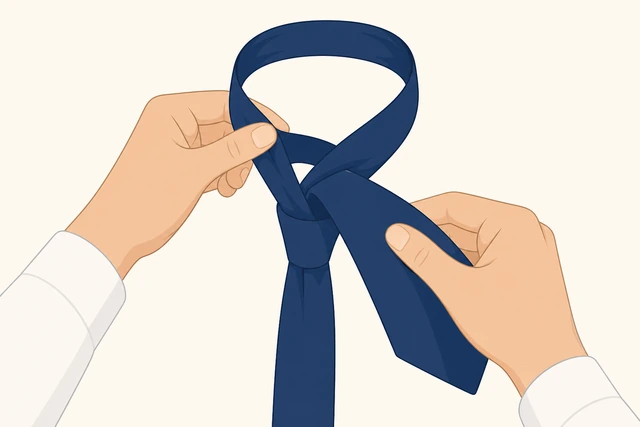
The loop must stay open until the tip is through.
- Hold the loop with one finger.
- Pass the wide tip down through.
- Remove the finger and pull gently.
Wide end is through a visible front loop.
Pull the wide end straight down while pinching the knot.
Pinch knot · pull straight down · cinch.
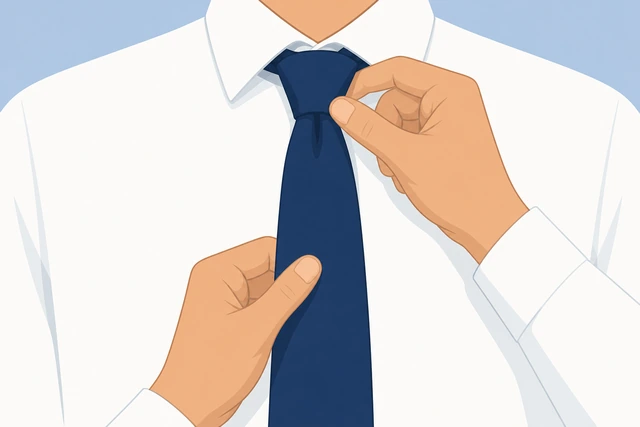
Sideways pulls collapse the loop instead of tightening it.
- Pinch.
- Pull straight down.
- Stop when snug.
Knot holds when you release for a second.
Seat the knot at the collar and recheck.
Slide to collar · recheck snugness.
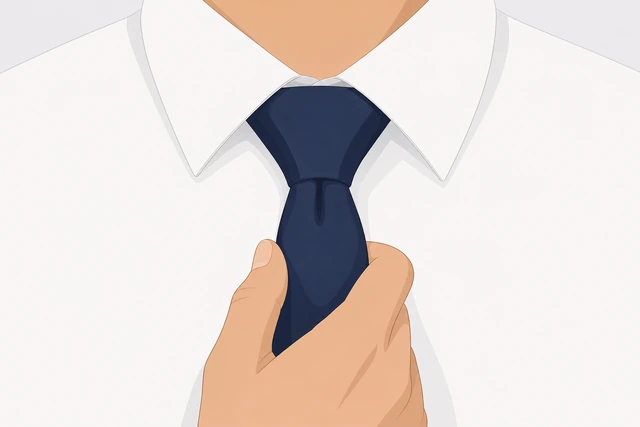
A knot that loosens as it rises usually had a bad front loop.
- Slide up with the narrow end.
- If it loosens, remake the front loop once more.
Knot stays snug at the collar.
If the tip or keeper is damaged, replace the tie.
Damaged tip/keeper · replace the tie · tying skill is fine.
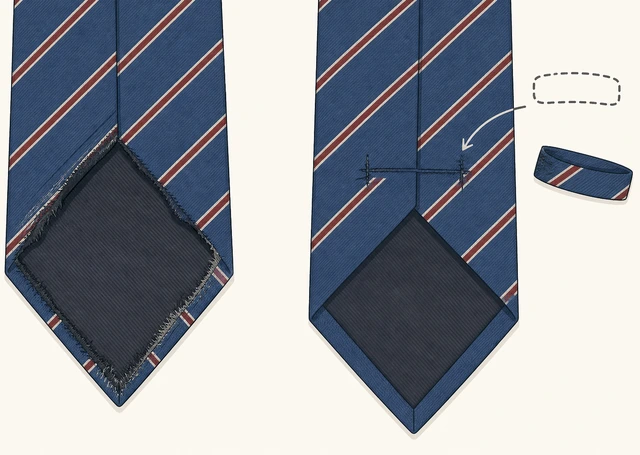
Hardware damage is not fixed by a better knot.
- Inspect the tip lining.
- Inspect the keeper loop.
- Replace a failing tie before an important event.
You either have a sound tie or a replacement plan.
When to get help
- Ask someone to demonstrate once in person while you mirror each step.
- For a same-day formal event with no time, use a pre-tied or clip-on backup.
When This Doesn't Work
- Very thick lined ties. Four-in-hand may look stubby — try half-Windsor or a thinner tie.
- Skinny ties / short ties. Starting length marks differ; expect more trial.
- Clip-on or zipper ties. Different mechanism — not covered here.
Warnings
- Do not overtighten — you should breathe and swallow comfortably.
- Keep the knot away from open flame and hot irons.
- This guide teaches four-in-hand, not full Windsor.
Tips
- Once you find the right start length for a favorite tie, remember that mid-thigh mark.
- A small dimple looks sharper than a flat puffy knot.
- Practice twice on a day with no time pressure.
FAQ
Which knot is this?
Four-in-hand — the most common everyday necktie knot. It is slightly asymmetric and works for most collar spreads.
Where should the tip end?
Near your belt buckle, within about an inch.
Wide end on which side?
On your right as you face the mirror for these steps.
Comments
Questions, corrections, and what worked for you. Comments are reviewed before they appear.