How to Start a Compost Pile
Start a compost pile in about 45 minutes to set up, then a few minutes a week to maintain, turning kitchen and yard scraps into rich, dark garden soil. Pick a well-drained site, layer browns and greens at roughly a 2-3:1 ratio, and keep it wrung-sponge damp. Read one step at a time. Start with the preflight. Smells rotten or looks slimy? See Soggy/smelly. Bone dry and not breaking down? See Dry/stalled. Rodents or raccoons showing up? See Pests/rodents.
Tips for reading this guide
- One step at a time. Read the green caption, the Why line, then the bullets.
- Move on when the green done line is true — then go to the next step.
- Squeeze test. A handful should feel like a wrung-out sponge — damp, never dripping or dusty.
- Browns beat greens. When unsure of the ratio, add more browns rather than more greens.
- Rotten smell? See Soggy/smelly. Nothing's breaking down? See Dry/stalled. Rodents or raccoons? See Pests/rodents.
- Need help? Ask someone to help carry or turn material if a full pitchfork load feels too heavy.
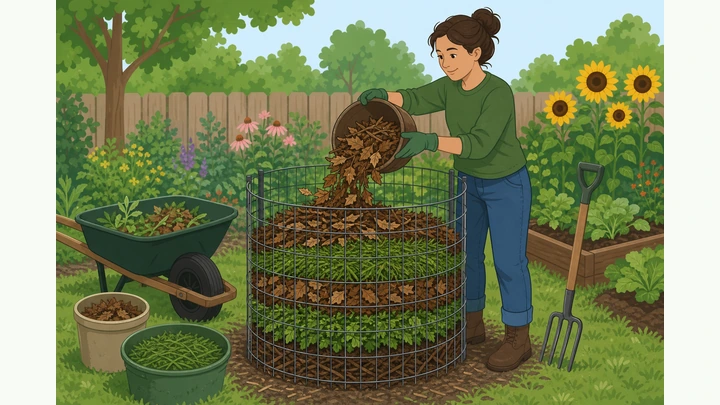
Things You'll Need
- Pitchfork or a compost aerator tool
- Garden gloves
- Wire fencing, pallets, or a bin/tumbler (optional — an open pile also works)
- Browns — dried leaves, straw, plain cardboard, twigs, plain paper
- Greens — fruit and vegetable scraps, coffee grounds, grass clippings, eggshells
- A tarp or bin lid, and a compost thermometer (optional)
Where are you stuck?
Follow Start here to build a pile from scratch. Jump to a branch if it's already soggy, dry, or attracting pests.
- I need to start a compost pile from scratch Pick site · sort browns/greens · layer · moisture · turn
- Smells like rotten eggs or looks slimy/wet Turn immediately · mix in dry browns · check drainage
- Bone dry, nothing's breaking down Confirm dry · water while turning · add fresh greens
- Rodents, raccoons, or flies keep showing up Remove mistakes · bury deep · secure the bin
Start herePick site → set up bin → sort → chop → layer → moisture → cover → heat → turn → maintain → harvest
Preflight — pick a site, decide bin vs. open pile, and gather tools.
Well-drained, part-sun spot away from structures · bin or open pile decided · tools ready.
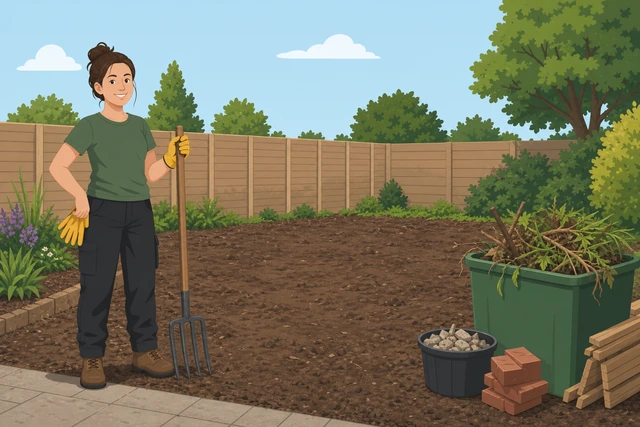
The site and container decision you make now determines whether the pile drains, breathes, and heats properly for months to come — fixing a bad site later means starting over.
- Pick a spot with good drainage and direct soil contact, in part sun or part shade, a few feet clear of fences, sheds, or house siding.
- Decide bin vs. open pile — a wire/pallet bin, tumbler, or a simple open heap all work if built at least 3x3x3 feet.
- Gather a pitchfork or aerator tool, garden gloves, and bin materials (wire fencing or pallets) if not going open-pile.
The site is chosen and reachable with a full wheelbarrow, bin vs. open pile is decided, and tools are on hand.
Yard already has rodent or raccoon problems? Plan on a secured lid or fully enclosed bin from the start — see Pests/rodents.
Clear and level the site.
Bare soil, level, 3x3 ft or larger · turf removed.
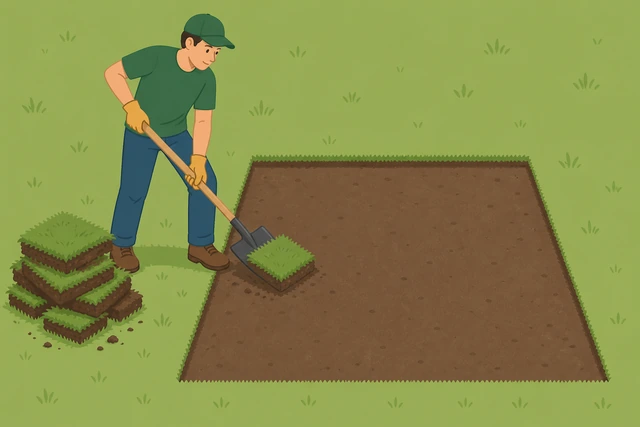
Direct soil contact lets worms and organisms move in from below and lets excess water drain away, which a patio, concrete pad, or thick turf underneath will block.
- Remove any sod, turf, or heavy weeds from the footprint down to bare soil.
- Level the area roughly so material won't slide downhill to one side.
- Confirm the cleared footprint is at least 3 feet by 3 feet.
The site is a level, bare-soil patch at least 3x3 feet, clear of turf, with direct soil contact.
Set up the container.
Wire/pallet bin assembled, or open-pile footprint marked · minimum 3x3x3 feet.
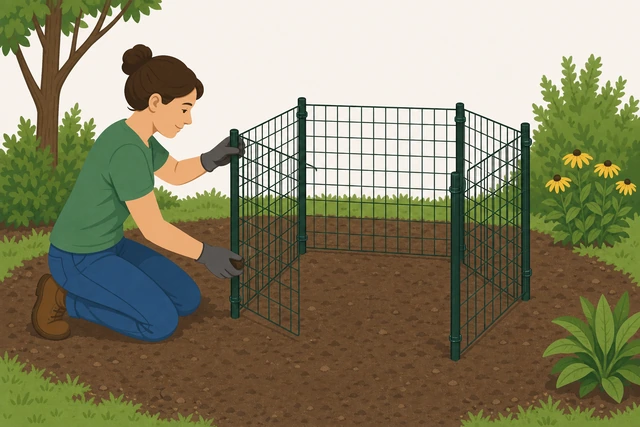
A pile smaller than about 3 feet in each direction can't hold enough heat in its center to actively decompose, no matter how well it's layered.
- Assemble a wire mesh or pallet bin on the site, or set a tumbler in place.
- For an open pile, mark the footprint with stakes or a visual boundary.
- Check the finished footprint measures at least 3 feet by 3 feet by 3 feet tall.
A bin is assembled and sitting on the site (or an open-pile footprint is marked) at least 3 feet on each side.
Sort materials into browns and greens.
Browns (dried leaves, straw, cardboard) and greens (scraps, coffee grounds, clippings) — two separate piles.
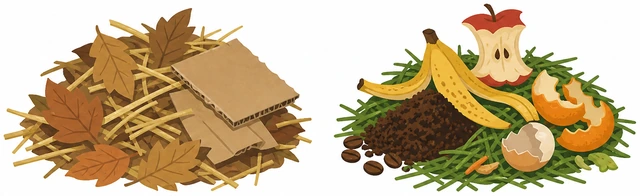
Browns supply carbon and greens supply nitrogen — decomposer microbes need both in the right balance, so sorting first makes it possible to layer or mix them on purpose instead of guessing.
- Collect browns: dried leaves, straw, plain cardboard, twigs, plain paper.
- Collect greens: fruit and vegetable scraps, coffee grounds, grass clippings, eggshells.
- Keep the two groups in separate piles or bins so you can see the difference at a glance.
You have two distinct piles or containers — browns and greens — and can point to which is which.
Chop or shred bulky material.
Break pieces down to about 2-3 inches · tear or shred cardboard.
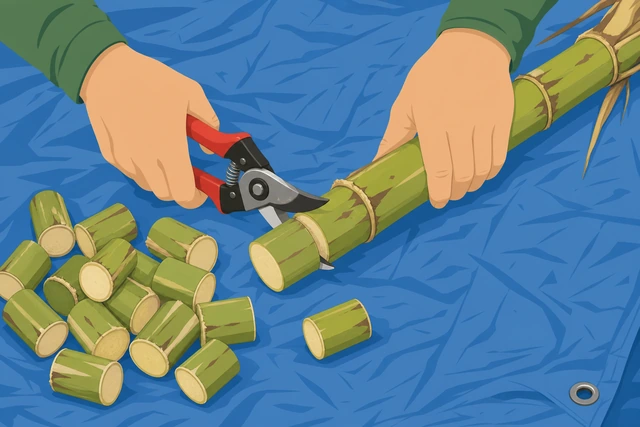
Smaller pieces give decomposer microbes far more surface area to work on, so chopped material breaks down noticeably faster than whole stalks or sheets.
- Cut or snap thick stalks and small branches into pieces roughly 2 to 3 inches long.
- Tear or shred whole cardboard and large leaves instead of adding them in full sheets.
- Set aside anything still too woody or thick to break down at home.
No piece going into the pile is bigger than about a fist, and cardboard is torn or shredded, not whole sheets.
Lay a coarse base layer.
3-4 inches of twigs, straw, or wood chips over bare soil.
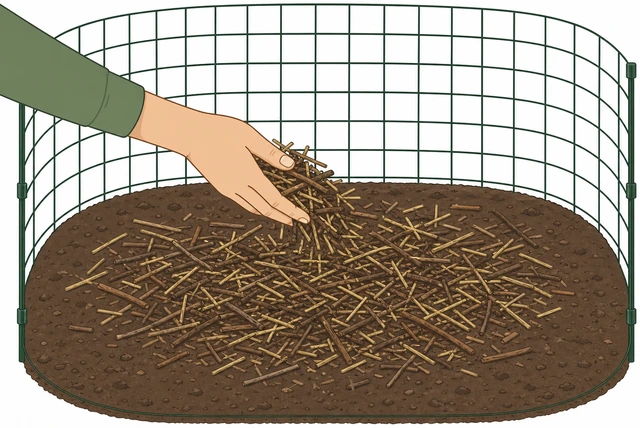
A loose, airy base layer keeps air moving up from underneath and lets excess water drain instead of pooling against the soil.
- Spread a 3 to 4 inch layer of twigs, straw, or wood chips over the full footprint.
- Keep this base layer loose and airy rather than packed down.
- Confirm the whole site floor is covered before adding anything else.
A loose, airy base layer covers the full footprint of the site before other material goes on top.
Build the pile at roughly a 2-3:1 browns:greens ratio.
About 2-3 parts browns to 1 part greens · alternate scoops or thin layers.
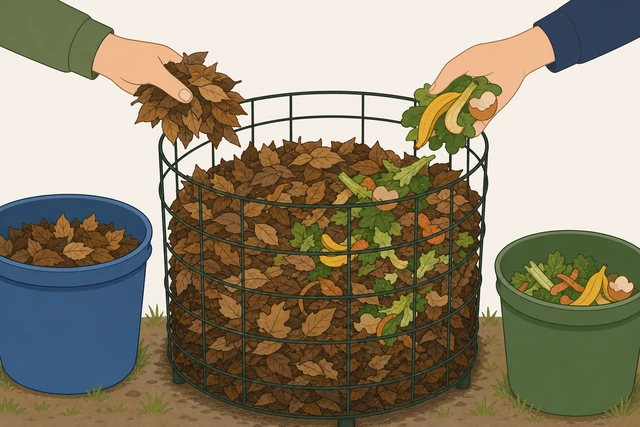
Too many greens and the pile turns soggy and smelly; too many browns and it stays dry and stalled — this ratio is the balance point that lets it heat up and break down cleanly.
- Add browns and greens in alternating thin layers, or mix them together as you go.
- Keep roughly 2 to 3 scoops of browns for every 1 scoop of greens.
- Step back and check that browns visibly outnumber greens in the pile.
The pile visibly contains noticeably more brown material than green, layered or mixed rather than one solid layer of either.
Check moisture with a squeeze test.
Squeeze a handful from the middle — feels like a wrung-out sponge, not dripping or dusty.
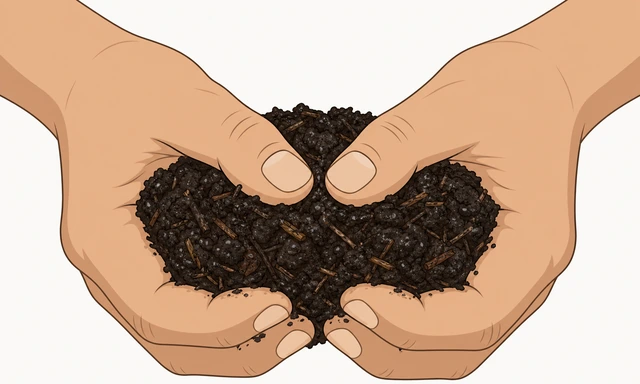
Decomposer microbes need moisture to work but drown without air — the wrung-sponge feel is the balance point between too dry to break down and too wet to breathe.
- Reach into the middle of the pile and grab a handful of material.
- Squeeze it — damp with no dripping means it's right; add water if it crumbles dry, add dry browns if water runs out.
- Recheck after adjusting until the squeeze test feels like a wrung-out sponge.
A squeezed handful holds together and feels damp but doesn't drip, and you've adjusted if it didn't start that way.
Feels soggy, dripping, or already smells sour? → Soggy/smelly. Feels bone dry and crumbles apart? → Dry/stalled.
Cover the pile.
Tarp, bin lid, or a thick brown cap layer on top.
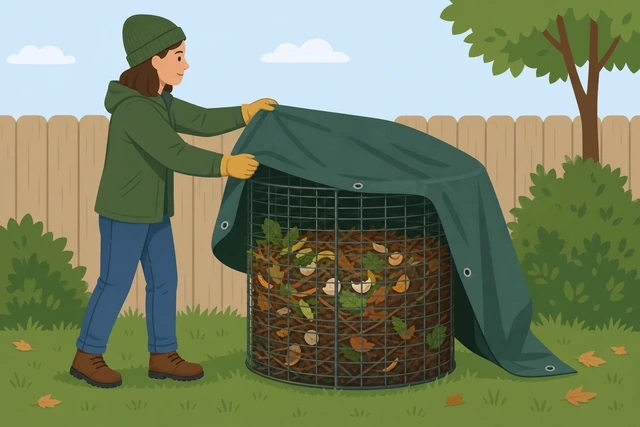
A cover holds in the moisture and heat the pile has built up and keeps heavy rain from waterlogging it or dry wind from drying it out.
- Add a tarp, bin lid, or a thick top layer of dry browns over the pile.
- Make sure the cover doesn't seal the pile completely airtight.
- Check the cover is secure enough to stay put in wind or rain.
The pile has a lid, tarp, or brown 'cap' layer on top, not left bare to the sky.
Wait for it to heat up, then check.
Give it 3-5 days · check center by hand or with a compost thermometer.
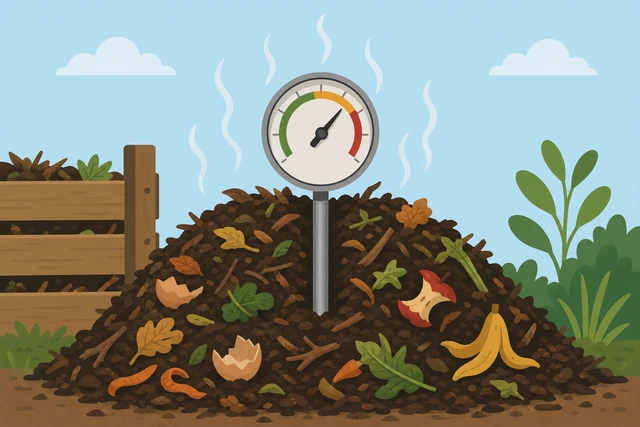
A warm center is the first sign decomposer microbes are actively working — checking early tells you whether the ratio and moisture you built are actually working before you wait weeks to find out.
- Let the pile sit undisturbed for 3 to 5 days after building it.
- Reach into the center (or use a compost thermometer) and feel for warmth.
- Compare the center temperature to the outside air temperature.
The center of the pile feels noticeably warmer than the outside air (or reads warm on a thermometer), signaling active decomposition has started.
No warmth at all after 5+ days? → Dry/stalled.
Turn and aerate every 1-2 weeks.
Pitchfork or aerator tool · move outside material to the center · break up clumps.
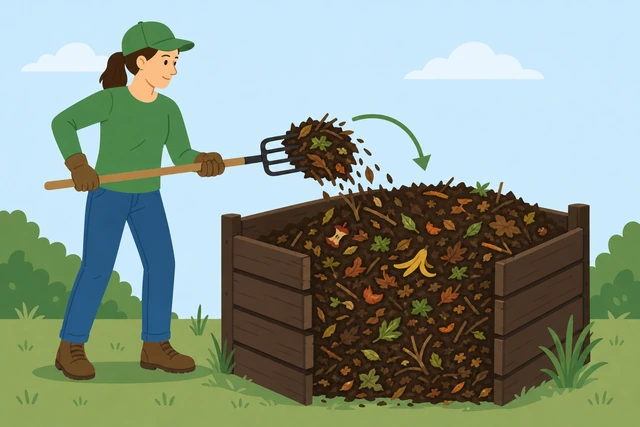
Turning is what keeps oxygen reaching the whole pile instead of just the surface — without it the center can run out of air and turn anaerobic and smelly.
- Use a pitchfork or aerator tool to lift and flip the pile roughly every 1 to 2 weeks.
- Move material that was on the outside into the center as you turn.
- Break up any dense, matted clumps you find while turning.
The pile has been flipped or mixed so material that was on the outside is now in the middle, and no dense, matted clumps remain.
Keep adding scraps, buried, and rebalance.
Bury fresh scraps under existing material · keep rebalancing browns and greens.
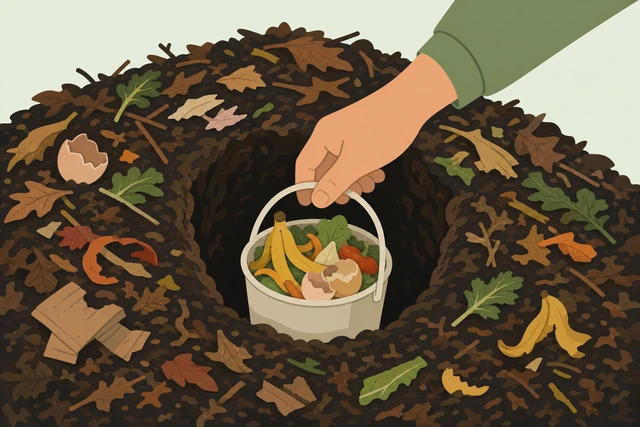
Fresh scraps left sitting on the surface are the single biggest reason rodents, raccoons, and flies show up — burying them under existing material keeps the pile working and keeps pests away.
- Bury new kitchen and yard scraps under the surface of the pile, not left on top.
- Add a scoop of browns along with new greens to keep the ratio balanced.
- Mix new additions in during your next turn rather than leaving them in one spot.
New scraps are mixed in under the surface, not left exposed on top, and the pile still leans brown-heavy overall.
Scraps disappearing, scattered, or digging near the pile? → Pests/rodents.
Keep out the never-compost list.
No meat, dairy, oily food, pet or human waste, or diseased/seedy plants — ever.
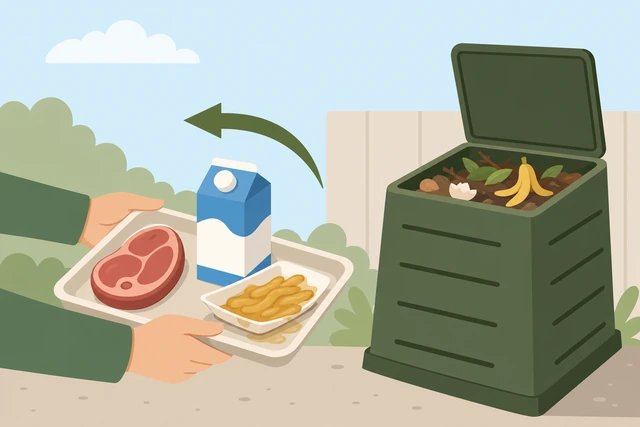
These items rot into a smelly, pest-attracting mess and can carry pathogens or seeds that home compost temperatures don't reliably kill, so keeping them out from day one avoids problems no amount of turning can fix.
- Keep meat, dairy, and oily or greasy food scraps out of every addition.
- Keep pet waste and human waste out — these are never safe for home compost.
- Keep diseased plants and weeds that have already gone to seed out of the pile.
You can name the never-compost list from memory and confirm none of it went into the pile.
Check in on the pile weekly.
Check smell, moisture, and pest signs weekly · course-correct early.
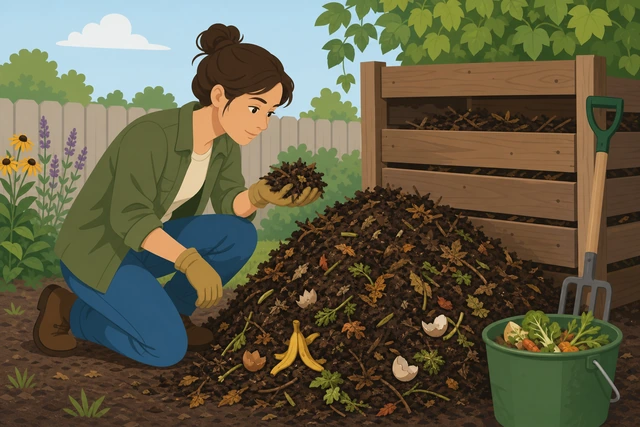
Catching a soggy, dry, or pest problem in its first week is a five-minute fix — catching it a month later usually means rebuilding the whole pile.
- Smell the pile — it should smell earthy, not rotten or like ammonia.
- Squeeze-test the moisture again and adjust if it's drifted dry or soggy.
- Look for digging, tunnels, or scattered scraps that signal pests.
Each weekly check confirms the pile still smells earthy, still feels like a wrung sponge, and shows no digging or nesting signs.
Rotten smell? → Soggy/smelly. Dry and not breaking down? → Dry/stalled. Pest signs? → Pests/rodents.
Recognize finished compost and harvest it.
Dark, crumbly, earthy smell, scraps unrecognizable · screen out chunks.
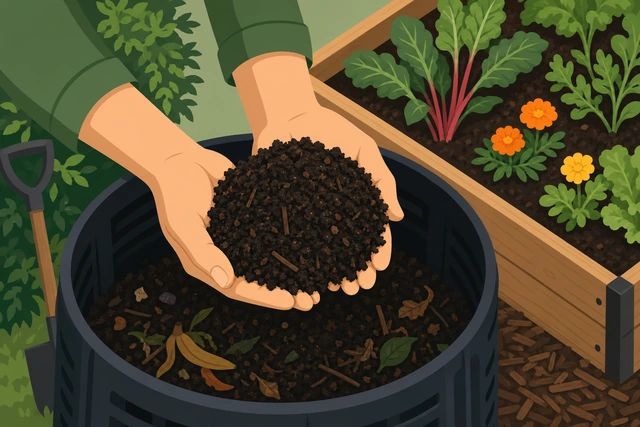
Using compost before it's actually finished can tie up nitrogen and even stress plants, so knowing what 'done' looks and smells like keeps you from harvesting too early.
- Check for dark brown or black color, a crumbly texture, and an earthy smell.
- Confirm the original food and yard scraps are no longer recognizable.
- Screen out any chunky, unfinished bits and toss them back into a new pile.
You can pull a handful of finished compost that looks and smells like rich garden soil, with no recognizable food scraps left in it.
Soggy/smellyRotten-egg or ammonia smell, slimy or matted wet material, standing water
Turn the pile immediately to add oxygen.
Flip the whole pile · break up wet mats as you go.
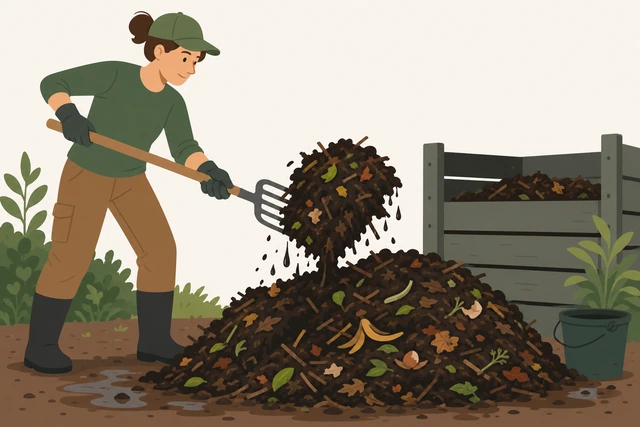
Oxygen is what turns the smelly anaerobic process back into the clean-smelling aerobic one — turning is the fastest way to reintroduce it throughout the pile.
- Use a pitchfork to lift and flip the entire pile, not just the top layer.
- Break apart any slimy, matted clumps you find as you turn.
- Work all the way down to the base, since anaerobic pockets often sit at the bottom.
The pile has been fully turned and any wet, matted clumps have been broken apart.
Mix in a generous amount of dry browns.
Add a generous amount of dried leaves, straw, or shredded cardboard.
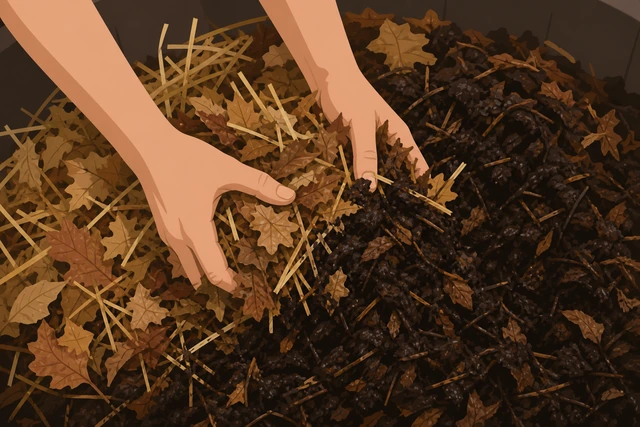
Dry browns soak up excess moisture and add the airy structure the pile lost when it went soggy, giving microbes room to breathe again.
- Gather a generous supply of dry browns — dried leaves, straw, or shredded cardboard.
- Mix the dry browns thoroughly through the wet material, not just on top.
- Add more in the coming days if the pile still feels soggy.
Dry browns are mixed through the wet material and the pile no longer feels dripping wet.
Check drainage and add a cover.
Add a base layer if missing · add a lid or tarp if rain caused it.
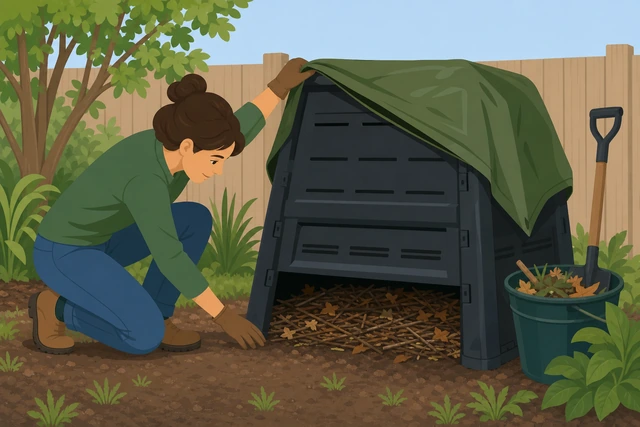
If water can't drain out the bottom or keeps getting rained on from the top, no amount of turning or adding browns will fix the problem for long.
- Check whether a coarse base layer is under the pile; add one if it's missing.
- Add a tarp or lid if recent rain is the likely cause of the sogginess.
- Confirm the site itself drains and isn't sitting in a low, wet spot.
Drainage is checked and improved if needed, and the pile has a cover if rain was the cause.
Rebalance future additions going forward.
Add greens and browns together in smaller batches · recheck moisture each time.
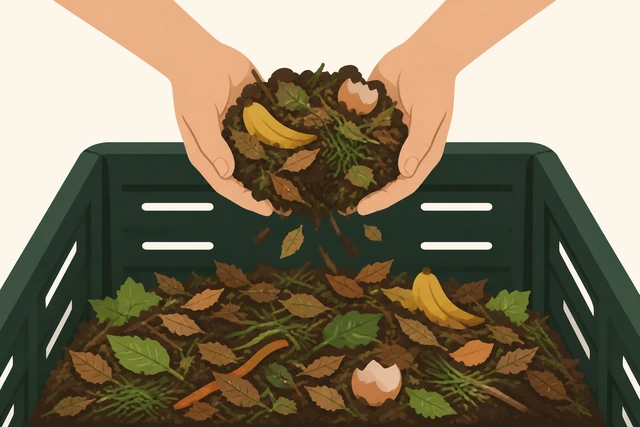
Adding a big batch of greens all at once is what tips most piles into anaerobic — smaller, balanced batches with a moisture check each time prevents the problem from repeating.
- Add future greens and browns together in the same smaller batch instead of separately.
- Squeeze-test the moisture every time you add new material.
- Turn the pile a little more often for the next few weeks to keep air moving.
The rotten smell has cleared within about a week, and new additions go in as balanced, moisture-checked batches.
Smell doesn't clear within about a week, or water keeps pooling underneath? Consider rebuilding on a better-drained site or switching to a raised bin with more airflow at the base.
Dry/stalledBone dry, materials unchanged after a month, center never warms
Squeeze-test the center to confirm it's dry.
Reach into the middle · crumbles apart with no dampness at all means too dry.
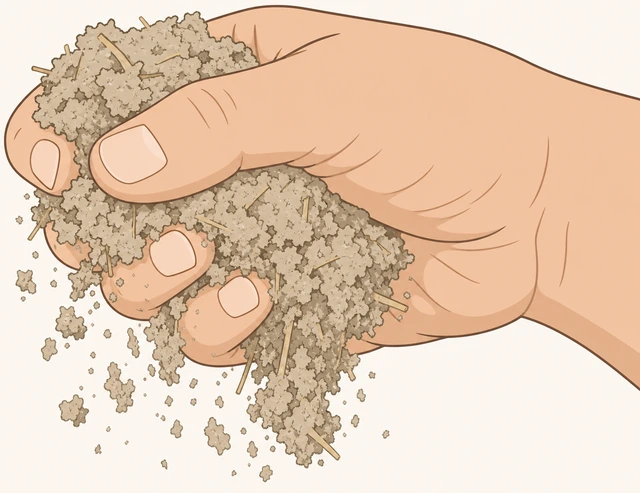
Confirming the pile is actually dry throughout (not just dry on the surface) makes sure you're fixing the real problem instead of guessing.
- Dig into the center of the pile, not just the top or edges.
- Squeeze a handful and check if it crumbles apart with zero dampness.
- Compare the center to the outer edges to see how far the dryness goes.
You've confirmed the center is dry throughout, not just dusty on the outside.
Water thoroughly while turning.
Water while turning · aim for wrung-sponge feel all the way through.
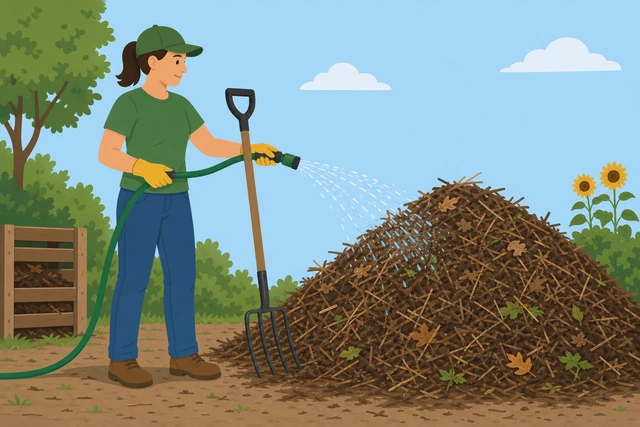
Watering only the surface just runs off — turning while you water is what actually gets moisture worked evenly through the whole pile.
- Turn the pile with a pitchfork while adding water with a hose or watering can.
- Keep adding water and turning until a squeeze anywhere feels like a wrung sponge.
- Check a few different spots, not just one, before stopping.
The pile feels evenly damp like a wrung sponge throughout, not just on the surface.
Mix in fresh greens.
Add kitchen scraps or fresh grass clippings if the pile is mostly old browns.
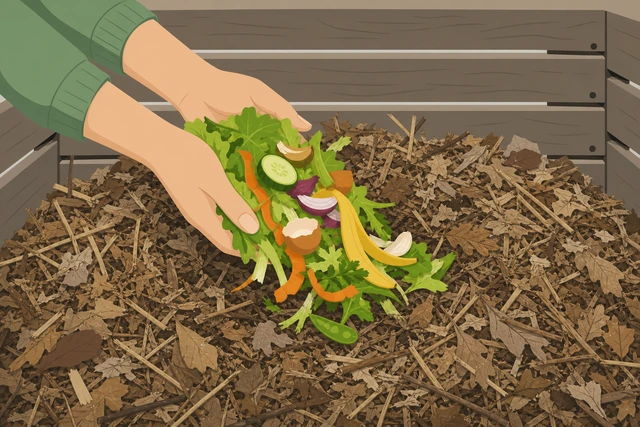
A pile that's gone mostly dry, aged browns is short on the nitrogen and moisture that greens bring, which is often why it stalled out in the first place.
- Check whether the pile is mostly old, dried-out browns with few greens left.
- Add a batch of fresh kitchen scraps or fresh grass clippings.
- Mix the fresh greens through the pile rather than piling them on top.
Fresh greens are mixed into the pile, rebalancing it away from being almost all old browns.
Chop large dry pieces smaller.
Break down any big dry chunks so they can absorb moisture.
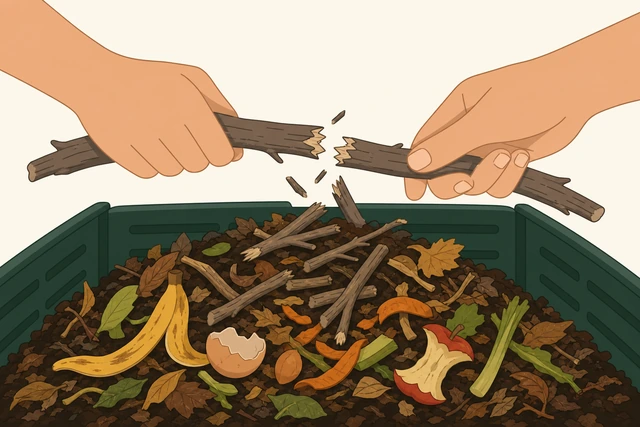
Large dry pieces resist absorbing water and decomposing no matter how much you water the pile, so breaking them down smaller is what actually lets them take up moisture.
- Look for any large, dry chunks left in the pile.
- Break or chop them down to roughly 2 to 3 inch pieces.
- Mix the smaller pieces back into the dampened pile.
No large dry chunks remain — everything in the pile is small enough to absorb moisture.
Still won't hold moisture or heat up after watering, turning, and adding fresh greens? Check the pile is at least 3x3x3 feet — an undersized pile can't retain enough heat regardless of moisture.
Pests/rodentsRodents, raccoons, or flies digging in the pile, tunnels, or scattered scraps
Remove any meat, dairy, or pet waste added by mistake.
Find and remove any meat, dairy, oily food, or pet waste that got in by mistake.
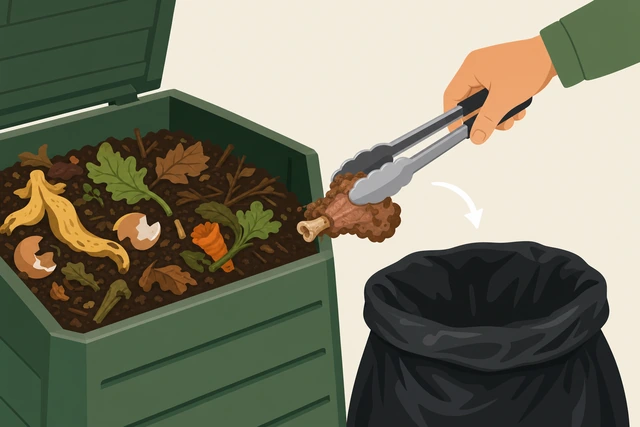
These items are almost always what draws animals in the first place, so removing them is the first thing that has to happen before any other fix will hold.
- Dig through the pile and look specifically for meat, dairy, oily food, or pet waste.
- Remove anything you find and dispose of it in the regular trash, not the pile.
- Double-check the pile is clear before moving on to the next fix.
Any meat, dairy, oily food, or pet waste has been found and removed from the pile.
Bury fresh scraps deep, not near the surface.
Bury new scraps 8-10 inches under existing material, not near the surface.
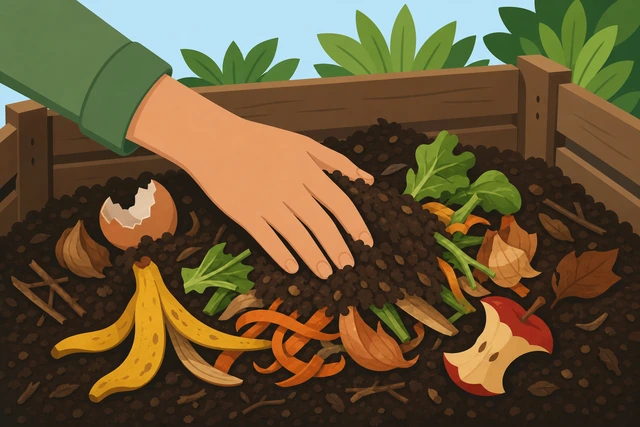
Scraps sitting within easy digging distance of the surface are what keeps animals coming back even after you clean up — burying them deep puts them out of easy reach.
- Dig a hole roughly 8 to 10 inches into the existing pile for new scraps.
- Place fresh scraps in the hole and cover them completely with existing material.
- Avoid dropping food scraps loosely on top of the pile going forward.
Fresh scraps are buried 8 to 10 inches under existing material, not sitting near the surface.
Secure the bin against animals.
Add or reinforce a lid, hardware-cloth bottom, or fully enclosed bin.
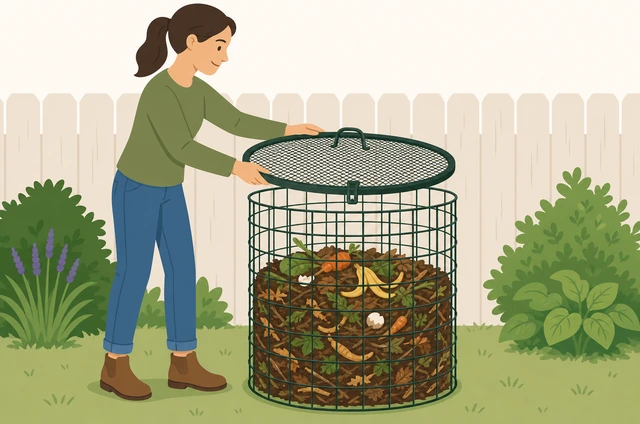
An open pile with no barrier is an easy target no matter how well scraps are buried — a secure lid or enclosed bin removes the access point entirely.
- Add a secure, animal-resistant lid if the pile doesn't already have one.
- Line the bottom with hardware cloth if digging from underneath is the problem.
- Switch to a fully enclosed bin if an open pile keeps attracting animals despite these fixes.
The pile now has a secure lid, hardware-cloth bottom, or fully enclosed bin blocking animal access.
Change how and when you add scraps.
Keep a covered kitchen container · add scraps in fewer, buried batches.
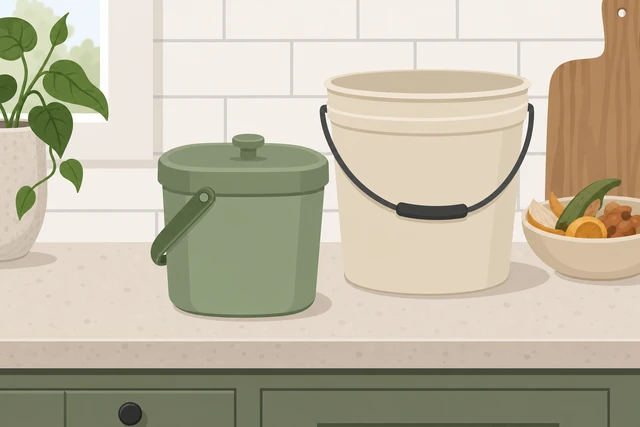
Adding food scraps throughout the day leaves fresh material exposed far more often — collecting them covered and adding in fewer batches cuts down how often the pile smells inviting to animals.
- Keep a lidded container in the kitchen to collect scraps between trips outside.
- Add scraps to the pile in one or two batches a day instead of many small trips.
- Bury each batch immediately using the same 8 to 10 inch method.
Kitchen scraps are collected covered and added to the pile in fewer, immediately buried batches.
Rodents or raccoons keep returning even with a secured, fully enclosed bin and no exposed scraps? Consider a rodent-resistant tumbler bin, moving the pile farther from structures, or pausing kitchen scraps and composting yard waste only for a while.
When to get help
- Ask someone to help carry or turn material if a full pitchfork load feels too heavy.
- Rotten smell doesn't clear within about a week of turning and adding browns, or water keeps pooling underneath? Consider rebuilding on a better-drained site or a raised bin with more airflow.
- Pile still won't hold moisture or heat up after watering, turning, and adding fresh greens? Check it's at least 3x3x3 feet — an undersized pile can't retain enough heat regardless of moisture.
- Rodents or raccoons keep returning even with a secured, fully enclosed bin and no exposed scraps? Consider a rodent-resistant tumbler, relocating the pile, or pausing kitchen scraps for a while.
- Living under an HOA or local ordinance restricting open piles? Check the rules first — a fully enclosed bin often satisfies stricter requirements.
When This Doesn't Work
- Freezing winter weather. Decomposition slows dramatically or stalls in a hard freeze — that's normal; the pile restarts on its own once temperatures warm up in spring.
- Small apartments, balconies, or no yard space. A full 3x3x3 ft outdoor pile won't fit — a compact tumbler, a worm bin (vermicomposting), or a countertop electric composter are better fits.
- Bokashi or vermicomposting systems. These follow their own fermentation or worm-bin instructions instead of the browns/greens turning method described here.
- HOA rules or local ordinances restricting open piles. Check local rules before building; a fully enclosed, tidy bin often satisfies stricter requirements that an open heap doesn't.
Warnings
- Never add meat, dairy, oily food, or pet or human waste. These rot into a smelly, pest-attracting mess and can carry pathogens home compost doesn't reliably kill.
- Never compost diseased plants or weeds that have already gone to seed. Home piles often don't get hot enough long enough to kill pathogens or seeds.
- Avoid building the pile directly against wood fencing, siding, or a shed wall — trapped moisture and pests can damage it over time.
- Wear gloves when turning — an actively working pile can get uncomfortably warm to the bare touch.
- Don't expect finished compost overnight. Realistic timelines run a few months (hot, well-managed) to about a year (cold, low-maintenance).
Tips
- Keep a lidded container in the kitchen so scraps collect covered between trips outside.
- The squeeze test is free and reliable — a compost thermometer is a nice-to-have, not a requirement.
- Shred fall leaves with a mower before adding them; shredded leaves break down noticeably faster than whole ones.
- When unsure of the ratio, lean toward more browns — it's easier to fix a pile that's too dry than one that's too soggy.
- Most yard waste that used to go in a curbside bin can go straight into the pile instead.
FAQ
How long until I get finished compost?
Typically a few months if the pile is well-balanced, turned regularly, and stays warm, up to about a year for a cooler, lower-maintenance pile. Season and pile size both affect the timeline.
Can I compost citrus peels, onions, or garlic?
Yes, in moderation. They're fine as part of your greens — just don't dump an entire large batch in at once, since that can throw off the browns:greens ratio.
Do I need a special bin to start composting?
No. An open pile works fine if you have the space and no local rules against it. A bin or tumbler mainly helps with tidiness, turning, and keeping animals out.
Why isn't my pile heating up?
Usually the pile is too small, too dry, or too brown-heavy. Check it's at least 3x3x3 feet, squeeze-test the moisture, and mix in fresh greens — see the dry/stalled branch for the full fix.
Can I add weeds from the garden?
Yes, as long as they haven't gone to seed yet and aren't diseased. Weeds with mature seed heads can survive composting and spread right back into your garden.
Comments
Questions, corrections, and what worked for you. Comments are reviewed before they appear.