How to Plant Tomatoes in Pots
Plant a tomato in a large draining pot: potting mix, deep stem burial, cage, thorough water, full sun. Read one step at a time. Start with preflight. No holes? No drainage. Flops? Plant flops. Leggy? Not enough sun.
Tips for reading this guide
- One step at a time. Read the green caption, the Why line, then the bullets.
- Move on when the green done line is true — then go to the next step.
- Plant deep — bury most of the stem.
- No holes in the pot? No drainage.
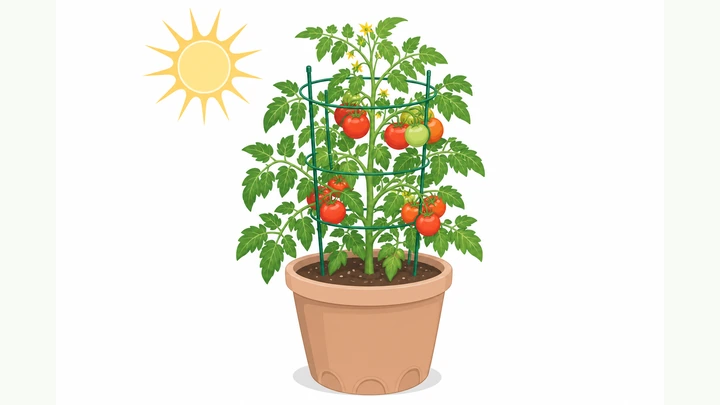
Things You'll Need
- Pot 5 gallons or larger with drainage holes
- Bagged potting mix (not garden soil)
- Tomato seedling or transplant
- Tomato cage or sturdy stake + soft ties
- Watering can or hose
- Optional: saucer, mulch, plant label
Where are you stuck?
Start hereBig pot · deep plant · support · water · sun.
Preflight — choose a pot at least 5 gallons with drainage holes, bagged potting mix, a tomato seedling, a cage or stake, water, and a spot with 6–8 hours of sun.
≥5 gal pot with holes · potting mix · seedling · support · sun site.
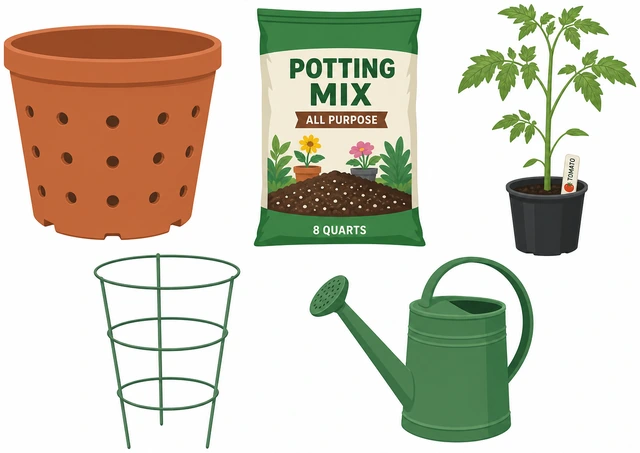
Small pots dry out and starve roots; garden soil in pots compacts and drowns plants.
- Pick one plant per 5+ gallon pot (bigger is better for indeterminate types).
- Buy potting mix, not dug yard dirt.
- Confirm a sunny patio/balcony/yard spot.
- No drainage holes? → No drainage.
Pot, mix, plant, support, and sun spot are ready.
Confirm drainage holes at the bottom; add a saucer only if you need to protect a deck — empty standing water later.
Check holes · optional saucer · never leave pot sitting in water.
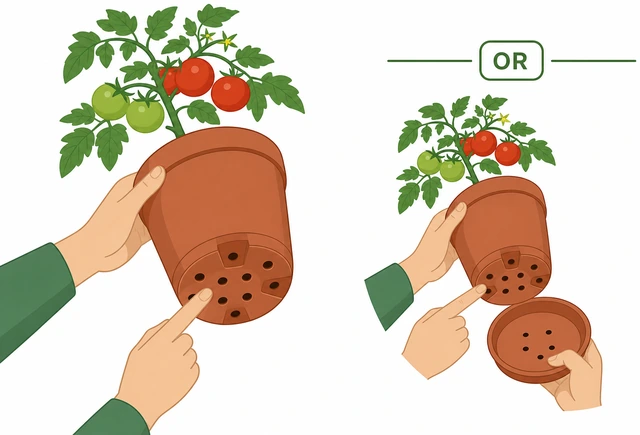
Tomatoes hate wet feet; holes are non-negotiable.
- Tip the pot and look for holes.
- If none, switch pots or drill (see branch).
- Place saucer only for surface protection.
You verified water can leave the pot.
Fill the pot about halfway to two-thirds with moistened potting mix.
Fill partway with potting mix · lightly moist.
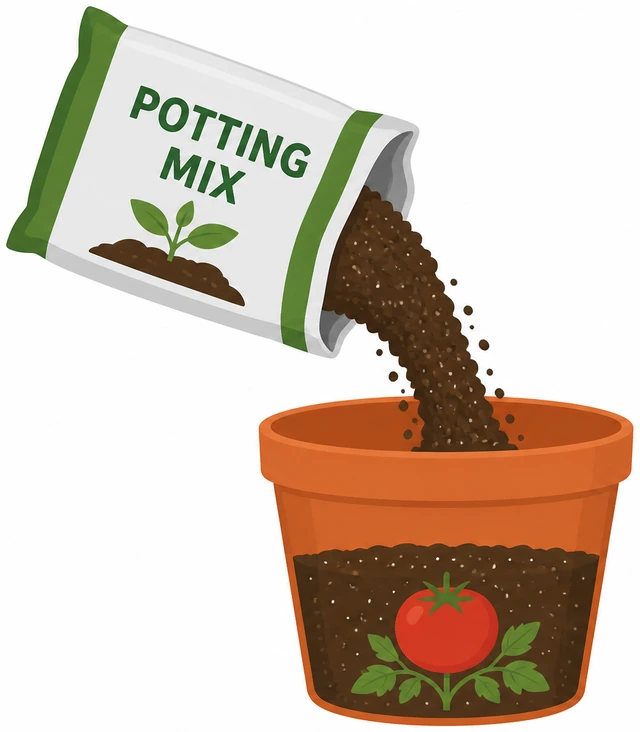
Starting part-full leaves room to set a deep plant and backfill.
- Pour mix in.
- Break up clumps with your hand.
- Pre-moisten if bone-dry dust.
Mix fills the pot partway and feels slightly damp.
Gently remove the seedling; pinch off lower leaves; dig a deep hole.
Unpot seedling · pinch lower leaves · dig deep hole.
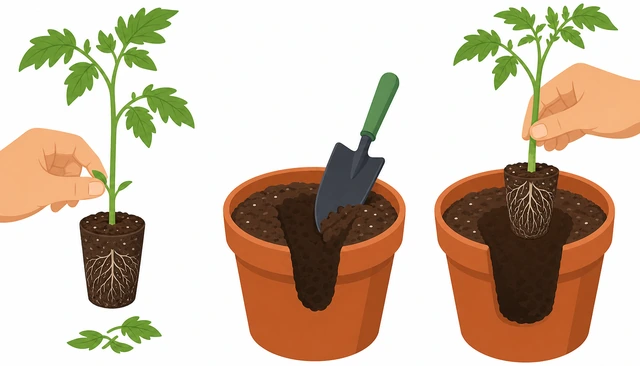
Tomatoes grow roots along buried stem — deeper planting builds a stronger plant.
- Squeeze the nursery pot sides; slide plant out.
- Pinch/snap leaves on the lower stem you’ll bury.
- Dig a hole deep enough for most of the stem.
Plant is free, lower leaves off, hole is deep.
Set the plant deep so only the top cluster of leaves sits above soil; backfill and firm gently.
Plant deep · backfill · firm soil snug not brick-hard.
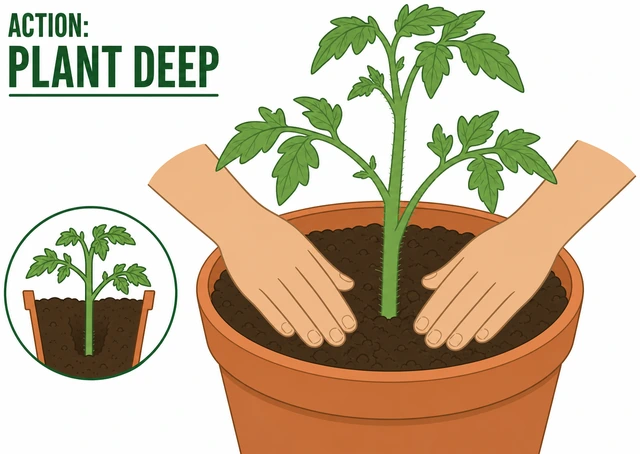
Shallow planting is why potted tomatoes flop in the first wind.
- Lower the rootball into the hole.
- Bury the bare stem up to the top leaves.
- Fill gaps; press soil lightly around the stem.
- Leave 1 inch of rim space for watering.
Plant sits deep and upright with soil firm around it.
Install a tomato cage or sturdy stake now — before roots fill the pot.
Install cage/stake now · don’t wait until it’s huge.
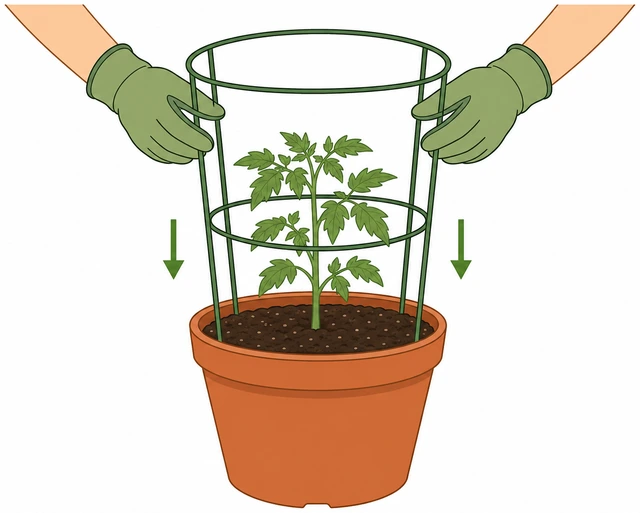
Staking later stabs roots; early support prevents flop.
- Push cage legs or stake deep into the pot.
- Keep support off the main stem by a finger width.
- Soft ties ready for later growth.
- Already leaning? → Plant flops.
Support is solidly in the pot.
Water slowly until water runs out the drainage holes; empty the saucer if it fills.
Water until it drains out · empty saucer puddles.
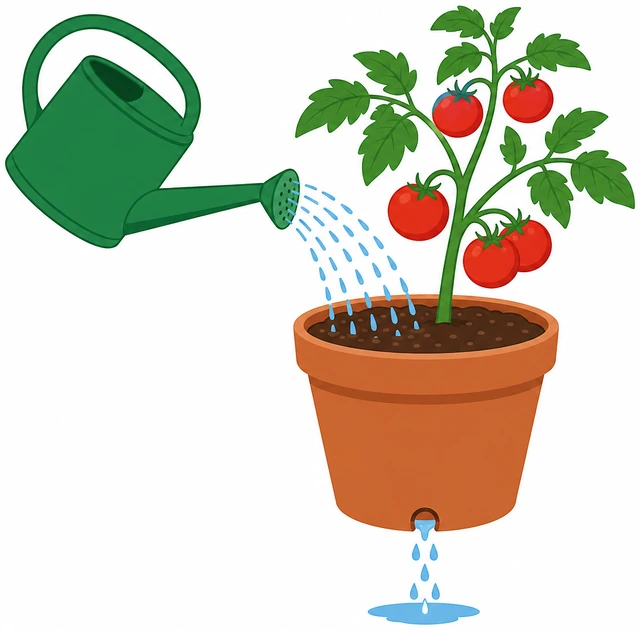
First watering settles soil around roots and proves drainage works.
- Water in a slow circle.
- Watch for runoff from holes.
- Dump saucer water within 30 minutes.
Soil is evenly moist and the pot drained.
Move the pot to full sun (6–8 hours). Rotate a quarter-turn every few days if light is one-sided.
Full sun 6–8 hours · rotate if needed.
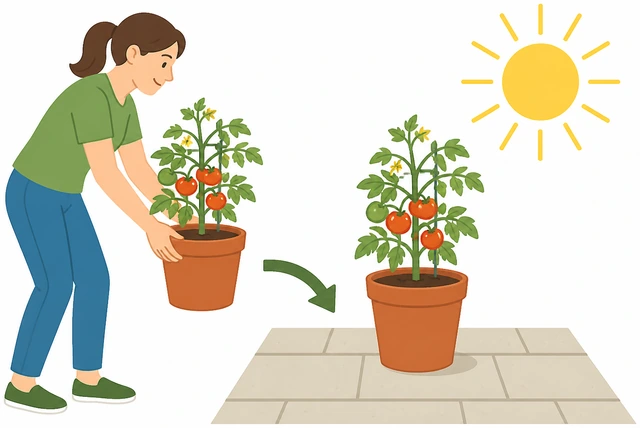
Less sun = tall weak stems and little fruit.
- Place in the sunniest safe spot.
- Avoid deep shade walls.
- Note afternoon wind exposure.
- Only pale stretchy growth later? → Not enough sun.
Pot is in its sunny home.
Optional: add a thin mulch layer on the soil surface and label the variety.
Optional thin mulch · label variety.
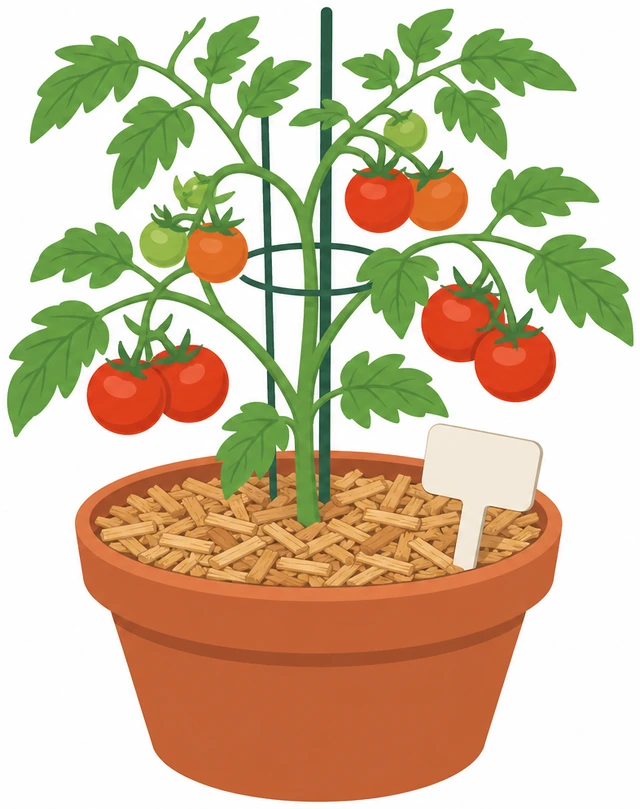
Mulch slows surface drying; labels stop “mystery tomato” month.
- Keep mulch off the stem collar.
- Use straw/chips lightly.
- Write variety on a tag.
Surface is finished and labeled (or consciously skipped).
For week one: finger-test soil daily — water when the top inch is dry; skip fertilizer until new growth shows.
Finger-test daily · water when top inch dry · no heavy feed yet.
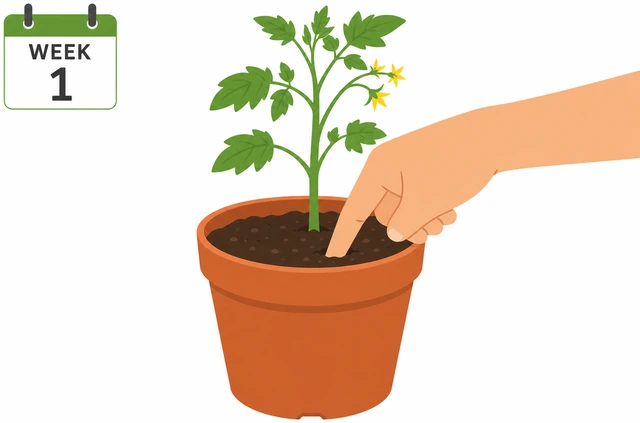
Transplants need water consistency more than fertilizer bombs.
- Finger to first knuckle.
- Water when dry at that depth.
- Wait on strong fertilizer until you see new leaves.
- Watch for wilt that doesn’t recover by evening.
You have a clear week-one water plan.
No drainageThe pot has no holes or water sits in the saucer constantly.
Stop watering. Tip out standing water from the saucer immediately.
Empty saucer · pause watering.
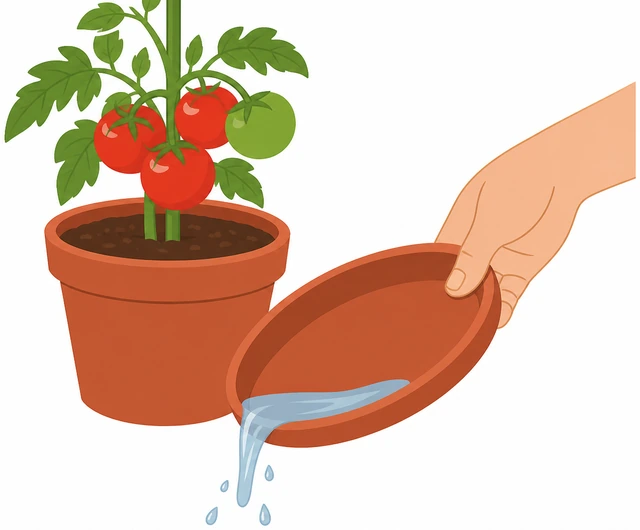
Standing water suffocates roots fast in heat.
- Dump saucer.
- Lift pot to feel weight.
- Move to shade briefly if wilting badly.
No standing water remains.
Drill drainage holes in plastic/resin pots, or repot into a pot that already has holes.
Drill holes or switch to a draining pot.
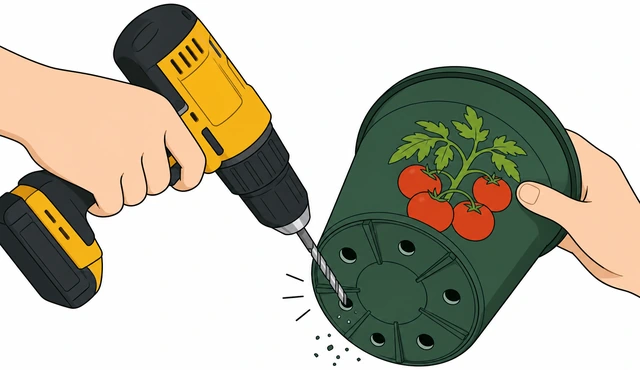
Without an exit, every watering is a flood.
- 3–5 holes in the bottom.
- Or transplant to a proper pot.
- Use potting mix again.
Water can exit the container.
If roots smell rotten, trim mushy roots and replace the soggy mix.
Rotten smell · trim mush · fresh mix.
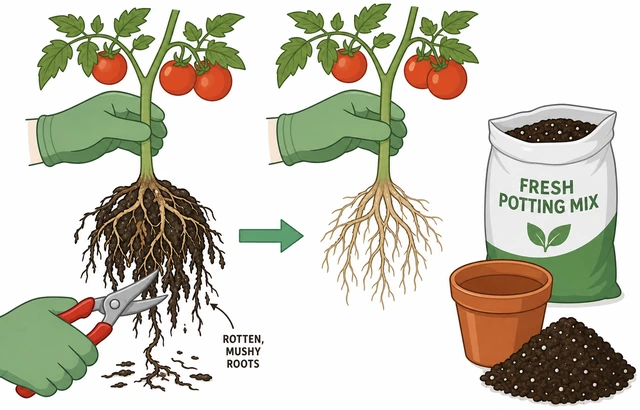
Reusing swamp soil reinfects the plant.
- Unpot carefully.
- Cut brown mushy roots.
- Fresh mix; replant deep.
Plant is in fresh draining mix.
Water once lightly and confirm runoff from the new holes.
Light water · confirm runoff.
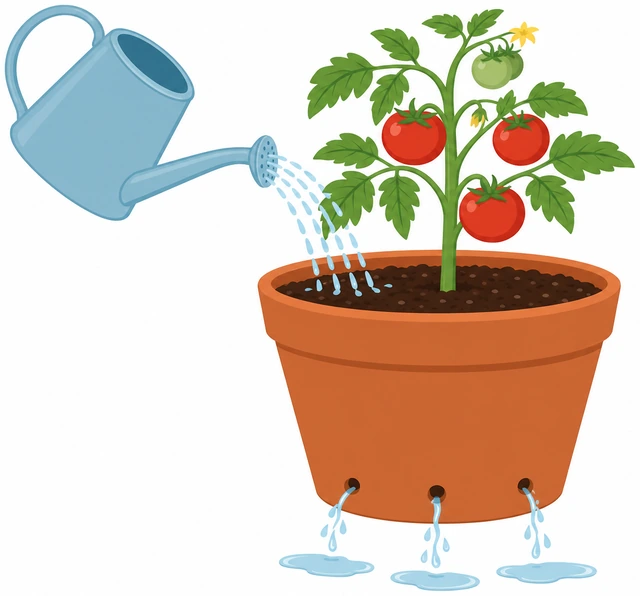
Proof beats hope.
- Water slowly.
- See drips from holes.
- Empty saucer.
Drainage works.
Return to main path support and sun steps.
Resume support + sun from main path.
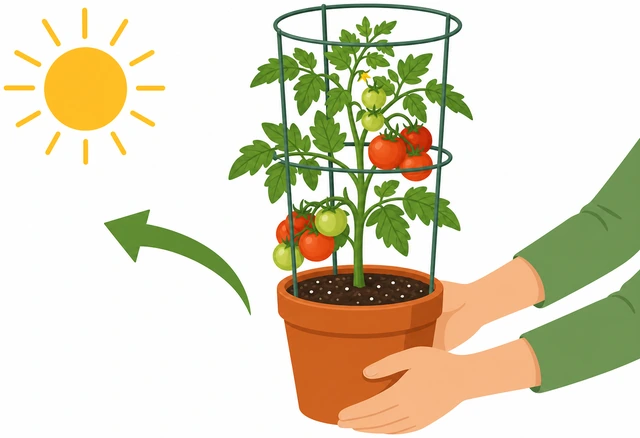
Drainage fix alone doesn’t finish planting.
- Check cage/stake.
- Return to sun.
- Week-one finger test.
You’re back on the main care path.
Plant flopsThe stem leans or falls after wind or growth.
Stand the plant upright and add a taller stake immediately.
Upright + taller stake now.
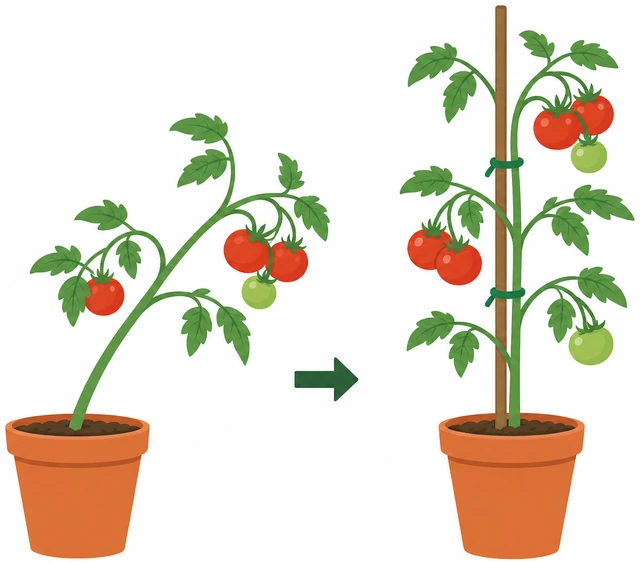
Waiting lets the stem kink permanently.
- Stake opposite the lean.
- Drive deep.
- Avoid stabbing the main rootball center if possible.
Plant is upright with a stake.
Tie loosely with soft cloth or tomato ties — figure-eight, not a strangling loop.
Loose figure-eight tie · not tight around stem.
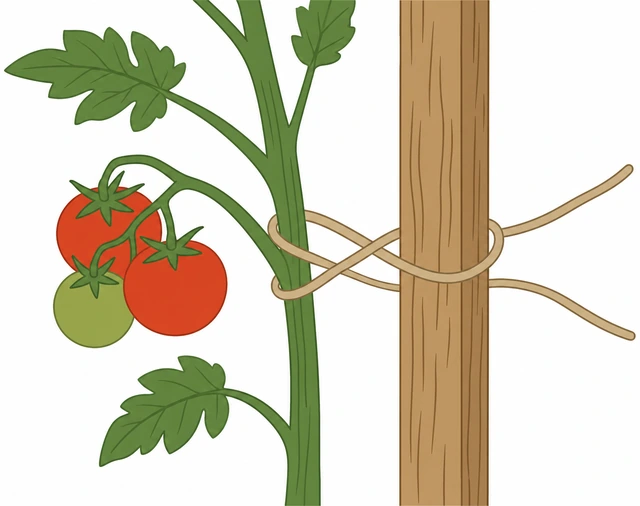
Tight ties girdle and kill stems as they thicken.
- Soft tie.
- Figure-eight between stake and stem.
- Room to grow.
Tie holds without digging in.
If the pot is under 5 gallons and roots circle, upsize the pot.
Rootbound in tiny pot · upsize.
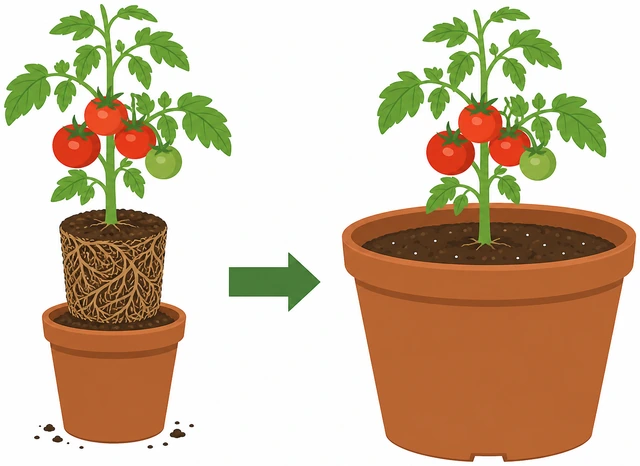
Top-heavy fruit in a 1-gallon pot will always flop.
- Move to 5–15 gallon.
- Plant deep again.
- Water in.
Plant has a bigger base.
If the stem is cracked but not severed, splint with stake and reduce fruit load temporarily.
Cracked stem · splint · reduce weight.
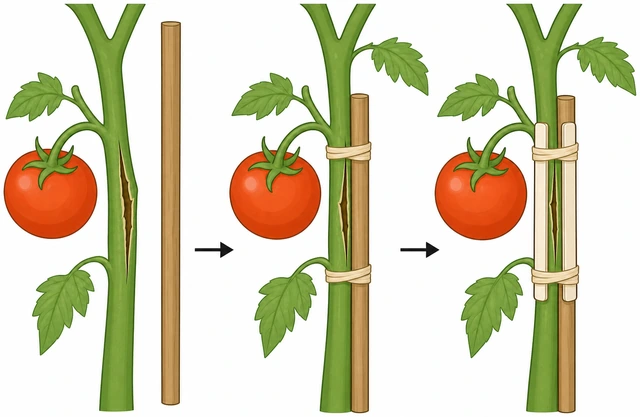
A partial crack can heal if supported.
- Align stem.
- Extra tie.
- Remove some heavy fruit clusters if needed.
Stem is splinted.
Replace the plant if the stem is snapped through or the top is wilted beyond recovery.
Fully snapped · replace plant.
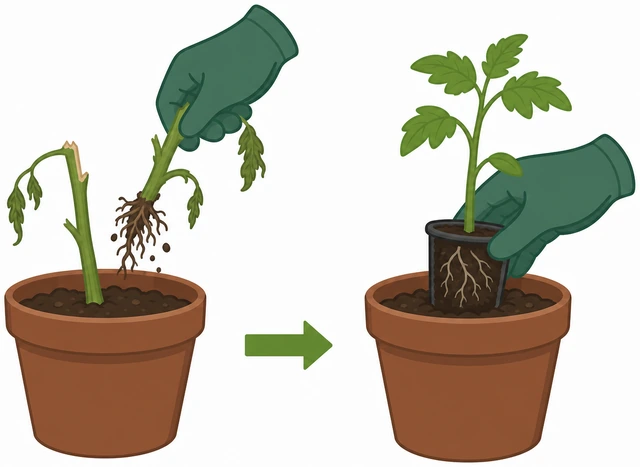
Time is better spent on a new seedling in peak season.
- New seedling.
- Same pot if mix is healthy.
- Restart main path.
You have a viable plant again.
Not enough sunGrowth is pale, stretchy, and leaning hard toward a window or gap.
Move the pot to the sunniest available spot for a full day test.
Move to max sun · one-day test.
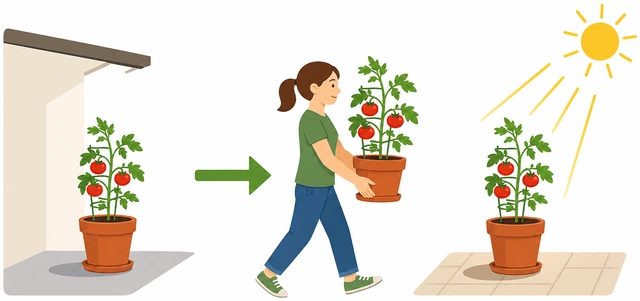
Many “sick” tomatoes are just shade-starved.
- South/west exposure if possible.
- Avoid deep porch shade.
- Watch for leaf scorch if moving from deep shade suddenly — ease over 2 days.
Pot is in a brighter site.
Rotate the pot a quarter turn every 2–3 days so it doesn’t lean permanently.
Quarter-turn every few days.
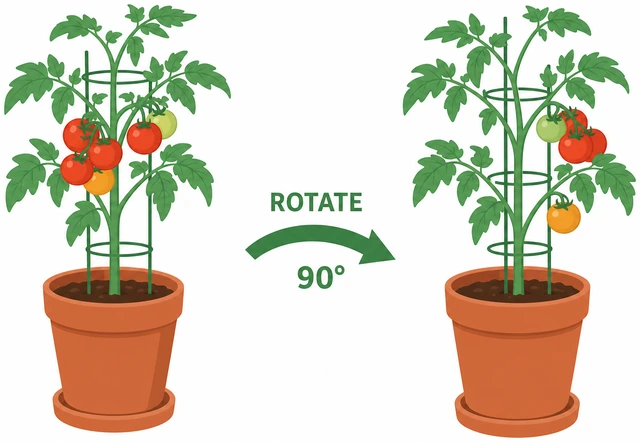
One-sided light makes a permanent lean.
- Mark the pot rim.
- Rotate on schedule.
- Retie if needed.
Rotation habit is set.
Reflect light with a light-colored wall if that’s all you have — still aim for 6 hours.
Use reflective wall · still chase 6 hours.
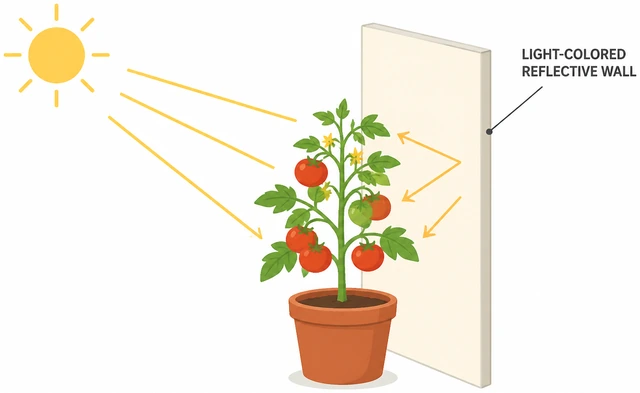
Bounce helps; it doesn’t replace real sun.
- Place near light wall.
- Avoid heat-trap black corners.
- Measure hours roughly.
You’ve maximized bounce light.
If you truly get under ~4 hours of sun, switch crops (lettuce/herbs) or accept poor tomato yield.
<4 hours sun · different crop or low expectations.
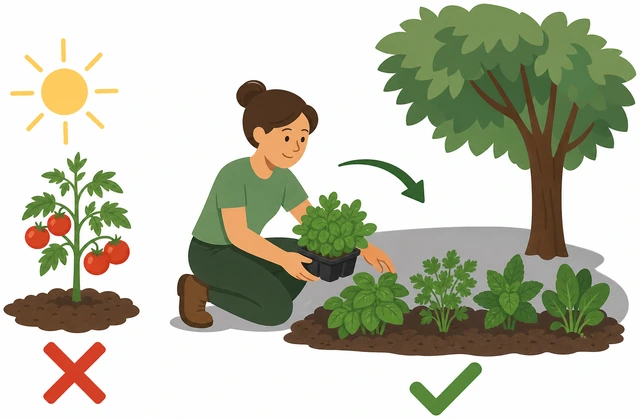
Tomatoes are sun crops — fighting physics wastes a season.
- Be honest about hours.
- Swap plant if needed.
- Or keep tomato knowing fruit will be scarce.
You made a sun-realistic choice.
Once in better light, resume normal watering — don’t drown a shade-stressed plant.
Better light · normal finger-test water — no flood.
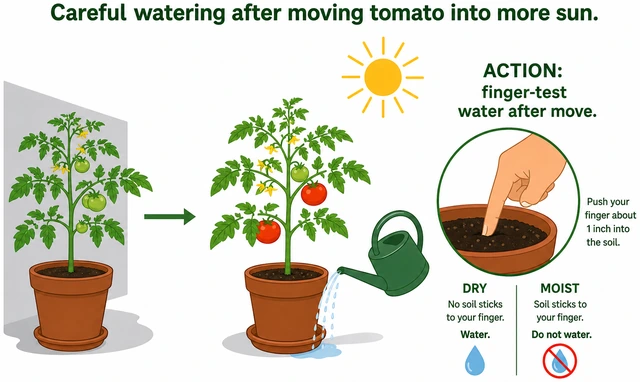
Shade plants use less water; sudden floods rot them.
- Finger test.
- Water when top inch dry.
- Watch new green growth.
Watering matches the new light.
When This Doesn't Work
- Leaves yellow and soil stays wet — Drainage or overwatering. Empty the saucer, confirm holes, and wait until the top inch dries before watering again.
- Flowers but no fruit — Often heat, lack of pollination, or too much nitrogen. Ensure sun, gently shake flowers at midday, and ease off high-nitrogen feed.
- Plant outgrew a tiny decorative pot — Upsize now. Tomatoes in 1–2 gallon pots almost always fail midseason.
Warnings
- Do not plant tomatoes in pots without drainage holes.
- Do not use heavy garden dirt as the only potting medium.
- Empty saucers — do not let pots sit in water.
Tips
- One plant per pot — Crowding two tomatoes in one 5-gallon pot doubles water stress and disease risk.
FAQ
Determinate or indeterminate in pots?
Both work. Determinate (bush) types suit smaller cages; indeterminate (vining) need bigger pots (10+ gallons ideal) and taller support.
Can I start from seed in the final pot?
You can, but most beginners succeed faster with a sturdy nursery transplant for the first plant.
Comments
Questions, corrections, and what worked for you. Comments are reviewed before they appear.