How to Replace a Phone Screen Protector
Replace a cracked or peeling phone screen protector (tempered glass or film) without trapping dust — about 15 minutes of hands-on work plus a 30–60 minute wait before the case. You will clear the old sheet, clean under side light, sticker every speck, dry-fit, lower with a frame or hinge (no sliding), press center-out, then case on gently. Read one step at a time. Start with the preflight. Dust or a stubborn bubble? See dust & bubbles. Crooked after contact? See misaligned. Case peels a corner? See case lifts edges.
Tips for reading this guide
- One step at a time. Read the green caption, the Why line, then the bullets.
- Move on when the green done line is true — then go to the next step.
- Tempered glass is the hard sheet; film is the thinner soft sheet. Both use clean → de-dust → align → lower → press.
- Dust is the main failure. Spend real time on Steps 3–5 with a side light before you peel any sticky liner.
- Alignment frame (tray that snaps on the phone) is the easy path. No frame? Use the hinge / hover method in Steps 6–8.
- Need a helper? Ask someone you trust to hold the phone steady for Steps 7–8 while you lower the glass.
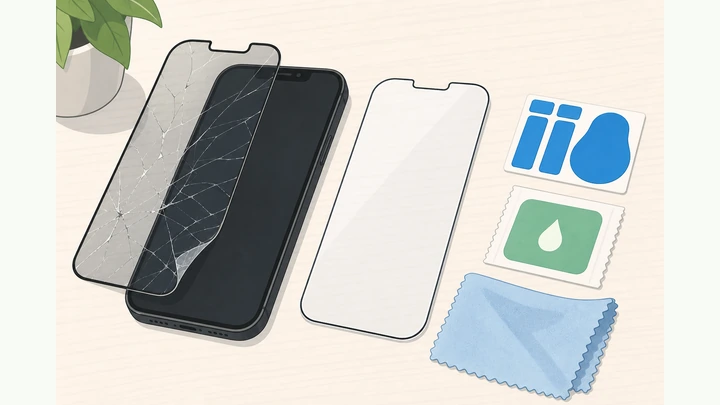
Things You'll Need
- New protector sized for your exact phone model (2-pack ideal; frame kit preferred if available)
- Alcohol wipe and dry microfiber cloth (usually in the kit)
- Dust-removal stickers — or a strip of clean clear tape as backup
- Plastic card (or kit squeegee) plus a second clean microfiber to wrap the card
- Side light: desk lamp or window light aimed across the glass (not a blasting fan)
- Still-air spot: desk or bathroom counter; fans and HVAC vents off
- Optional: hot shower run 2 minutes first, then install in the steamy bathroom with the door closed
- Your case nearby — but plan to wait 30–60 minutes before putting it back on
- Clean dry hands; cotton shirt preferred (skip fleece or wool that sheds lint)
Where are you stuck?
Follow Start here for a full dust-controlled replace. Jump to a branch if dust is trapped under the glass, the sheet landed crooked, or the case peels a corner.
- I want to replace the protector from scratch Still air · clean · stickers · dry-fit · lower · wait · case
- There is dust or a bubble under the new protector Tape-lift · sticker once · or sheet two / wait on clear air
- The protector landed crooked Lift — don’t slide · realign · or fresh sheet
- My case peels up the protector corners Settle time · case-friendly glass · roomier case
Start hereStill air → peel old → clean → sticker dust → dry-fit → lower (no slide) → wait → case
Preflight — all three checks must be YES before you open sticky liners.
Exact model kit · still air + side light · clean dry hands (no fleece lint).
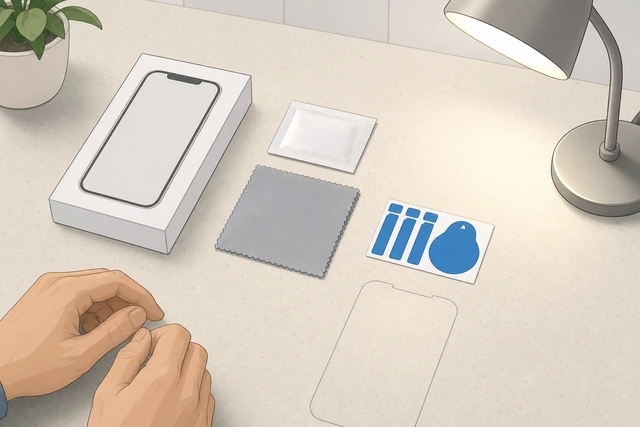
Wrong size and airborne dust waste both sheets in a 2-pack before you ever press the glass down.
- Model match? Box names your exact phone (for example iPhone 16 Pro, not a vague “16 series”).
- Still air + side light? Fans/HVAC off; lamp or window light across the glass; optional steamy bathroom after a 2-minute hot shower.
- Hands and clothes? Wash and dry on a lint-free towel; skip fleece/wool; kit wipe, cloth, and dust stickers within reach.
All three checks are YES — kit, still workspace with side light, and clean dry hands.
Prefer a kit with an alignment frame (tray that snaps on the phone). No frame is fine — Steps 6–8 cover freehand hinge.
Remove the case and anything that blocks the screen edges.
Case off · MagSafe wallet / pop socket off · screen off if you can · bare phone on the clean surface.
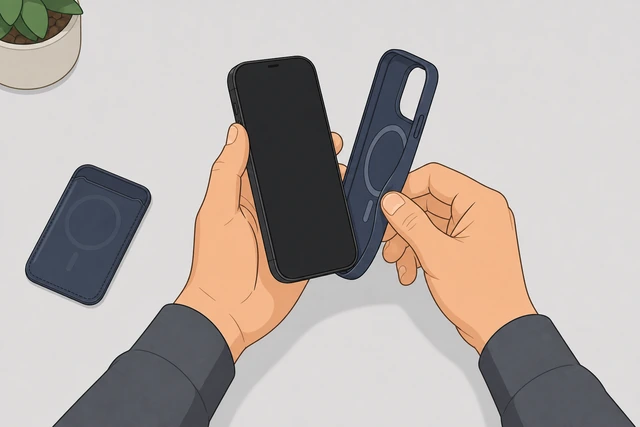
Case lips hide dust and later pry fresh glass corners; a black (off) screen makes leftover specks easier to see.
- Turn the screen off if the phone has battery — black glass shows dust better under side light.
- Peel the case off completely and set it aside until Step 12.
- Remove any MagSafe wallet, ring mount, or pop socket so the four screen edges are free.
The phone is bare, edges are free, and it sits on your clean still workspace.
Peel off the old screen protector completely.
Lift one corner with a nail or plastic card · peel slowly at a low angle · clear every shard.
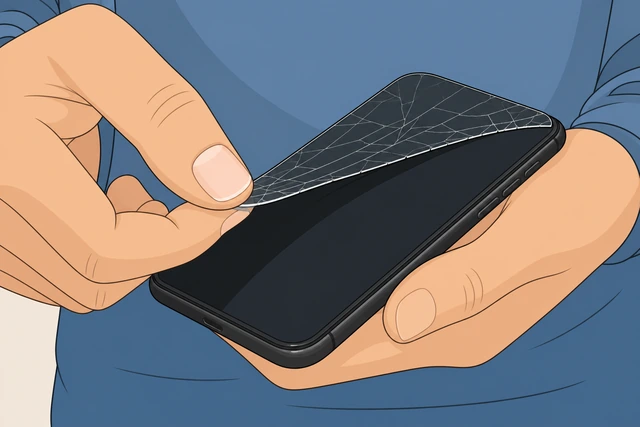
Leftover glass chips or sticky islands scratch the new sheet the instant you press it down.
- Slide a fingernail or the kit card under a top or side corner of the old sheet.
- Peel toward the opposite edge slowly — keep the old glass almost flat as it lifts so it does not snap shards inward.
- Check for leftover sticky bits or glass crumbs; they must come off before Step 3.
The old film or glass is fully off — no shards or sticky islands left on the display.
Old glass shattered? Brush crumbs into the trash with the card — never wipe shards across the phone glass with cloth.
Wipe with the alcohol pad, then wait ~30 seconds to evaporate.
One-direction alcohol strokes · keep ports dry · wait until the glass looks dry of alcohol.
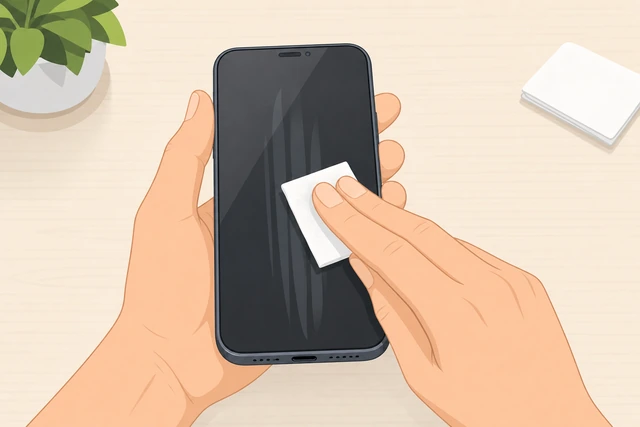
Oils block adhesive wet-out — and installing onto still-wet alcohol traps haze and weakens the bond.
- Open the kit wet wipe (or alcohol pad) and wipe the full screen in long one-direction strokes — not circles.
- Keep liquid out of the charging port, speakers, earpiece, and open buttons.
- Wait about 30 seconds until the alcohol sheen is gone before you touch the dry cloth.
The display is cleaned and the alcohol has fully evaporated — no wet sheen left.
Dry-buff with microfiber, then inspect under side light.
Dry microfiber same direction · tilt toward side light · stop when streaks are gone.
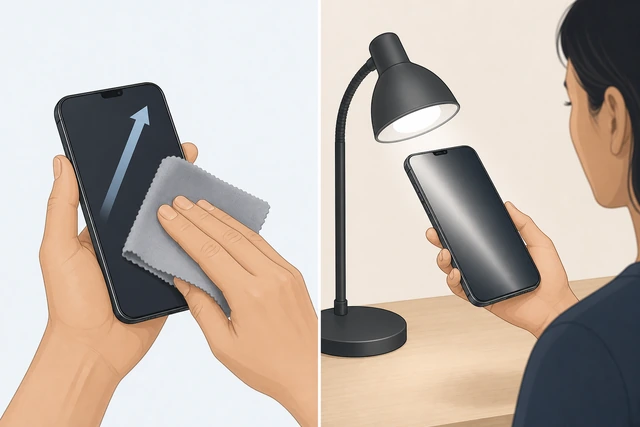
A damp or streaky screen makes dust stickers smear particles around instead of lifting them.
- Buff with the dry microfiber in the same long direction you wiped — slow strokes.
- Tilt the phone toward your desk lamp or window so light skims across the glass.
- Repeat buffing until you see no streaks — tiny bright dots you still see are for Step 5, not more wiping.
The screen is dry and streak-free under side light — ready for stickers, not more wiping.
Lift every remaining dust particle with stickers (do not wipe them).
Side light on · press sticker on each speck · peel straight up · repeat until none sparkle.
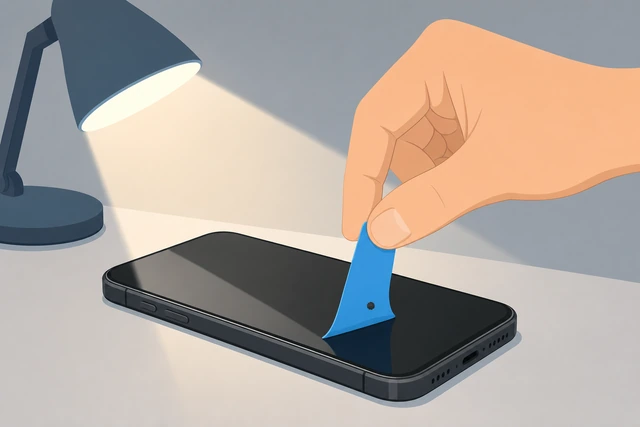
Wiping moves dust; stickers remove it. One missed speck becomes a permanent bubble island under glass.
- Hold the phone at an angle to the side light and look for bright dots or tiny shadows.
- Press a dust sticker (or a sticky-side-out tape loop) on each particle, then peel straight up.
- Keep going until you can tilt the phone any way under the light and see no particles.
Under side light at several angles, the glass shows zero visible dust, hair, or lint.
Speck appears after you apply? → Dust & bubbles. Do not open sticky liners until this pass is clean.
Dry-fit with the liner on, then prep the frame or a tape hinge.
Aim with liner still on · snap on alignment frame OR tape a hinge · peel only the adhesive liner the kit labels.
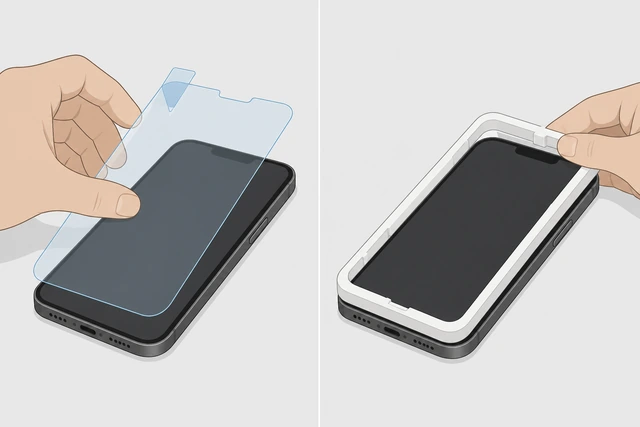
Dry-fit locks your aim before sticky contact; peeling early fingerprints the adhesive and ruins the sheet.
- With liners still on, rest or hover the sheet and match the earpiece, camera hole, or island cutout and both long sides.
- If the kit has an alignment frame/tray, snap it onto the phone now so the glass can drop into the recess.
- No frame: tape one long edge as a hinge; peel only the labeled adhesive liner — hold edges only.
Aim is locked and the sticky face is exposed only as far as the kit requires — still clean.
Kit labels films “1” and “2” — follow that order. Do not peel both faces at once.
Lock final alignment — frame seated or hover 1–2 mm above.
Frame firm on phone · or hover match cutouts and equal left/right bezels · still no full sticky slap yet.
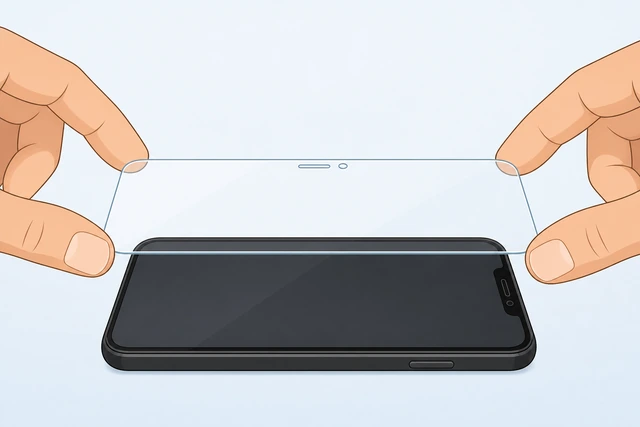
Once adhesive grabs, sliding to “fix” it usually smears glue and drags dust under the trailing edge.
- Frame kits: confirm the tray sits firm with no wobble and the glass is ready to drop into the recess.
- Freehand: hold 1–2 mm above; match top cutouts and equal bezel reveal on both long sides.
- Keep hovering or framed — do not commit the full sticky face until Step 8.
Cutouts and side edges line up with the phone before you commit full adhesive contact.
Already stuck crooked? → Misaligned.
Lower the protector — frame drop, hinge swing, or one-edge set — never slide.
Drop or swing closed · or touch one short edge then lower · no dragging after contact.
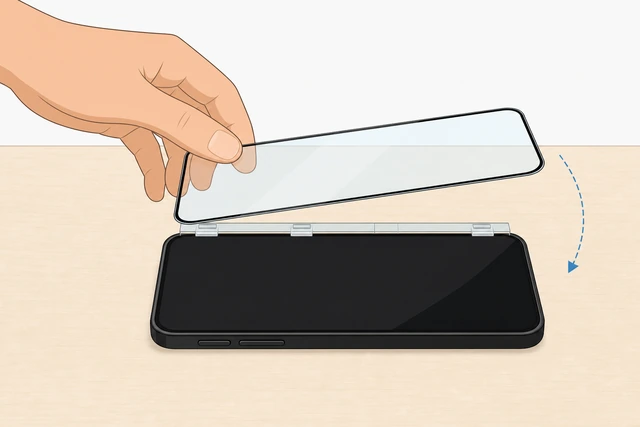
Lateral sliding after contact traps a dust line at the trailing edge and streaks the adhesive.
- Frame: lower or release so the glass drops into place; peel the frame away when the kit says.
- Hinge: swing down like a book cover; freehand: set one short edge, then lower the rest smoothly.
- If it lands wrong in the first seconds and still lifts, peel — do not slide — or use the misalign branch.
The protector lies flat on the glass with no big sideways shift after contact.
Crooked after contact? → Misaligned.
Press from the center outward with a finger or cloth-wrapped card.
Center press · stroke to each edge · wrap the card in microfiber · note dust centers vs clear air.
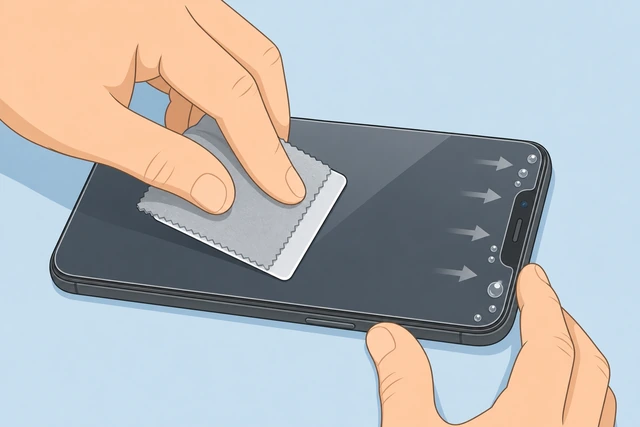
Even pressure spreads adhesive and pushes air out; a bare hard card can scuff soft film or chip a glass edge.
- Press firmly in the center with a clean fingertip, then stroke outward toward top, bottom, left, and right.
- For stubborn air, wrap the card in microfiber and push to the nearest edge — do not dig a fingernail under the glass.
- Note bubbles with a dark speck (dust) versus tiny clear bubbles (air that often shrinks later).
Most air is gone or only at the outer edges; any dust-centered bubble is noted for the branch.
Dust speck or bubble that will not move? → Dust & bubbles.
Peel any remaining front install film or numbered pull tabs.
Peel front film / tabs at a low angle · only the protector layer should remain.
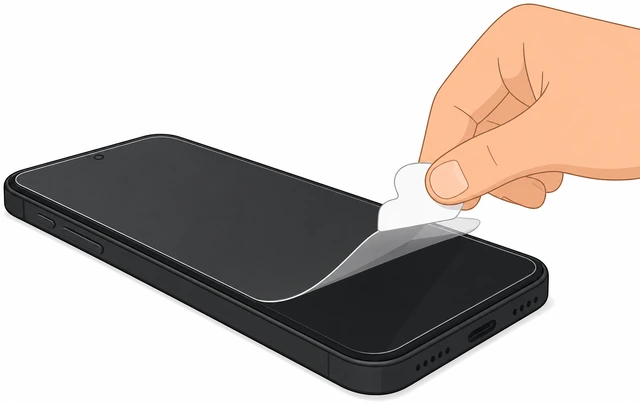
Leaving the install film on blocks touch and makes a good install feel like a failure.
- Find any remaining front film or numbered pull tab sitting on top of the glass.
- Peel it slowly at a low angle so you do not lift the protector with it.
- Confirm only the protector remains — no plastic film still covering the touch surface.
No install film or tabs remain — only the protector sits on the phone.
Check the edges, then wait 30–60 minutes before any case.
Fingertip around the perimeter · phone flat on the desk · timer 30–60 min (or kit minimum).
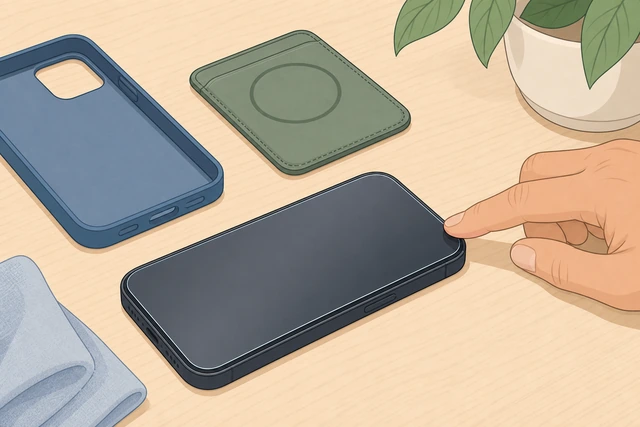
A case lip on fresh adhesive is the top cause of “it was perfect then the corner lifted.”
- Run a clean fingertip lightly around all four edges; press any small lifting flap flat for a few seconds.
- Leave the phone flat and bare — no case, no MagSafe wallet — for 30–60 minutes (follow a longer kit time if printed).
- Use the wait to note tiny clear edge bubbles; they often shrink over 24–48 hours if there is no dust speck.
Edges feel stuck and the settle timer is finished — still no case on yet.
Planning to force the case on early? Expect corner lift — see Case lifts edges if it happens.
Reinstall the case gently — watch the corners as the lip passes.
Case on from the bottom · watch top corners · MagSafe wallet still off · stop if the lip lifts glass.
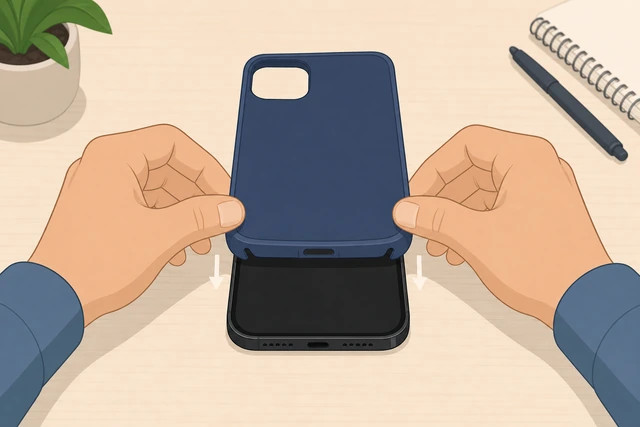
Tight lips and wallets add edge force that peels recessed adhesive before it finishes wetting out.
- Start the case at the bottom edge, then snap the sides and top slowly.
- Watch the protector corners as the case lip passes — they must stay flat.
- Leave MagSafe wallets off for the rest of the day if corners felt close to lifting.
The case is on and the protector corners are still flat under the lip.
Corners peel when the case snaps on? → Case lifts edges.
Final side-light check, touch test, and fingerprint re-enroll if needed.
Side-light QA · cutouts clear · unlock and swipe · re-enroll under-display fingerprint if unlock fails.
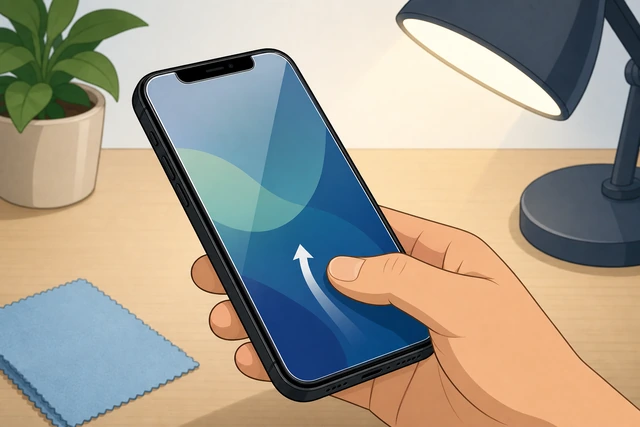
A two-minute QA catch now beats a crooked camera hole or a dead fingerprint sensor all week.
- Tilt under side light: cutouts clear, no dust islands, edges down. Mild haze with no speck can clear in 24–48 hours.
- Unlock and swipe once — touch should feel even across the panel.
- Under-display fingerprint: if unlock fails, open Settings and re-enroll your fingerprint through the new glass.
Alignment looks good, no dust islands, and touch (and fingerprint, if used) works — you are done.
Dust island? → Dust & bubbles. Case peeling? → Case lifts edges.
Dust & bubblesClear air vs dust-centered bubbles after you press
Tape-lift the nearest edge, sticker the particle once, then re-press.
Clear tape on the edge · slow low-angle lift just past the speck · dust sticker · lower and press — one deliberate lift.
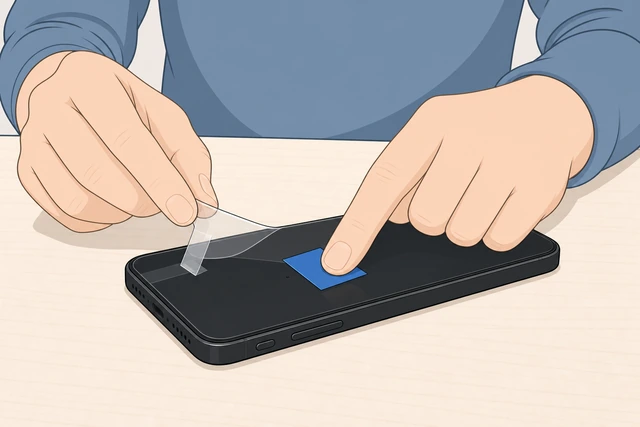
Dust bubbles never self-heal. One careful lift beats sliding. Repeated lifts create static that pulls in more dust.
- Only if an edge still lifts or the sheet is freshly applied — do not force a fully cured sheet.
- Stick clear tape to the nearest edge, lift just past the particle, press a dust sticker on it, and peel the speck away.
- Lower from the still-stuck side, press center to edges once, and stop — do not keep peeling up and down.
The speck is gone and the glass is re-pressed, or you know the sheet is too stuck to lift safely.
Decide: wait on clear micro-air, or start sheet two for dust islands.
Clear pinhead air → wait 24–48h · dark speck / multi-dust → peel and restart from Step 3 with sheet two.
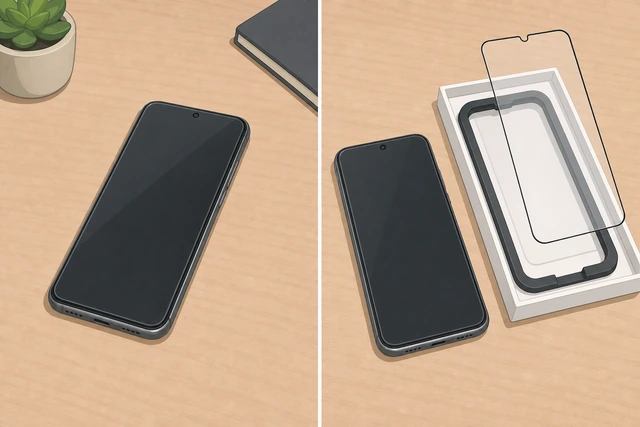
Clear air often leaves as adhesive cures; trapped dust is permanent cosmetic damage under tempered glass.
- Tiny clear bubble, no speck: leave flat 24–48 hours; then press with a cloth-wrapped card if air remains.
- Dark speck, hair, or several dust islands: remove the sheet, re-clean from Step 3, and use the spare protector.
- Out of sheets? Buy another exact-model 2-pack (frame kit if freehand failed) — do not stack a second film on top.
You are either waiting on clear micro-air, or you have started a clean second install.
Two sheets ruined by dust? Move to a stiller room (or steamy bathroom method) or a store install desk.
MisalignedCutouts or bezels crooked after the protector contacts the glass
Within the first seconds, lift — do not slide — and realign.
Slow lift from one short edge · hover and match cutouts again · lower from one edge only.
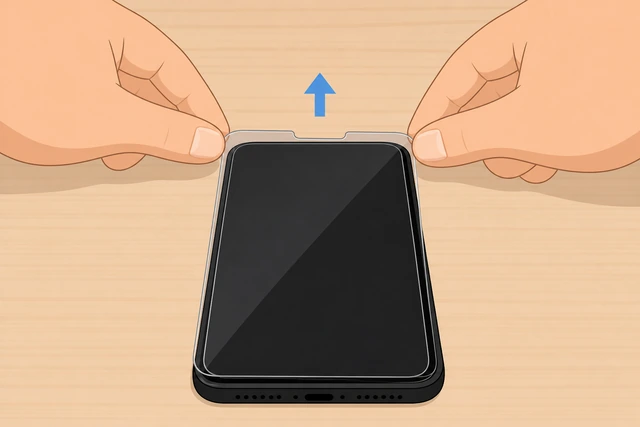
Sliding smears adhesive and drags a dust line; a slow lift within seconds can still save the sheet.
- Keep the phone flat; lift from one short edge slowly while adhesive is still soft.
- Hover and rematch cutouts and bezels (repeat the aim from Steps 6–7).
- Lower from one edge or the hinge — never drag sideways to “nudge” it into place.
The protector is reset and cutouts can be aimed again without a smear trail.
If the adhesive smeared or went cloudy, discard and use sheet two.
Trash the smeared sheet · re-clean wipe → dry → stickers · fresh sheet from Step 6.
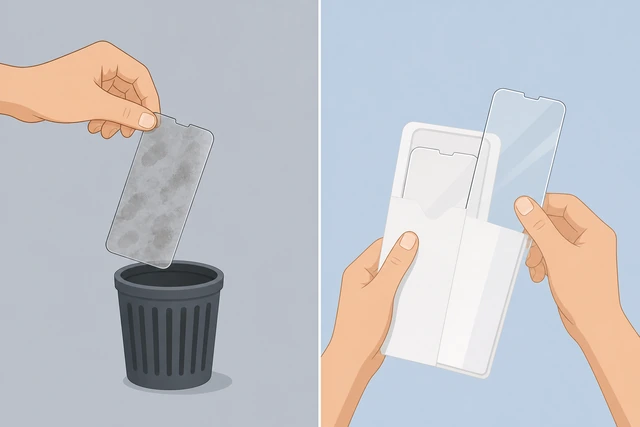
Tempered glass almost never reseats clean after a full peel — the spare sheet is the real fix.
- If the sticky face looks streaked, cloudy, or linty, stop pressing that sheet.
- Clean the phone again from Step 3 through Step 5 (wipe, evaporate, dry, stickers).
- Open the spare sheet and continue from Step 6 — treat it as a brand-new install.
You are on a fresh clean sheet, or you stopped to order another exact-model kit.
Only one sheet and it is ruined? Stop and buy a 2-pack with an alignment frame if freehand failed.
Case lifts edgesCase lip peels protector corners minutes or hours later
Pull the case and wallet off; let adhesive settle; retry slowly.
Case off · MagSafe wallet off · press corner flat · wait several hours · retry case from the bottom.
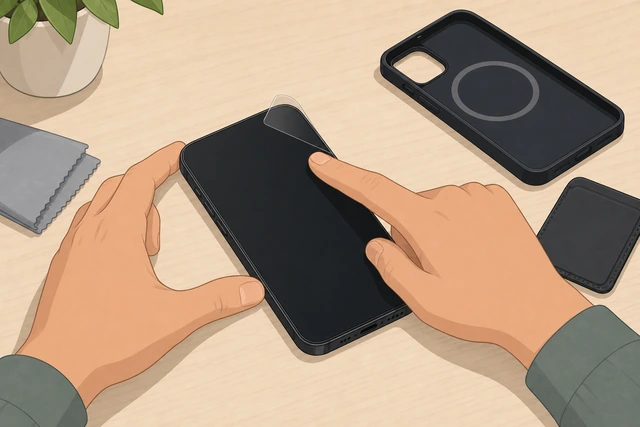
Fresh adhesive plus a tight lip (and wallets) is the usual peel — settle time removes the fight.
- Take the case off and remove any MagSafe wallet or thick ring mount.
- Press the lifting corner flat and leave the bare phone flat for several hours (overnight is fine).
- Retry the case slowly from the bottom; watch the corners as the lip passes.
Corners stay down after a gentle retry, or you know this case still fights this glass.
Switch to case-friendly glass, thinner film, or a roomier case.
Recessed-edge “case-friendly” glass · or soft film · or a case with more screen clearance — stop forcing.
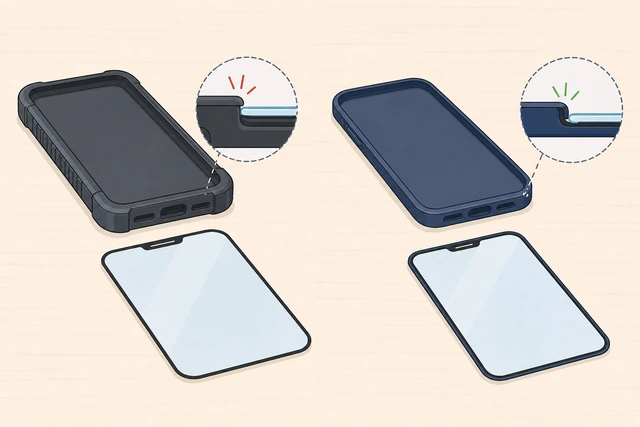
Edge-to-edge glass plus a rugged lip will keep winning; fighting it chips corners.
- Look for a protector labeled case-friendly or recessed-edge (leaves a tiny margin the lip can clear).
- Or try a thinner tempered glass / soft film, or a different case with more screen clearance.
- If every case peels the same corner on a brand-new sheet, recheck the model listing — it may be oversized.
You have a case + protector combo that stays flat, or a clear buy plan for a better match.
Persistent lift on a correct-model kit? Contact the seller for a thinner or case-friendly replacement.
When to get help
- Ask a trusted person to hold the phone steady for Steps 7–8 while you lower the glass.
- If the phone’s own glass is cracked, stop and get a screen repair — a protector will not fix it.
- After two sheets ruined by dust, move to a stiller room (steamy bathroom method) or pay for a store install desk.
- Foldable inner screen film peeling? Use authorized service — do not DIY-peel the factory inner film.
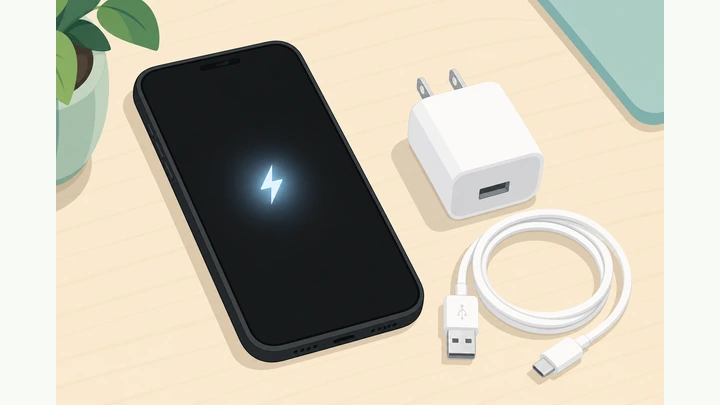
- Phone will not power on for the touch test? Charge with a known-good cable and wall block before judging the install.
When This Doesn't Work
- UV or “Dome” liquid-glue kits. Those need liquid adhesive and a UV lamp — follow that kit’s card, not this dry-apply path. Dust trapped at cure is permanent.
- Strongly curved Galaxy Ultra edges. Use the maker’s curved glass, a verified UV kit, or flexible TPU film — flat glass often fails at the curve.
- Foldable inner display film. The factory inner film on Z Fold / Z Flip–style phones is part of the display — do not peel it at home; replace through authorized service.
- The phone’s own glass is shattered. A protector will not fix a broken digitizer. Repair the screen first.
- Under-display fingerprint still fails on “compatible” glass. Re-enroll the fingerprint in Settings. If it still fails, switch to a thinner verified-compatible protector.
- Privacy or matte film feels dim or soft. That texture and viewing-angle shift are normal — not a failed install.
Warnings
- Do not flood the charging port, earpiece, or speakers with alcohol — wipe the glass only.
- Do not slide the protector after adhesive contacts the screen — lift to redo, or use a new sheet.
- Do not dig fingernails under a tempered-glass edge to chase bubbles — you can chip the glass; use a microfiber-wrapped card.
- Do not put a tight case on in the first half hour — wait 30–60 minutes so corners do not peel.
- Do not reuse a tempered-glass sheet after a full peel — adhesive picks up dust and will bubble.
- Keep fans, HVAC vents, and shedding fleece away during install; moving air drops lint onto sticky adhesive.
Tips
- Steamy bathroom method: run a hot shower ~2 minutes, close the door, let steam settle, then clean and apply — humidity drops airborne dust. Keep the kit closed until you are ready.
- Alignment-frame kits (tray that snaps on the phone) remove most freehand aim errors — worth it if you have already wasted a frameless sheet.
- Buy the exact model year and variant (Pro / Plus / Ultra). “Series” listings often have wrong camera cutouts.
- Mild white haze or rainbow Newton rings without a dust speck often clear in 24–48 hours as adhesive finishes wetting out.
- Charge the phone before you start so you can unlock and test touch (and fingerprint) at the end.
FAQ
Tempered glass or plastic film — which should I buy?
Tempered glass feels closer to bare glass and takes impacts better. Soft film is thinner and usually friendlier with tight cases and curves. Both follow the same clean → sticker → align → lower → press path here.
How do I tell a dust bubble from a normal air bubble?
Look under side light. A bubble with a dark speck, hair, or lint in the center is dust — lift and sticker or use sheet two. A tiny clear bubble with no speck is usually air and often shrinks in 24–48 hours.
Can I reuse the protector after I peel it?
Tempered glass — almost never. The adhesive picks up dust the moment it leaves the screen. Plan on the spare sheet from a 2-pack.
Why does my case keep lifting the corner?
The case lip is fighting the glass edge. Wait longer before casing, remove MagSafe wallets, or switch to case-friendly recessed-edge glass / a roomier case.
My under-display fingerprint stopped working.
Re-enroll your fingerprint in Settings through the new glass. If it still fails, the sheet may be too thick — use a protector verified for under-display sensors.
Comments
Questions, corrections, and what worked for you. Comments are reviewed before they appear.