How to Replace a Light Switch
Replace a worn single-pole light switch in about 45 quiet minutes. Turn off the breaker, verify dead with a voltage tester, swap wires on screw terminals, remount, and test the light. Read one step at a time. Start with the preflight. Not sure which breaker or tester still beeps? See no power test. Cloth, aluminum, or backstab-only wiring? See old wiring.
Tips for reading this guide
- One step at a time. Read the green caption, the Why line, then the bullets.
- Move on when the green done line is true — then go to the next step.
- Power off first. Breaker OFF plus a silent voltage tester on the switch screws is your shock barrier.
- Photo before disconnect. One clear picture of which wire on which screw prevents swapped connections.
- Tester still beeps, or old aluminum or cloth wire? Jump to the matching branch below.
- Need a helper? Ask someone you trust to hold a flashlight, spot the panel, or call if you feel unsure.
Things You'll Need
- Non-contact voltage tester — required before touching any screw terminal
- Two-lead voltage tester for branch troubleshooting if the non-contact result is unclear
- Flathead and Phillips screwdrivers sized for faceplate and mounting screws
- Replacement single-pole switch with the same amp rating as the old switch
- Needle-nose pliers to bend wire ends away from the box
- Wire strippers only if bare copper gets nicked during disconnect
- Phone or camera to photograph wire layout before disconnecting
- Small cup or bowl to hold faceplate and mounting screws
- About 45 quiet minutes; breaker panel access and good lighting at the switch
Where are you stuck?
Follow Start here for a full single-pole switch swap. Jump to a branch if the tester still beeps after breaker off, or you see cloth, aluminum, or backstab-only wiring.
- I want to replace the switch from scratch Breaker off · test dead · photo wires · screw terminals · test light
- Voltage tester still beeps after breaker off Adjacent breakers · retest · two-lead check · label map
- Old cloth, aluminum, or backstab wiring Screw terminals only · CO/ALR for aluminum · call pro if crumbling
Start hereBreaker off → voltage test → remove faceplate → pull switch → photo wires → disconnect → wire new switch → fold in box → remount → faceplate → breaker on test
Preflight — tools, matched switch, and breaker panel located before you touch the plate.
Voltage tester · screwdrivers · matched switch · panel found · photo ready.
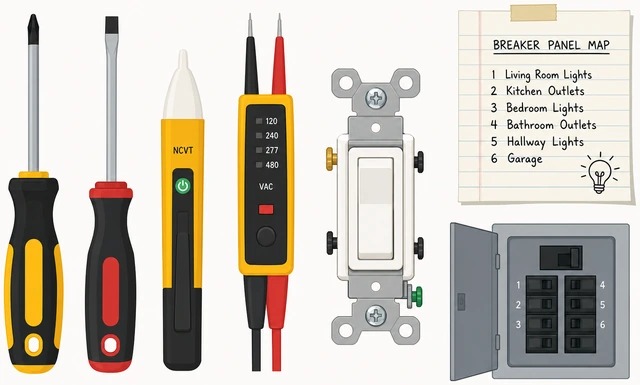
Wrong breaker is the top DIY shock risk — gathering tools and confirming switch type first keeps you from opening live screws or buying the wrong device.
- Tools gathered? Non-contact tester, screwdrivers, pliers, and phone camera are within reach.
- Switch matched? New switch is single-pole with the same amp rating as the old one.
- Panel located? You know which breaker feeds this room — label map ready if needed.
- Not a three-way? Only two screw terminals plus ground on the old switch — three-way setups need a different guide.
Tools are ready, replacement switch matches, breaker panel is located, and you confirmed single-pole layout.
Unsure which breaker feeds this switch? See No power test before removing the faceplate.
Turn off the circuit breaker that feeds this switch.
Breaker handle OFF · same room or switch label · hands off switch plate.
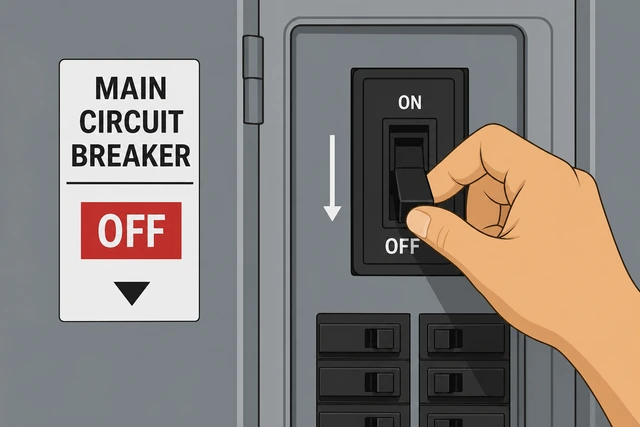
Opening screws on a live switch risks shock and arc flash — the breaker must be OFF before any metal tool touches the plate.
- Open the electrical panel and find the breaker for this room or switch.
- Move the handle firmly to OFF — not middle or tripped halfway.
- Leave the panel door open or note the breaker number for step 12.
Correct breaker handle is in the OFF position.
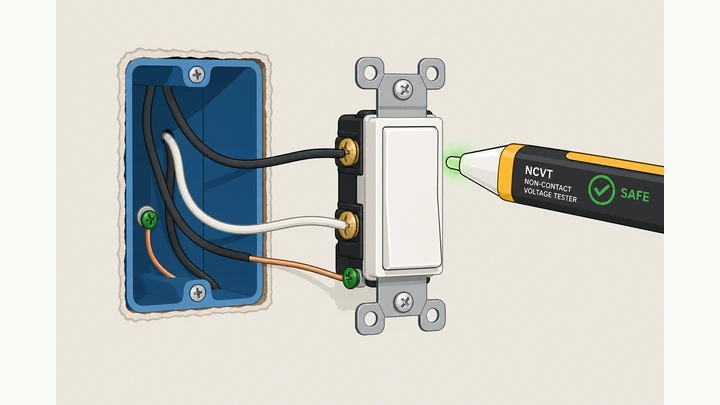
Never touch switch screws or bare wire ends until a non-contact voltage tester stays silent on the switch and cover plate area. If the tester beeps or flickers after you turned off a breaker, see No power test — do not guess.
Test the switch and nearby outlets with a non-contact voltage tester.
Tester on switch screws · cover plate area · must stay silent.
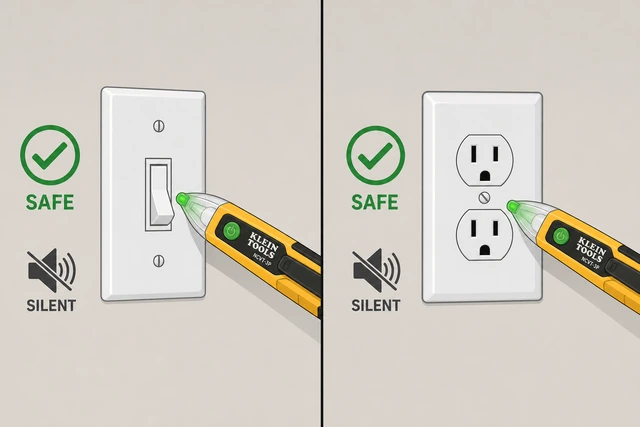
Breakers are mislabeled in many homes — a silent tester on the switch screws is what proves the circuit is dead, not the label alone.
- Hold the tester tip near each visible screw on the switch without touching metal.
- Sweep the cover plate area and a nearby outlet on the same wall.
- Tester must stay silent — beeps or flickers mean power is still present.
Voltage tester is silent on switch screws and the cover plate area.
Tester beeps or flickers? → No power test. Do not remove the faceplate.
Remove faceplate screws and set the faceplate aside.
Unscrew cover plate · screws in cup · yoke exposed.
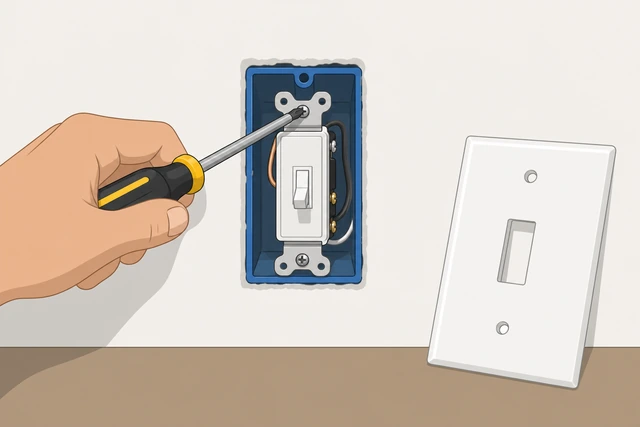
You need clear access to mounting screws — losing faceplate screws in the wall gap slows reassembly.
- Remove faceplate screws with the correct screwdriver — slot or Phillips.
- Pull the plate straight off without cracking brittle plastic.
- Drop screws into a cup so they cannot roll into the carpet.
Faceplate is off, screws are saved, and the switch yoke is exposed.
Remove the two mounting screws holding the switch to the box.
Top and bottom screws · switch loose · wires still connected.
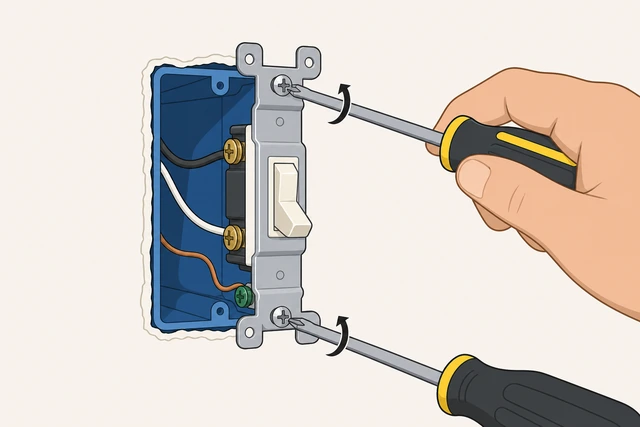
The switch must hang free on its wires before you disconnect — removing both mounting screws lets you pull it out safely.
- Loosen the top mounting screw at the switch ears.
- Loosen the bottom mounting screw the same amount.
- Switch should wiggle but wires stay on their terminals.
Both mounting screws are out and the switch is loose in the box.
Pull the switch straight out on its wires; do not touch brass terminals.
Gentle pull · wires visible · no fingers on screws.
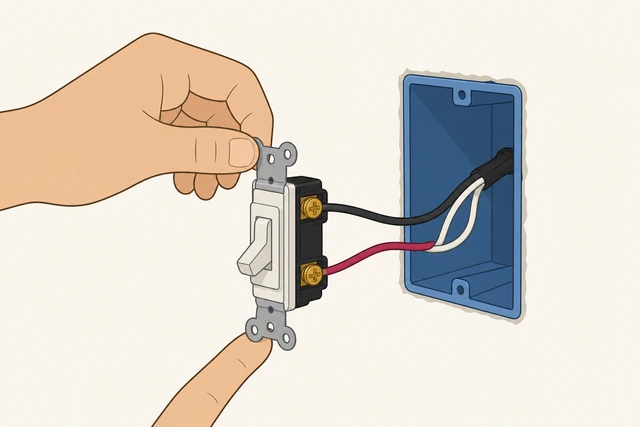
Pulling the body out gives room to photograph and loosen screws — touching brass terminals before a silent tester check would be unsafe if power returned.
- Grip the switch sides or yoke — not the bare screws.
- Pull straight out until wires are visible and you can read colors.
- Let the switch hang clear of the box without tugging wire insulation.
Switch hangs clear of the box with wires and screw colors visible.
Photograph wire layout before disconnecting anything.
Clear photo · each wire on its screw · backup before loosening.
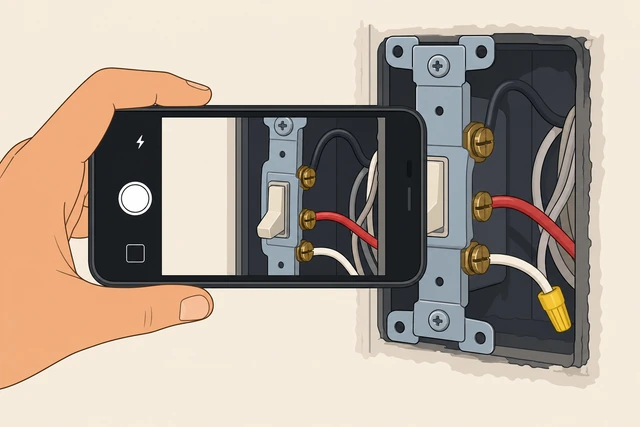
Swapped hot and traveler wires cause wrong operation or tripped breakers — a photo is faster than guessing after wires are loose.
- Take a well-lit photo showing every wire and which screw it lands on.
- Include wire colors and any tape marks in the frame.
- Review the photo on screen before loosening the first screw.
Photo clearly shows which wire connects to each screw terminal.
Cloth insulation, silver-gray aluminum, or no bare ground wire visible? → Old wiring.
Disconnect wires from the old switch one at a time.
One screw at a time · bend end away · wires not touching.
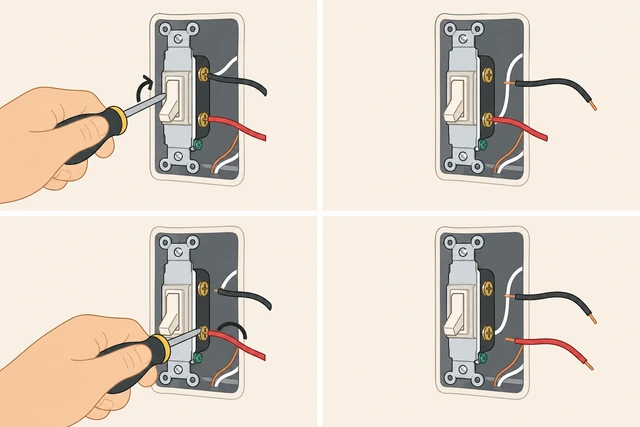
Loosening all screws at once lets bare ends touch each other or the box — one-at-a-time keeps shorts and shocks unlikely while power is meant to be off.
- Loosen one screw and remove only that wire.
- Bend the bare end away from other conductors and the metal box.
- Repeat for each remaining wire until all are free of the old switch.
All wires are free of the old switch and bare ends are separated.
Wires only in rear push-in holes with no screw wraps? → Old wiring. Do not copy backstab push-in holes from the old switch — curl each wire clockwise under the screw terminals on the new switch instead.
Connect the same wires to matching screws on the new switch.
Black or red on brass · white on silver · ground on green.
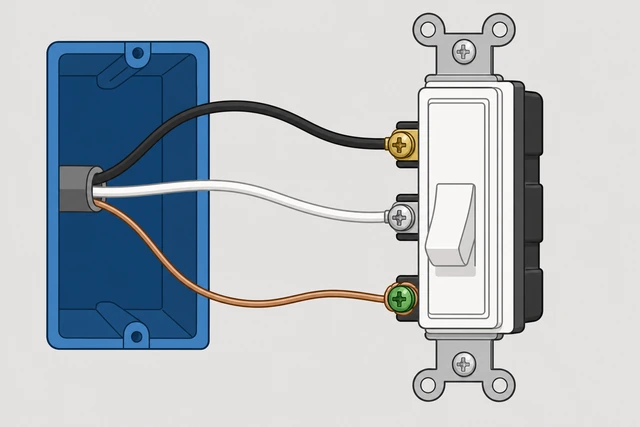
Standard single-pole wiring lands hot on brass, neutral on silver, and ground on green — matching the photo prevents reversed connections.
- Curve each wire clockwise under its screw — hook catches when you tighten.
- Tighten brass for black or red, silver for white, green for bare or green.
- Gently tug each wire — it should not pull out from under the screw.
Each wire is on the same screw color as the photo shows, snug under the terminal.
Do not copy backstab push-in holes from the old switch — curl each wire clockwise under the screw terminals on the new switch instead.
Fold wires neatly and push the switch into the box without pinching insulation.
Fold behind switch · no copper exposed · wires not pinched.
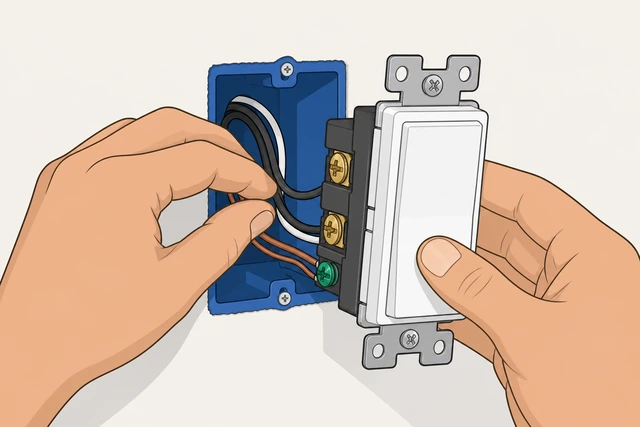
Overstuffed boxes crack insulation and cause arcs — neat folds behind the switch body let the device sit flush without exposed copper.
- Fold wires in an accordion pattern behind the switch body.
- Push the switch into the box while watching for pinched insulation.
- No copper should show outside the screw terminals.
Switch sits in the box with wires folded and no exposed copper beyond screws.
Reinstall mounting screws until the switch is flush and straight.
Top and bottom screws · ears flat · switch level.
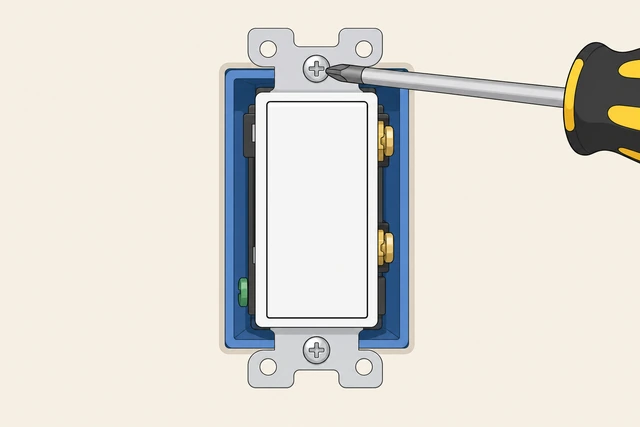
Loose switches rock and crack faceplates — snug mounting screws pull the ears flat so the toggle lines up with the plate opening.
- Drive the top mounting screw until the ear contacts the box.
- Drive the bottom screw evenly so the switch sits level.
- Switch should not rock when you toggle it.
Mounting screws are snug, switch is flush, and the toggle is straight.
Reattach the faceplate without cracking it.
Align holes · snug evenly · no overtighten on plastic.
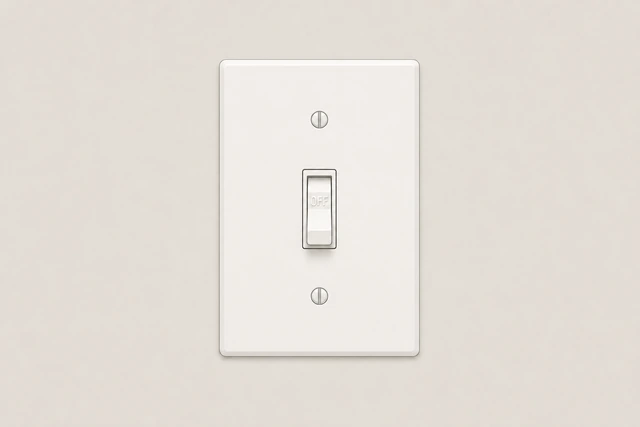
Crooked faceplates expose box gaps and crack when screws are overtightened — even pressure on both screws prevents chipped corners.
- Align the faceplate over the switch opening.
- Start both screws by hand before fully tightening either one.
- Snug until the plate sits flat — stop if plastic starts to bow.
Faceplate is on evenly with no cracks and covers the box gap.
Turn breaker on; flip switch and confirm light works.
Breaker ON · toggle switch · light on/off · no buzz or heat.
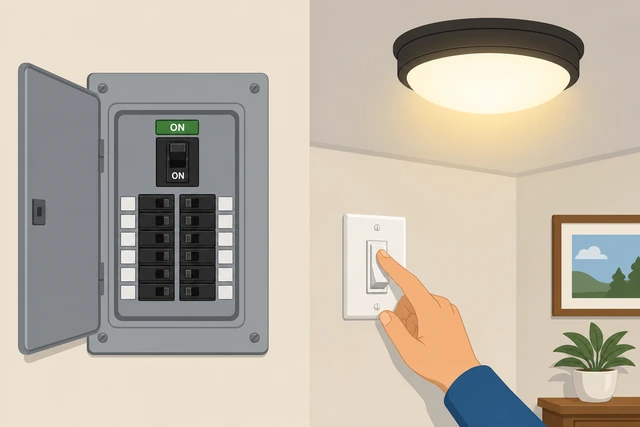
Restoring power and testing confirms correct wiring — buzz, heat, or spark at the toggle means stop and recheck connections.
- Return the breaker handle to ON at the panel.
- Flip the switch off and on — the light should follow each position.
- Feel the plate for warmth and listen for buzz — either means stop.
Light turns on and off correctly with no buzz, heat, or spark at the switch.
Light does not respond, breaker trips, or you smell burning? Turn breaker OFF and call a licensed electrician.
No power testNon-contact tester still beeps, flickers, or is inconclusive after breaker off
Turn off adjacent breakers one at a time and retest after each.
One breaker OFF · retest switch · note which silences tester.
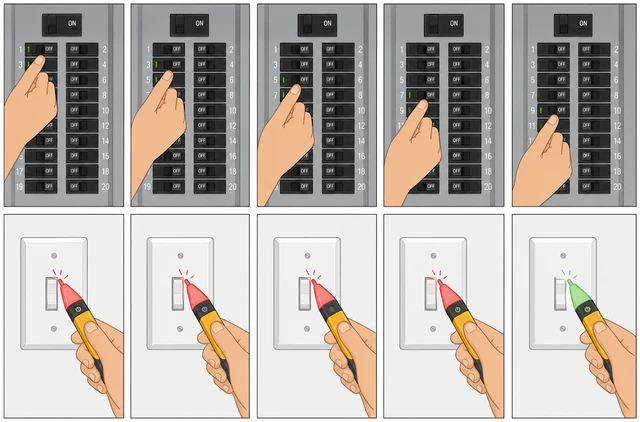
Shared neutral or mislabeled panels keep a circuit live when only one breaker is off — turning off neighbors one at a time finds the real feed.
- Turn OFF the next likely breaker — same room or lighting circuit.
- Retest switch screws with the non-contact tester after each OFF.
- When the tester goes silent, stop and leave that breaker OFF.
You found the breaker that makes the tester silent on the switch screws.
Never touch switch screws or bare wire ends until a non-contact voltage tester stays silent on the switch and cover plate area. If the tester beeps or flickers after you turned off a breaker, see No power test — do not guess.
Use a two-lead tester screw-to-ground; label breaker or stop if still live.
Two-lead tester · each screw to ground · label map · stop if hot.
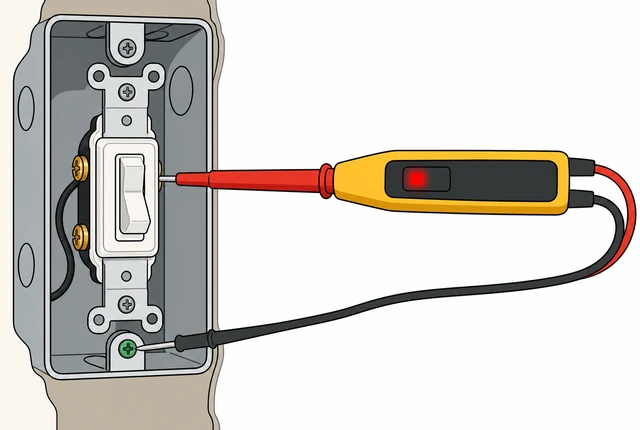
Non-contact testers can false-beep on static — a two-lead test between each screw and ground or box metal confirms dead before you touch terminals.
- Touch one lead to a ground screw or metal box; probe each switch screw.
- No glow or beep between screw and ground means safe to proceed.
- Label the correct breaker on your panel map — if any screw is still hot, stop and call a licensed electrician.
Two-lead test confirms dead on all screws, breaker is labeled, or you stopped because a screw is still live.
Any wire still hot after testing, or shared neutral confusion? Call a licensed electrician — do not remove the switch.
Old wiringCloth wire, aluminum conductors, no ground, or backstab-only connections
Do not use backstab holes — curl each wire clockwise under screw terminals.
No backstab · clockwise hook · snug screw · gentle tug test.
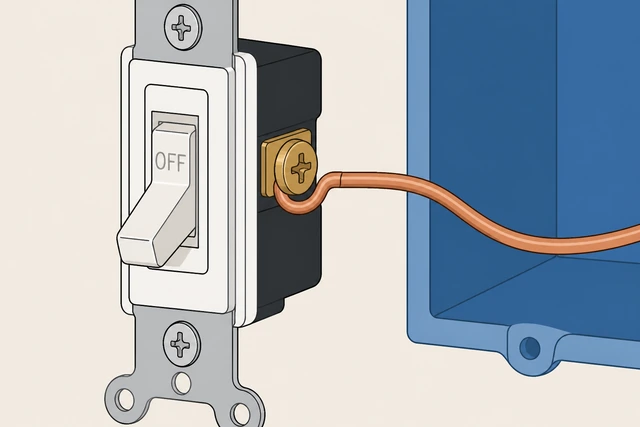
Backstab connections loosen over years and cannot be re-used safely — screw terminals with a clockwise hook are the reliable replacement method.
- Strip only if insulation is damaged — otherwise keep existing length.
- Curve bare copper clockwise under the screw so tightening pulls it in.
- Tighten fully and tug gently — wire should stay captured under the screw.
Every conductor is on a screw terminal with a clockwise hook — no push-in holes used.
Do not copy backstab push-in holes from the old switch — curl each wire clockwise under the screw terminals on the new switch instead.
Aluminum, crumbling cloth, or no ground — use rated parts or call a pro.
Aluminum needs CO/ALR · cloth crumbling stops work · ground pigtail if metal box.
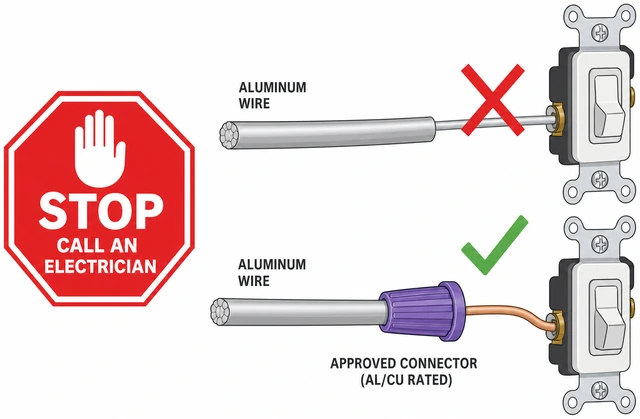
Aluminum on copper screws without rated connectors overheats — crumbling cloth or missing ground paths need code-aware fixes, not a quick swap.
- Silver-gray aluminum: stop — use AL-CU connectors or a CO/ALR switch per local code.
- Crumbling cloth insulation or burn marks: do not move wires — call a licensed electrician.
- No ground wire in a plastic box: follow local no-ground rules; metal box may ground through mounting ears.
You used rated connectors for aluminum, added a ground pigtail if required, or stopped and called a pro for damaged insulation.
Silver-gray aluminum wire needs special connectors or CO/ALR devices — do not land bare aluminum on a standard copper switch screw. See Old wiring or call a licensed electrician. More than two wires on one screw, scorched terminals, or box too crowded? Call a licensed electrician.
When to get help
- Ask a trusted person to hold a flashlight, spot you at the panel, or call for help if you feel dizzy or unsure on a ladder.
- Voltage tester never silent after trying adjacent breakers? Call a licensed electrician — do not open the switch.
- Crumbling cloth insulation, burn marks, or aluminum without proper connectors? Call a licensed electrician.
- Breaker trips, light stays dead, or you smell burning after install? Turn breaker OFF and call a licensed electrician.
- Three-way switches, crowded box, or more than two wires on one screw? Hire a licensed electrician for code-safe work.
When This Doesn't Work
- Three-way or four-way switch. Extra traveler wires and multiple switches controlling one light need a different wiring pattern — stop if you see more than one hot-style wire on odd terminals.
- Tester never goes silent. Mislabeled panel, multi-wire branch circuit, or shared neutral — call a licensed electrician instead of guessing.
- Aluminum conductors without CO/ALR device or AL-CU connectors. Standard copper-only switches are not rated for bare aluminum terminations.
- Cloth insulation crumbling when moved. Insulation failure needs rewire or pro repair — do not stuff brittle conductors into a new switch.
- Box overcrowded after reinstall. Switch and wires will not fit flush — deeper box or electrician required.
- Breaker trips or light stays off after swap. Loose neutral, swapped travelers, or shorted ground — turn breaker OFF and call a licensed electrician.
Warnings
- Do not touch switch screws until the voltage tester is silent. Wrong breaker is the most common DIY shock risk — see the no-power-test branch.
- Do not land bare aluminum on standard copper switch screws. Use AL-CU connectors or CO/ALR devices per local code.
- Do not reuse backstab push-in holes on the new switch — use screw terminals with a clockwise wire hook.
- Do not loosen all wire screws at once — remove one wire at a time so bare ends cannot short.
- Do not overtighten faceplate screws on brittle plastic — snug evenly until flat.
- Do not ignore buzz, heat, or spark when toggling — turn breaker OFF and call a licensed electrician.
Tips
- Photograph wire layout before disconnecting — it beats memorizing which color went where.
- Keep screws in a cup — faceplate and mounting screws look alike but lengths differ.
- Curve wire clockwise under the screw so tightening pulls the hook closed instead of pushing it out.
- Label the correct breaker on your panel map the first time you confirm it with a tester.
- If the old switch sparked when flipped, replace promptly — but verify power is off before opening the plate.
FAQ
Why does my voltage tester still beep after I turned off the breaker?
The breaker may be mislabeled, or another breaker feeds the same circuit through a shared neutral. Turn off adjacent breakers one at a time and retest — see the no-power-test branch. If any screw is still live on a two-lead test, call a licensed electrician.
Can I use the push-in holes on the back of the new switch?
We recommend screw terminals with a clockwise wire hook instead of backstab holes. Old backstab connections often loosen over time and should not be copied on the replacement.
What if my house has aluminum wiring?
Do not connect bare aluminum directly to a standard copper switch screw. Use AL-CU rated connectors or a CO/ALR switch per local code, or hire a licensed electrician.
Which wire goes on the brass screw?
On a standard single-pole switch, black or red hot wire goes on brass, white neutral on silver, and bare or green ground on the green screw. Your photo from step 6 confirms the exact layout in your box.
When should I call an electrician instead?
Call a pro if the tester never goes silent, you see crumbling cloth insulation or burn marks, aluminum needs proper connectors, the breaker trips after install, or the box is too crowded for the new switch.
Comments
Questions, corrections, and what worked for you. Comments are reviewed before they appear.