How to Replace a Car Air Filter
Replace your car's engine air filter in about twenty minutes with the hood open and the engine off. Open the air box, note the old filter's direction, clean the box, seat the new filter correctly, and reseal every clip. Read one step at a time. Start with the preflight. Bought the wrong filter? See Wrong filter fit. Lid won't close? See Lid won't seal. Not sure this is even the right filter? See Engine vs. cabin filter.
Tips for reading this guide
- One step at a time. Read the green caption, the Why line, then the bullets.
- Move on when the green done line is true — then go to the next step.
- Check the arrow. The new filter must face the same direction the old one did.
- Every clip matters. One missed clip can leak air the engine will notice.
- Wrong filter? See Wrong filter fit. Lid won't close? See Lid won't seal. Not sure this is the right filter? See Engine vs. cabin filter.
- Need help? Ask someone to double-check the arrow direction and the clips with you.
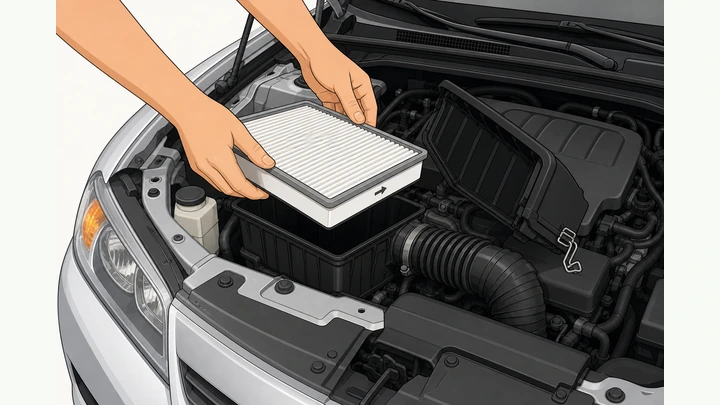
Things You'll Need
- Correct replacement engine air filter (match your old filter's size or your car's year, make, model, and engine size)
- Screwdriver (only if your air box lid uses screws instead of clips)
- Clean rag or a shop vacuum for the inside of the box
- Level ground with the engine off and cool enough to touch
- About 20 quiet minutes
Where are you stuck?
Follow Start here for a full filter swap. Jump to a branch if the fit is wrong, the lid won't seal, or you're unsure which filter this is.
- I need to replace the filter from scratch Open box · note old orientation · clean · seat new filter · reseal
- The new filter doesn't fit right Compare to old one · reinstall old temporarily · exchange
- The lid won't close or a clip won't catch Recheck filter seating · check for a broken clip · realign
- I'm not sure this is the right filter Engine filter = under hood · cabin filter = behind glovebox
Start hereOpen the box → note old filter direction → clean box → seat new filter → reseal every clip → start and listen
Preflight — confirm engine air filter, get the right filter, gather tools.
Right filter, tools ready, engine cool · confirm engine (not cabin) filter.
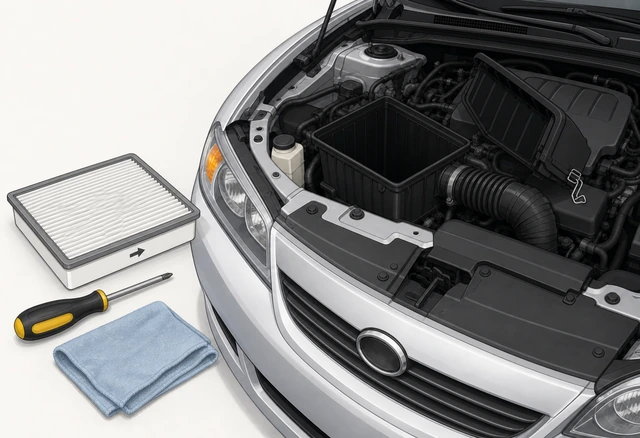
Buying the wrong filter or working on a hot engine wastes a trip or risks a burn — confirming both first saves the whole job.
- Confirm you need the engine air filter — a black box under the hood, not the flat cabin filter behind the glovebox.
- Get the correct replacement by matching your old filter's size or your car's year, make, model, and engine size.
- Have a screwdriver (if your box uses screws), a clean rag or shop vacuum, and let a hot engine cool first.
You have the correct engine air filter in hand, tools ready, and the engine is cool enough to touch.
Not sure if you need the engine or cabin filter? → Engine vs. cabin filter.
Park on level ground, engine off, and open the hood.
Flat ground · engine OFF · hood open and propped.
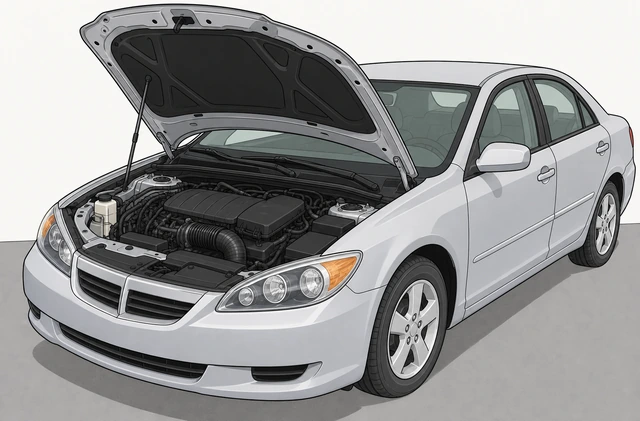
A secure, level workspace with the hood propped keeps both hands free and the job safe.
- Park on flat, level ground and turn off the engine.
- Open the hood and prop it securely with its rod or strut.
The hood is open, propped securely, and the engine is off.
Locate the air intake box and its wide intake tube.
Find the black plastic box · wide tube leads to the engine.
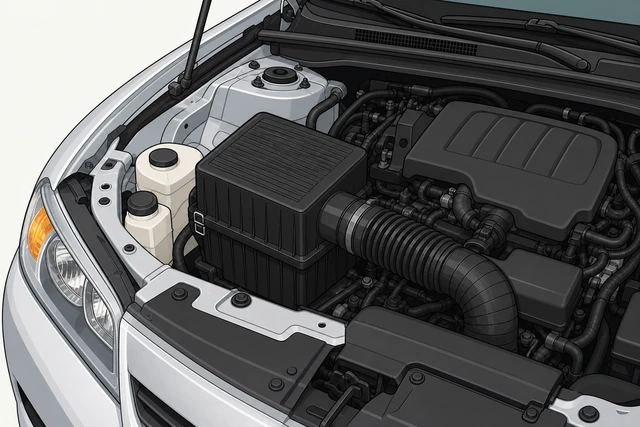
Confirming the box now — not the coolant or washer-fluid reservoir — avoids opening the wrong thing.
- Look for a black plastic box, often near the front or side of the engine bay.
- Follow the wide tube from the box toward the engine to confirm it's the intake.
You can point to the air box and the intake tube, and you're sure it isn't the coolant or washer-fluid reservoir.
Check how the lid is held on before touching anything.
Look for spring clips, screws, or both around the lid.
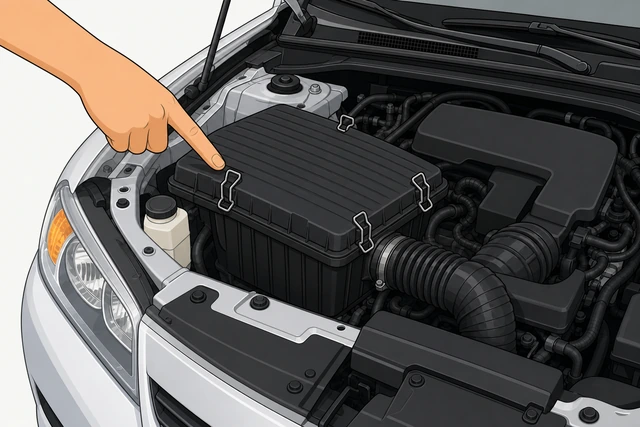
Knowing what holds the lid on — and where — keeps you from forcing or skipping a fastener later.
- Walk around the box and count the clips or screws holding the lid down.
- Note their positions so you can check every one is released later.
You know exactly how many clips or screws hold the lid, and where each one is.
Release every clip or screw, then lift the lid.
Unclip or unscrew all the way around · then lift.
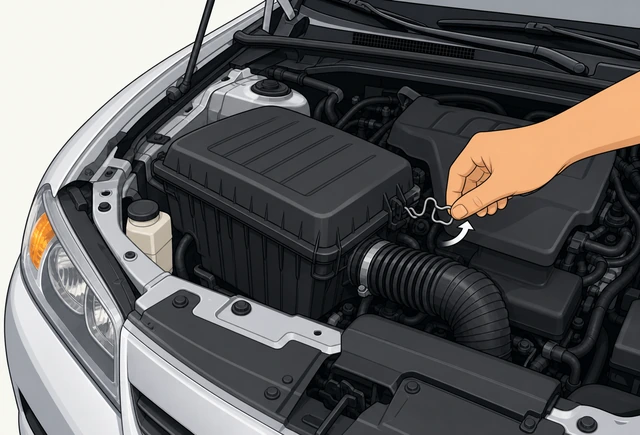
Skipping even one clip can leave the lid feeling loose or make it hard to lift evenly.
- Unclip each spring clip, or remove each screw, all the way around the lid.
- Once every fastener is free, lift the lid straight up.
Every clip or screw is released and the lid lifts freely without resistance.
Ease the lid up, watching for any attached wiring.
Lift gently · watch for a sensor connector still plugged in.
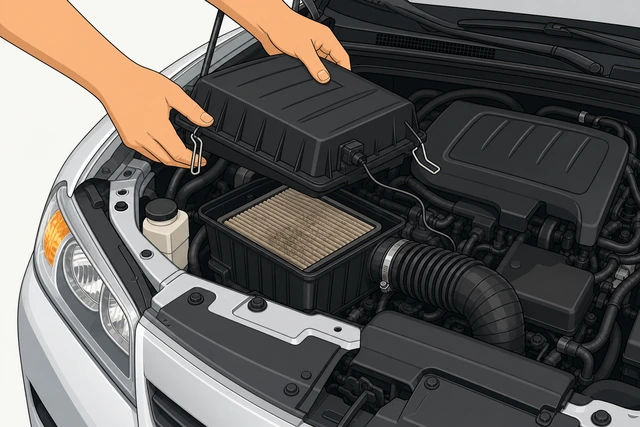
Some air boxes carry a sensor on the lid or tube — yanking the lid can damage its connector.
- Lift the lid slowly and look for any wiring or connector still attached to it or the tube.
- If wiring is attached, set the lid down gently to the side without pulling on it.
The lid is clear of the box, and any attached wiring is still intact and unstressed.
Note which way the old filter faces before removing it.
Check the printed arrow and which side faces the engine.
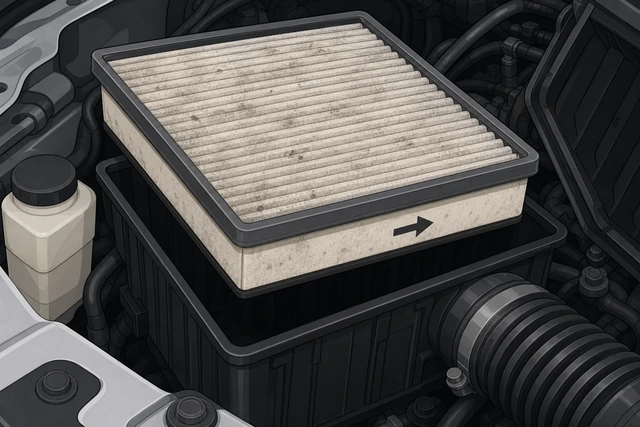
Knowing the old filter's orientation now is your best reference for installing the new one correctly.
- Find the printed arrow on the filter's frame and note which direction it points.
- Notice which face of the filter sits toward the engine side versus the incoming-air side.
You know exactly which way the arrow points and which face was toward the engine.
Lift the old filter straight out and set it aside.
Lift straight up · set the old filter aside.
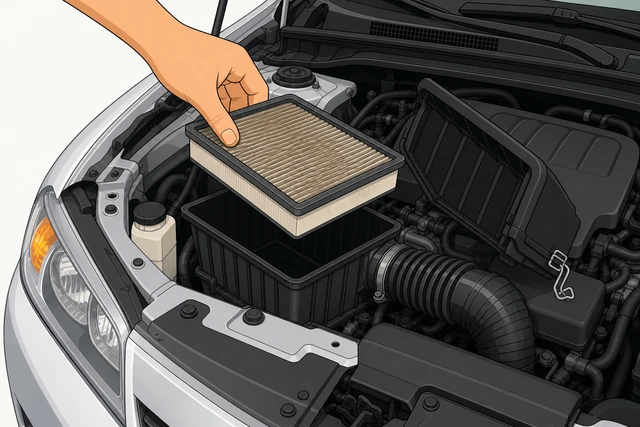
Lifting straight out avoids dragging dirt off the filter into the clean side of the box.
- Grip the filter frame and lift it straight up and out.
- Set it aside somewhere you won't lose track of its orientation.
The old filter is out and the box interior is empty.
Clean out the empty box before anything new goes in.
Check for leaves or dirt · vacuum or wipe the box clean.
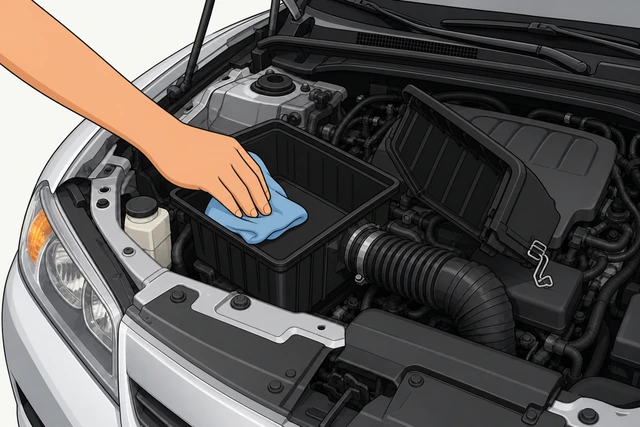
Anything left loose in the box gets pulled straight toward the engine once it's running.
- Look inside the empty box for leaves, dirt, or torn bits of the old filter.
- Vacuum or wipe the inside clean and dry with a rag.
The box interior is clean, dry, and free of any loose debris.
Compare the new filter to the old one before installing.
Match size, shape, gasket, and arrow direction to the old filter.
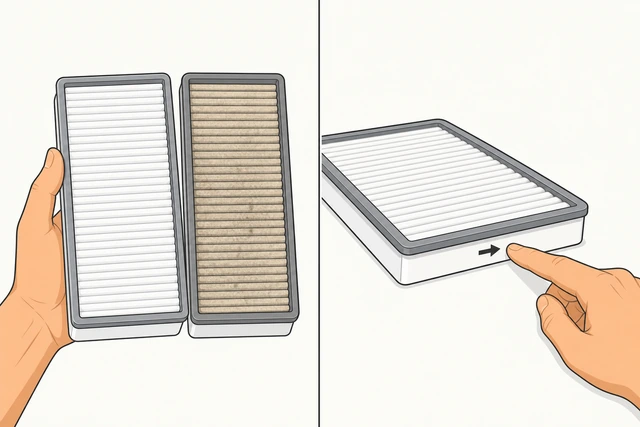
Catching a wrong-size or wrong-shape filter now — before it's in the box — saves a second trip later.
- Hold the new filter next to the old one and compare length, width, and height.
- Check the gasket edge is intact and the arrow is printed on the same face.
The new filter matches the old one in size, shape, and gasket condition.
Doesn't match, or the gasket won't seat evenly? → Wrong filter fit.
Set the new filter in with the arrow facing the same way.
Arrow matches the old filter's direction · gasket seated evenly.
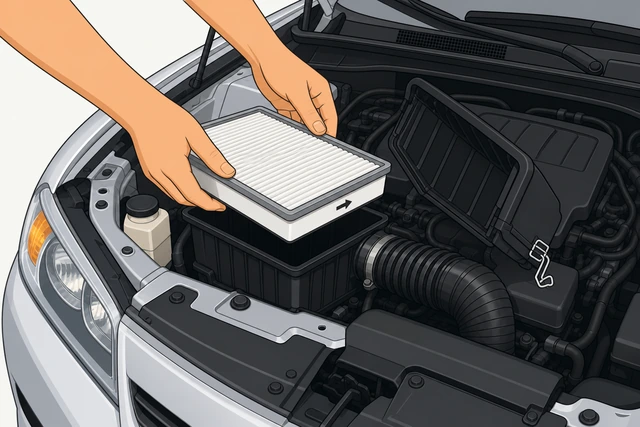
A reversed filter cuts filtration and airflow — matching the old arrow direction is the one detail that must be right.
- Lower the new filter into the box with its arrow pointing the same direction the old one did.
- Press the gasket edge down evenly all the way around the rim.
The filter lies flat with the correct arrow direction and no lifted or pinched edge anywhere.
Press down gently to confirm the filter sits flat.
Press each side · check for rock or gap.
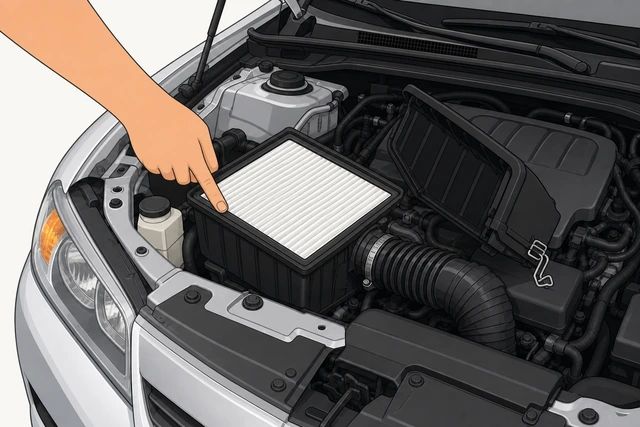
A filter that rocks or gaps on one side won't let the lid close flush, which leaks unfiltered air.
- Press down gently on a few points around the filter's rim.
- Check that it doesn't rock and there's no visible gap on any side.
The filter is fully flat with no rocking and no visible gap anywhere around the rim.
Set the lid back on, aligning any pegs or hinge first.
Line up locating pegs or hinge · lower the lid flush.
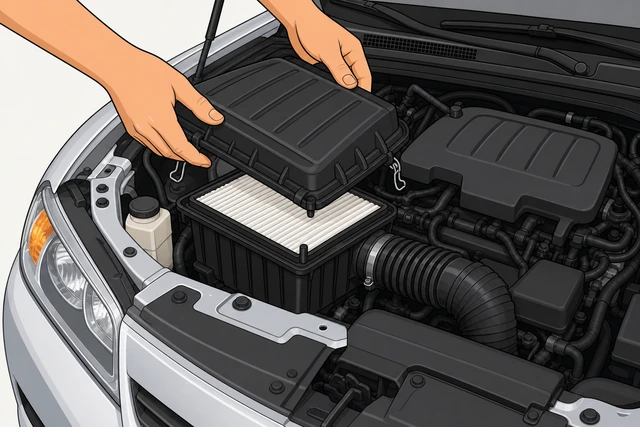
Lining up the lid before pressing down is what lets every clip catch evenly instead of forcing one corner.
- Find any locating pegs, notches, or a hinge on the box and line the lid up with them.
- Lower the lid down until it sits flush all around, before engaging any clip.
The lid sits flush all around the box before you engage a single clip.
Lid won't sit flush no matter how you align it? → Lid won't seal.
Reseat every clip or screw all the way around the lid.
One clip at a time, full perimeter · or retighten every screw.
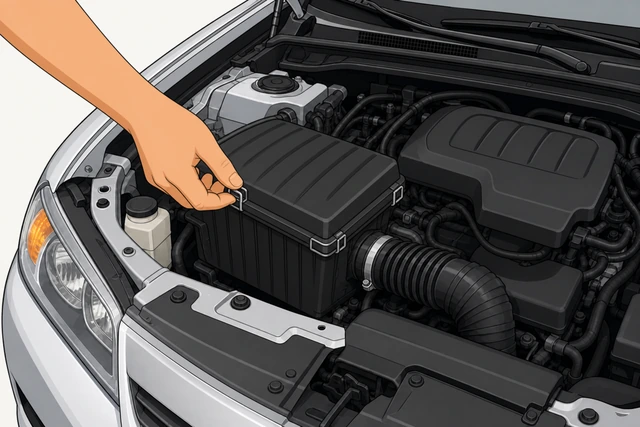
A single missed clip creates an air leak the engine will notice even if the lid looks closed.
- Snap each spring clip down one at a time, working all the way around the lid.
- Or retighten every screw in the same order they came out, snug but not overtightened.
Every clip is snapped down or every screw is tight, with no gap anywhere along the seam.
A clip won't catch or a gap remains? → Lid won't seal.
Reconnect any wiring, close the hood, and start the engine.
Wiring plugged in · clamps tight · listen for a normal idle.
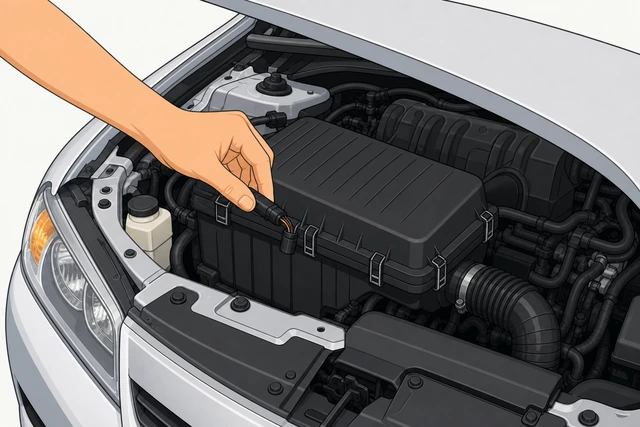
A loose sensor connector or hose clamp can cause the exact rough-idle or warning-light symptoms a bad filter job gets blamed for.
- Plug back in any wiring you moved, and check the intake hose clamp is tight.
- Close the hood, start the engine, and listen for a smooth idle with no hissing.
The engine idles smoothly with no hissing, and any wiring or clamps are secure.
Hissing, rough idle, or a check-engine light right after this job? → Lid won't seal — recheck the seal first.
Wrong filter fitThe new filter doesn't match the old one's size or shape, or the gasket won't seat evenly
Stop, and compare the new filter to the old one side by side.
Don't force it · compare size, shape, and part number.
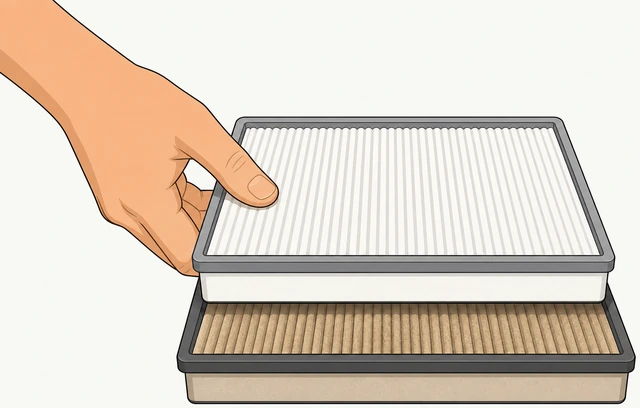
Forcing an ill-fitting filter into the box can crack the lid or leave a gap you won't notice until later.
- Set the new filter next to the old one and compare length, width, height, and gasket profile.
- Check the part number stamped on the old filter's frame against the new box or receipt.
You can see exactly how the new filter differs from the old one, or confirm it truly doesn't match.
Reinstall the old filter temporarily and get the right one.
Old filter back in if usable · exchange for the correct size.
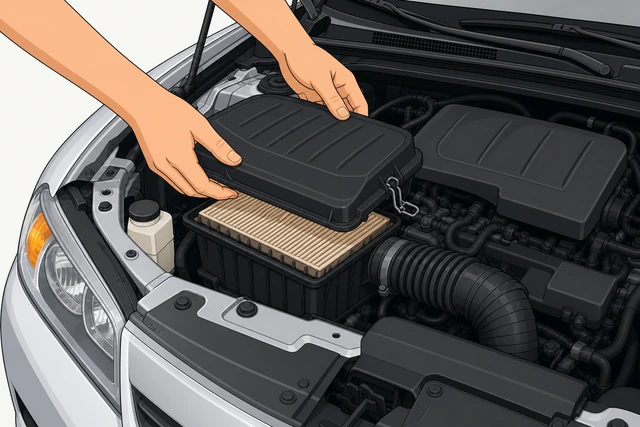
Keeping a usable old filter in place is safer than driving with the box open while you get the correct part.
- If the old filter isn't torn or soaked, set it back in the box the way it was and close the lid.
- Take the old filter or your car's year, make, model, and engine size to the store for an exchange.
The car is driveable again with a filter in the box, and you have what you need to get the correct replacement.
Old filter unusable and no correct replacement available? Don't drive with the box empty or the lid ajar — make only a short, low-speed trip for the right part, or have the car towed.
Lid won't sealThe lid has a visible gap, one or more clips won't catch, or the box surface isn't sitting flush
Reopen the lid and recheck how the filter sits.
Look for a pinched, bulged, or off-center edge · reseat flat.
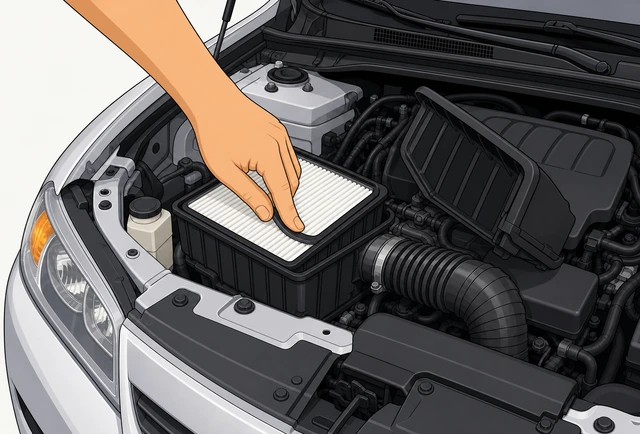
A filter edge that's pinched or riding up on one side is the most common reason a lid won't close flush.
- Lift the lid and look for a pinched, bulged, or off-center edge on the filter, or a foam gasket out of its groove.
- Lift the filter, straighten it, and set it back down flat and centered in the box.
The filter sits flat and centered with no pinched or bulging edge anywhere.
Check for a broken clip or a misaligned peg, then reseat.
Inspect clips and pegs · engage clips one at a time, full perimeter.
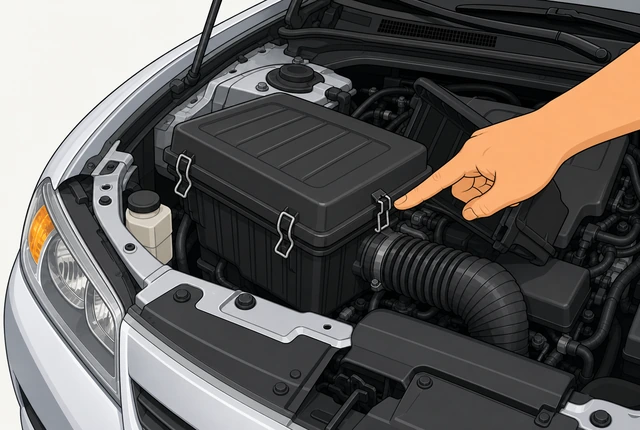
A cracked tab or a lid that's off its locating peg will never let every clip catch, no matter how hard you press.
- Check every clip and hinge for a cracked or broken tab, and confirm the locating peg or hinge is lined up.
- Realign the lid, then engage each clip one at a time around the entire perimeter, not just the corners.
Every clip is engaged and the lid sits flush all the way around with no gap.
A clip is physically broken and won't catch? Don't drive with a taped-shut or gaping lid on the highway — tape it flush over the seam only for a short local drive, then replace the lid or clip before driving normally again.
Engine vs. cabin filterYou're not sure this is the right filter, or the one you found is behind the glovebox
Confirm which filter this guide covers before you continue.
This guide = engine filter under the hood, not the cabin filter.
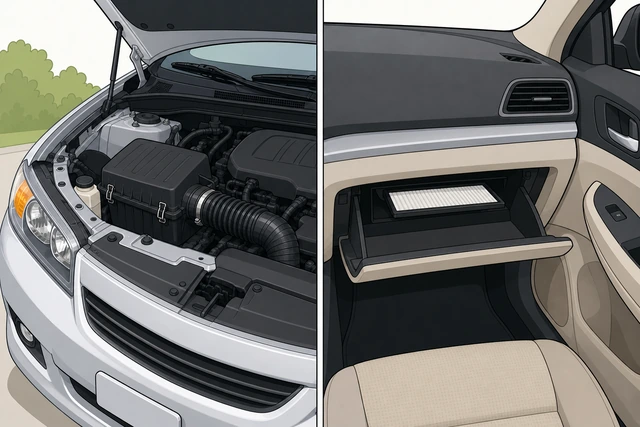
The engine air filter and cabin air filter are two different parts in two different locations — mixing them up means starting the wrong job.
- This guide covers the engine air filter, in a black plastic box under the hood connected to a wide intake tube.
- The cabin air filter is a separate, flatter filter behind the glovebox or under the dash, for heater/AC air only.
You know which filter you're looking at and whether it's the one this guide covers.
If you opened the wrong one, close it and go to the right spot.
Close the wrong compartment unchanged · go to the correct location.
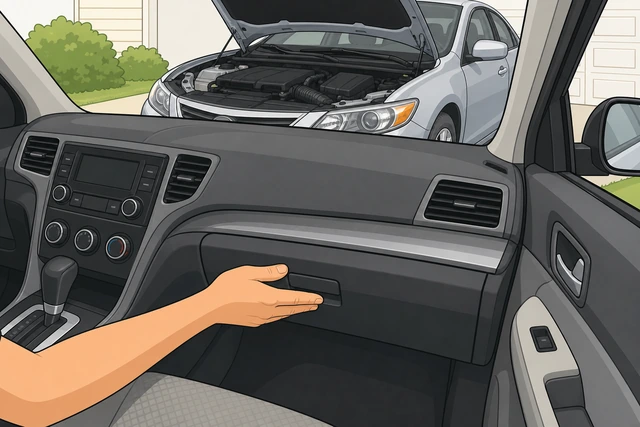
Closing the wrong compartment back up unchanged keeps you from creating a second problem while you find the right part.
- If you opened the wrong compartment, close it back up exactly as you found it.
- Go under the hood for this guide's engine filter, or search "cabin air filter" for the glovebox part instead.
You're working on the correct filter for the job you actually need to do.
Still not sure which one matches your symptom? A musty AC/heater smell points to the cabin filter; power loss, rough idle, or a check-engine light points to the engine filter covered here. A shop can identify the right one in minutes if you're still unsure.
When to get help
- Ask someone to double-check the arrow direction and every clip with you.
- New filter clearly doesn't fit and you have no usable backup? A parts store can match it from your old part number in minutes.
- A clip is broken and the lid won't stay sealed? Get a replacement lid or clip before driving normally again.
- Check-engine light, rough idle, or hissing that doesn't go away after rechecking the seal? Have a shop look at the sensor and hose clamps.
When This Doesn't Work
- You're looking at a flat filter behind the glovebox. That's the cabin air filter, a different part — see the engine-vs-cabin branch instead.
- Your air box has an integrated MAF sensor housing that must be unbolted. A few models route the tube differently — check your owner's manual for any extra bolt before forcing the lid.
- The engine has been running and the intake tube near a turbo is still hot. Let it cool first — this guide assumes a cool engine bay.
- The old filter is soaked in oil or fuel. That points to an upstream leak, not a normal filter change — have it checked before just swapping the filter.
- You can't find the air box at all. A few models tuck it low or behind other components — check your owner's manual for its exact location before assuming it's missing.
Warnings
- Never install the filter with the arrow reversed. Match the old filter's direction every time.
- Never skip a clip. One unlatched clip can leak unfiltered air into the engine.
- Don't let debris fall into the box or tube. Clean the box before the new filter goes in.
- Let a hot engine cool before working near the intake tube, especially on turbocharged cars.
- Don't force a misaligned lid or over-tighten plastic clips — a cracked tab may never seal again.
- Don't leave tools or a rag in the engine bay before closing the hood.
Tips
- Take a quick photo of the old filter's arrow and orientation before you remove it.
- Check the filter every oil change and replace it about once a year or per your owner's manual — sooner if you drive on dusty roads.
- Keep the old part number or a photo of the box on your phone for next time.
- A quick look for cracks in the intake tube while the box is open can catch a leak early.
FAQ
How do I know which direction the arrow should face?
Match it to the old filter — note the arrow direction before you remove the old one, and install the new filter the same way. The arrow points the direction air flows through the filter, typically toward the engine.
Is this the same as the cabin air filter?
No. The engine air filter is under the hood in a box connected to the intake tube. The cabin air filter is a separate, usually flatter filter behind the glovebox or under the dash that filters heater/AC air. See the engine-vs-cabin branch if you're unsure which one you have.
My check-engine light came on right after I changed the filter. What happened?
This is almost always a lid that isn't fully sealed or a sensor connector that got bumped loose. Recheck every clip around the lid and confirm any wiring is plugged back in before assuming something else is wrong.
Can I just wipe the old filter and reuse it?
Only as a short-term bridge if you don't have the correct new filter yet — see the wrong-fit branch. A paper panel filter isn't meant to be cleaned and reused long-term; replace it with the correct part as soon as you can.
Comments
Questions, corrections, and what worked for you. Comments are reviewed before they appear.