How to Jump-Start a Car
Jump-start a car with a dead 12V battery in about twenty minutes on flat ground. Park safely, connect cables positive first, ground the last clamp on engine metal, start the donor, crank the dead car, then disconnect in reverse. Read one step at a time. Start with the preflight. Hybrid or EV? See Hybrid and EV. Car starts but dies again? See Battery won't hold.
Tips for reading this guide
- One step at a time. Read the green caption, the Why line, then the bullets.
- Move on when the green done line is true — then go to the next step.
- Last clamp on metal. The final black clamp goes on engine metal on the dead car — not its negative battery post.
- Order matters. Connect red positive first; remove ground clamp first when disconnecting.
- Hybrid or EV? Jump to Hybrid and EV — never clamp orange cables.
- Need help? Ask someone to hold cables clear of fans and confirm clamp order.
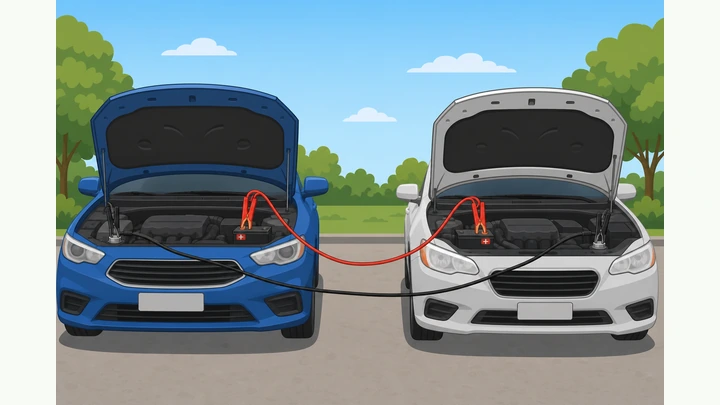
Things You'll Need
- Working donor vehicle with a charged 12V battery (similar size is fine)
- Jumper cables at least 10 feet long with intact insulation and clean clamps
- Safety glasses and work gloves (recommended)
- Parking brake set on both cars; flat ground away from traffic if possible
- Wire brush or baking soda and water for corroded terminals (optional)
- Owner's manual for hybrid or EV jump points if either vehicle is not a plain gas car
- About 20 quiet minutes; revived car should be driven 15–20 minutes afterward to recharge
Where are you stuck?
Follow Start here for a full jump-start. Jump to a branch if the car is hybrid/EV, or starts then dies again.
Start herePark → locate posts → connect positive first → ground last → start donor → crank dead → disconnect reverse → recharge drive
Preflight — donor car, cables, safe parking, and both engines off.
Donor car · jumper cables · gloves · flat ground · both OFF · parking brakes.
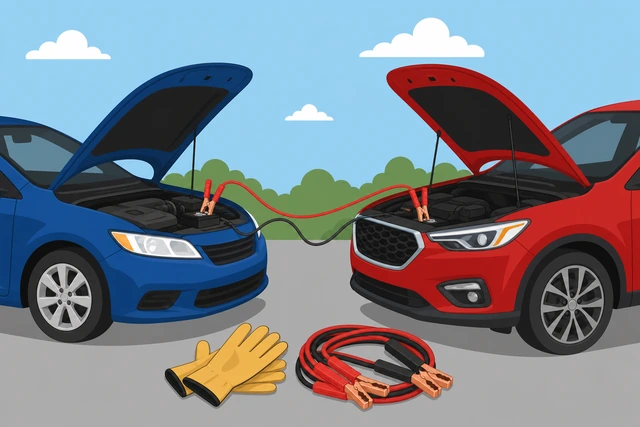
A moving donor or loose cables near the fan cause burns and shorts — flat parking with both engines off is the baseline for every clamp connection.
- Donor ready? Another car with a charged 12V battery is parked close enough for cables to reach without stretching.
- Cables checked? Insulation is intact; clamps open and close firmly.
- Both engines OFF? Keys out or ignition off; parking brakes set on both cars.
- Hybrid or EV? If either car is not a plain gas vehicle, read the hybrid branch before connecting.
Donor vehicle and cables are ready, both cars are off with parking brakes set, and you know if either vehicle is hybrid or EV.
Hybrid, plug-in, or full electric vehicle? Stop — see Hybrid and EV for approved 12V jump points. Never clamp orange high-voltage cables. Never connect positive to negative — reversed cables can damage electronics or cause a battery explosion. If clamps were reversed, do not retry; call roadside assistance.
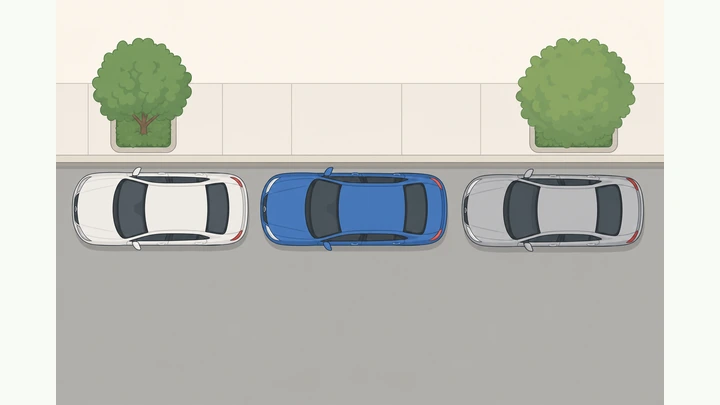
Position vehicles nose-to-nose or side-by-side; set parking brakes.
Cars close · cables reach · parking brakes · engines still OFF.
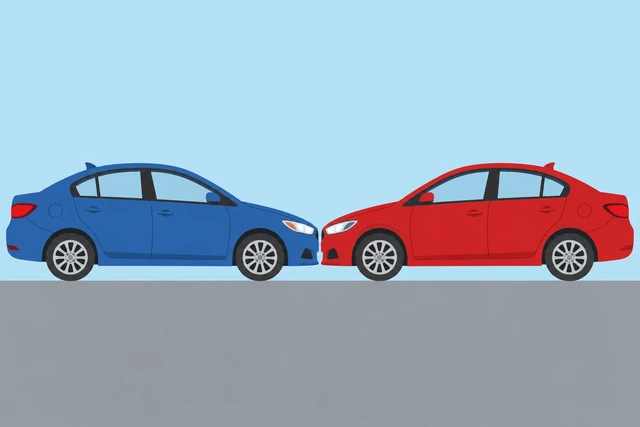
Cables that stretch tight can slip off mid-start — close parking also keeps you out of traffic on a shoulder.
- Park on level ground; nose-to-nose or side-by-side so hoods face each other or sit side by side.
- Leave enough room to stand between cars without leaning on bumpers.
- Confirm parking brakes are set and both engines remain off.
Vehicles are positioned, parking brakes set, and cables can reach both batteries without pulling tight.
Open hoods and locate battery posts on both cars.
Hood props secure · find + and − posts · red usually positive.
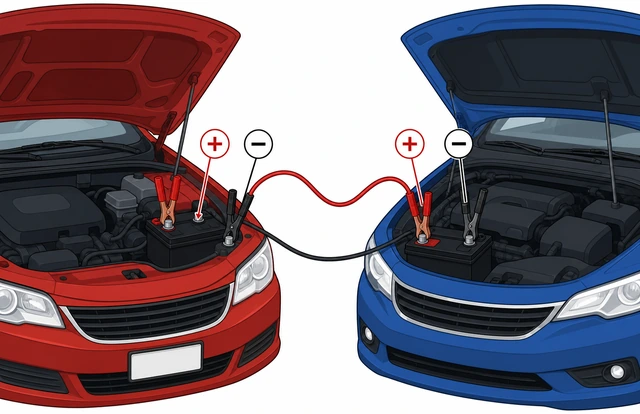
Connecting to the wrong post reverses polarity — identify plus and minus on both batteries before any clamp touches metal.
- Open both hoods and secure hood props or struts.
- Find the positive (+) and negative (−) posts — red cover or cable usually marks positive.
- Note any buried batteries; some cars have remote jump posts under a plastic cover.
You can point to positive and negative on both the dead and donor batteries.
Hybrid or remote jump posts? → Hybrid and EV.
Inspect cable insulation and brush mild terminal corrosion.
Check cable cracks · brush white powder · clamps bite clean metal.
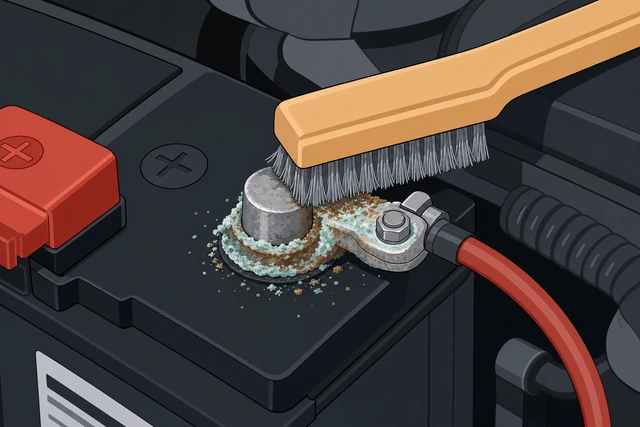
White corrosion acts like an insulator — clamps look connected but almost no current reaches the dead battery.
- Run fingers along cables — replace if rubber is cracked or copper wire shows.
- Brush white or green powder off posts with a wire brush or baking soda and water; dry before clamping.
- Twist clamps to confirm they can grip shiny metal.
Cables are sound and terminals are clean enough for clamps to bite metal.
Heavy corrosion or swollen battery case? → Battery won't hold.
Connect red (+) clamp to dead battery positive post first.
Red clamp · dead battery + only · no other clamps yet.
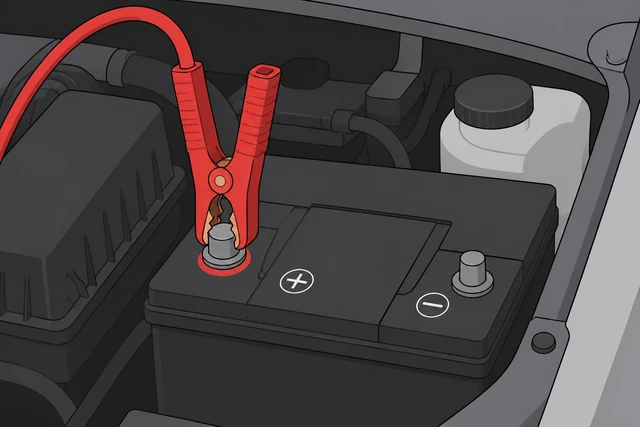
Positive-first on the dead battery keeps the live donor circuit incomplete until you choose the safe ground point last.
- Open the red (+) clamp and attach it firmly to the dead battery positive post.
- Wiggle the clamp — it should not slide on the post.
- Leave all other clamps unconnected for now.
Red clamp is firmly on the dead battery positive only; no other clamps attached.
Never connect positive to negative — reversed cables can damage electronics or cause a battery explosion. If clamps were reversed, do not retry; call roadside assistance.
Connect other red (+) clamp to donor battery positive.
Second red clamp · donor battery + · still no negative on dead post.
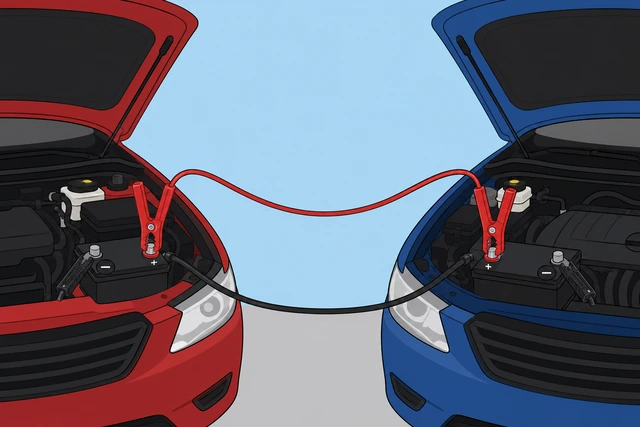
Linking both positives before any negatives lets you finish the circuit on engine metal instead of at the weak dead battery.
- Attach the other red (+) clamp to the donor battery positive post.
- Route cables so they clear fans, belts, and hot exhaust parts.
- Confirm no black clamps touch either negative post yet.
Both red clamps are on both positive posts; no black clamp on the dead battery negative.
Connect black (−) clamp to donor battery negative.
Black clamp · donor − post · one clamp still free.
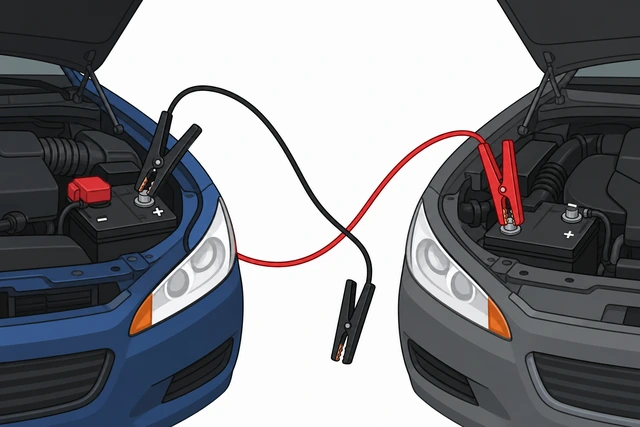
Donor negative completes the return path on the strong battery — the last free clamp will go to metal on the dead car, not its negative post.
- Attach one black (−) clamp to the donor battery negative post.
- Keep the free clamp away from both batteries for now.
- Verify red clamps remain on positives only.
Black clamp is on donor negative; one clamp remains free and unconnected.
Connect final black (−) clamp to unpainted metal on the dead car.
Last clamp · engine bolt or strut tower · NOT dead battery −.
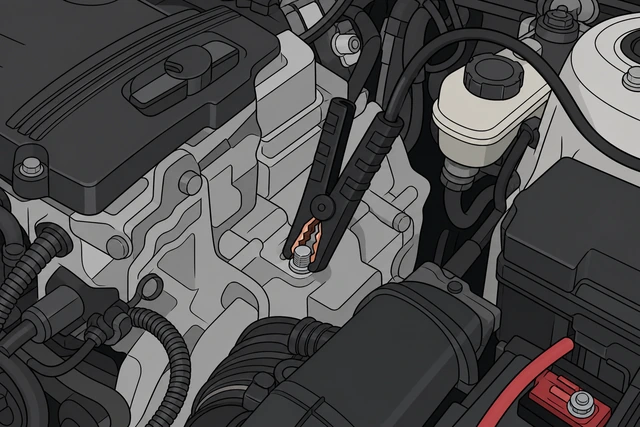
The dead battery can vent hydrogen — a spark at its negative post is risky; engine metal grounds the circuit away from the battery.
- Clamp the last black (−) cable to an unpainted bolt on the engine block or a strut tower bracket.
- Keep the clamp away from moving belts, pulleys, and fuel lines.
- Do not attach this clamp to the dead battery negative post.
Final black clamp is on solid unpainted metal on the dead car — not its negative battery post.
Start donor car and idle two to three minutes.
Donor engine running · steady idle · watch cables stay cool.
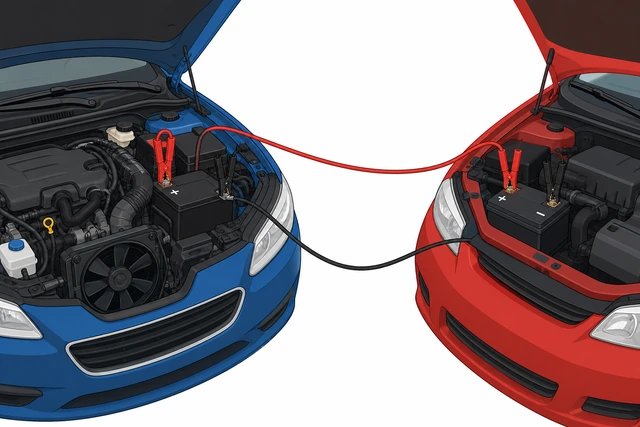
A running donor alternator supplies the amps a dead battery cannot — short idle often fails slow cranks.
- Start the donor car and let it idle two to three minutes.
- Stand clear of fans; keep cables away from hot or moving parts.
- Feel cables — they should stay cool, not hot or smoking.
Donor engine idles steadily for at least two minutes; cables stay cool.
Try starting the dead car — crank, pause, retry up to three times.
Crank 5–10 sec · pause 30 sec · up to 3 tries · donor stays running.
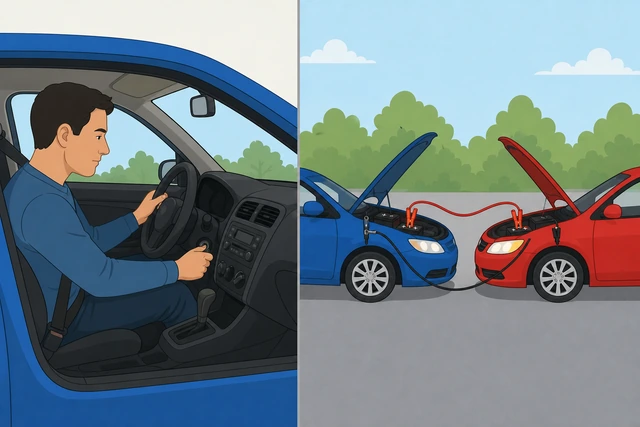
Long continuous cranking overheats the starter — short tries with pauses let the donor battery recover between attempts.
- With donor still running, try starting the dead car for five to ten seconds.
- If it does not catch, wait thirty seconds and try again — up to three attempts.
- When the dead engine starts, leave both cars idling — do not race the engine.
Dead engine either starts and idles or you completed three crank attempts without success.
Cranks slowly but won't catch? → Battery won't hold.
Dead car running — idle both cars two to three minutes.
Both engines on · headlights stable · do not disconnect yet.
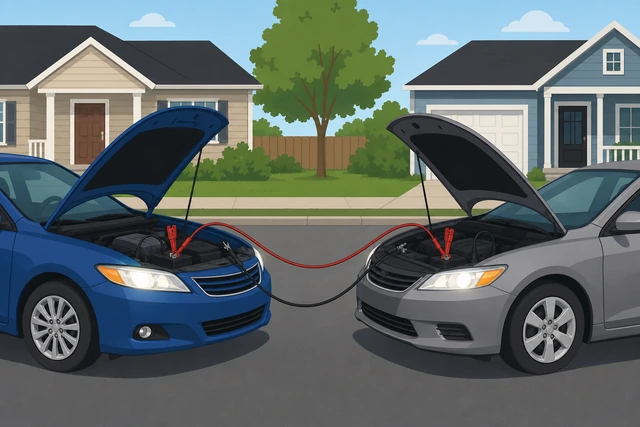
Immediate disconnect can drop voltage and stall a just-started engine — a short idle stabilizes charging.
- Leave both cars idling two to three minutes after the dead car starts.
- On the dead car, check that headlights brighten to normal — not dim.
- Keep cables connected until this idle period ends.
Both engines idle steadily; dead car lights look normal.
Remove cables in reverse order — ground first, then donor −, then both +.
Remove ground · donor − · donor + · dead + · clamps never touch.
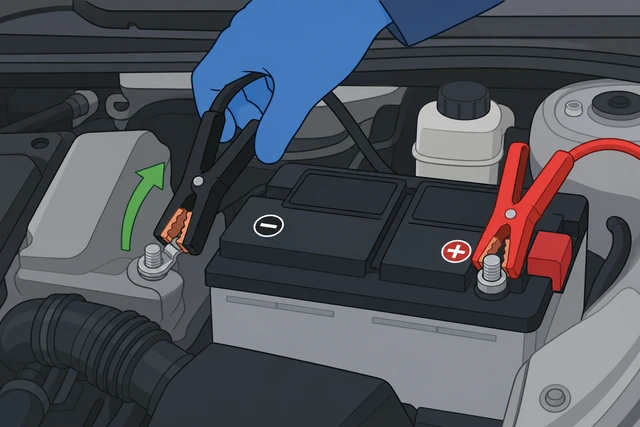
Reverse removal prevents sparks at the battery posts — ground clamp first breaks the circuit at the safe metal point.
- Remove the engine-ground black clamp first, then donor negative, then donor positive.
- Remove the dead battery positive red clamp last.
- Keep clamp ends apart so they do not touch each other or car metal.
All four clamps are off and stored; no sparks at battery posts during removal.
Close hoods; drive dead car 15–20 minutes to recharge.
Hoods latched · drive 15–20 min · note if restart fails later.
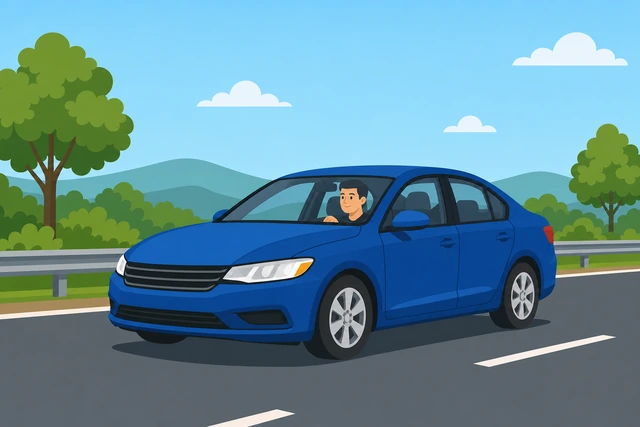
A jump only shares charge — driving (or a maintainer later) is what refills the battery so the next cold start works.
- Close and latch both hoods; coil cables for storage.
- Drive the revived car fifteen to twenty minutes on roads, not just idling in a driveway.
- If it stalls again soon or won't restart tomorrow, use the battery-hold branch.
Hoods are closed, cables stored, and you have a recharge drive plan or know to test the battery.
Starts then dies again? → Battery won't hold.
Battery won't holdCar starts with a jump but stalls after shutoff or will not restart the next day
Note slow crank, dim lights, or stall right after a successful jump.
Dim headlights · slow crank · stall after disconnect.
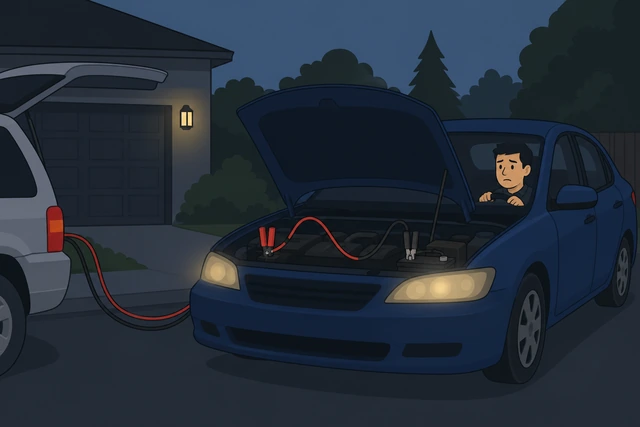
Those signs point to a weak cell or failing alternator — another jump without testing just repeats the symptom.
- After a jump, if headlights stay dim at idle, the battery or alternator may be failing.
- If the engine stalls when you remove cables, the battery is not holding charge.
- Write down whether the car died immediately or hours later.
You know whether the problem is immediate stall, slow crank, or next-day no-start.
Battery smells like rotten eggs, is bulging, or cracked? Do not jump — call roadside assistance.
Clean terminals, retighten, drive 20 min; plan replacement or shop test.
Clean posts · tight clamps · 20-min drive · shop test if still dies.
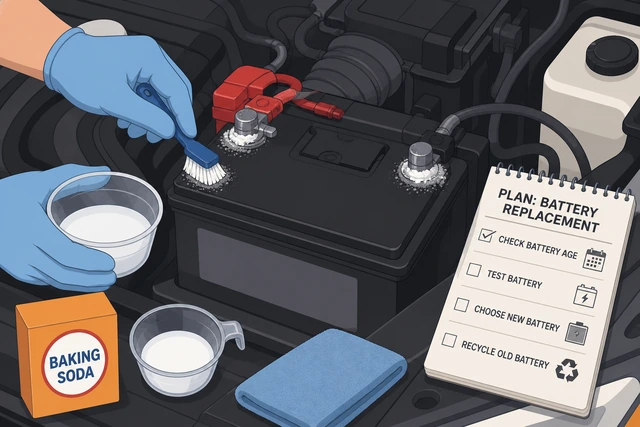
Loose or corroded terminals mimic a dead battery — cleaning and a real drive confirm whether the battery itself is finished.
- Clean posts with baking soda and water; dry and retighten terminal clamps.
- Drive twenty minutes; retest a cold start the next morning if safe.
- If it still dies, replace the battery or ask a shop to test the alternator output.
Terminals are clean and tight; you have a retest result or a plan to replace or shop-test.
Car dies while driving with battery light on? Tow to a shop — alternator or charging fault, not another jump.
Hybrid and EVHybrid, plug-in hybrid, or electric vehicle — use manual jump points only
Confirm vehicle type; find 12V auxiliary posts in the owner's manual.
Check manual · find 12V posts · stay clear of orange HV cables.
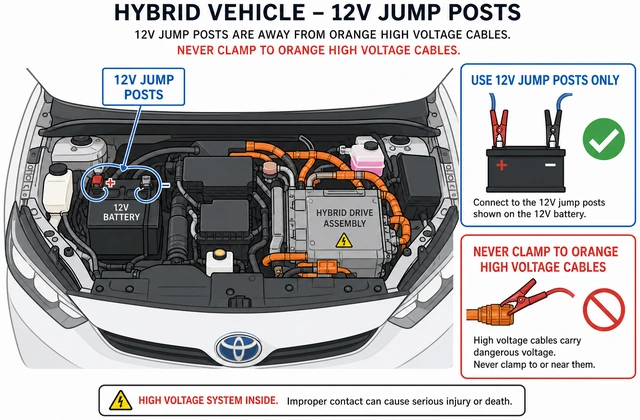
Traction packs and orange cables carry lethal voltage — only the small 12V system may have safe jump points.
- Check the manual for jump-start or 12V boost points — often under a hood cover or in the trunk.
- Identify orange high-voltage cables and stay at least a foot away.
- If no approved points are listed, stop DIY and call roadside assistance.
You located manufacturer-approved 12V jump points and kept clear of orange cables.
Never attach clamps to orange cables or the large traction battery pack.
Connect only to approved 12V points; use portable jump pack if manual requires.
Clamps on marked 12V only · same cable order · jump pack if specified.
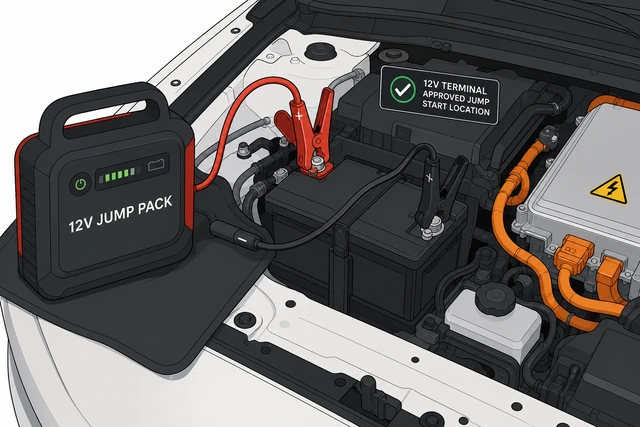
Some EVs forbid cable jumps from another car — a sealed jump pack on the 12V system is the approved path.
- Use the same red-first, ground-last order — but only on manual-approved 12V terminals.
- If the manual specifies a portable jump pack, use that instead of another vehicle.
- After start, disconnect in reverse and follow any EV-specific shutdown steps in the manual.
Clamps attached only to approved 12V points or jump pack used per manual; cables removed safely.
Jump pack fails or 12V system will not wake? Call manufacturer roadside — do not improvise on HV parts.
When to get help
- Ask someone to confirm clamp order and keep cables clear of the engine fan.
- Battery frozen, cracked, bulging, or smells like rotten eggs? Call roadside — do not jump.
- Cables were connected backward? Tow for electrical check — do not retry.
- Hybrid or EV with no listed 12V boost point? Call manufacturer roadside assistance.
- Car dies while driving with battery warning light on? Tow to a shop for alternator test.
When This Doesn't Work
- Battery frozen, cracked, or bulging. Do not jump — case can rupture. Call roadside assistance.
- Cables were connected backward even once. Do not retry — electronics may be damaged. Tow for diagnosis.
- Dead car makes no crank sound at all. May be a starter, immobilizer, or fuse issue — jumping alone may not help.
- Donor battery is also weak. Try a different donor or a portable jump pack rated for your engine size.
- Repeated jumps every few days. Replace the battery or test the alternator — jumping is a temporary fix.
- Full EV with no 12V boost procedure. Use manufacturer roadside assistance only.
Warnings
- Never reverse positive and negative. Reversed cables can destroy electronics or explode a battery.
- Last clamp on engine metal on the dead car — not its negative battery post.
- Keep clamps clear of fans and belts when the donor engine runs.
- Do not jump a frozen, leaking, or swollen battery.
- Never clamp orange high-voltage cables on hybrids or EVs.
- Remove jewelry and avoid leaning across both batteries while connecting.
Tips
- Say the order out loud: red dead +, red donor +, black donor −, black engine metal.
- A twenty-minute drive after a jump matters more than idling in the driveway.
- Keep a portable jump pack in the trunk if you often park with accessories on.
- Photograph your battery posts before first jump — helps remember which is positive.
- Replace batteries older than five years before winter if cranking slows.
FAQ
Why connect the last clamp to engine metal instead of the battery?
The dead battery can release hydrogen gas. A spark at its negative post is dangerous. Engine metal grounds the circuit away from the battery.
Can I jump-start a hybrid or electric car?
Only using manufacturer-approved 12V jump points or a specified jump pack. Never attach clamps to orange high-voltage cables or the traction battery.
How long should the donor car run before I try starting the dead car?
Let the donor idle two to three minutes so its alternator can supply stable current to the dead battery.
The car started but died when I removed the cables. Now what?
The battery likely will not hold charge. Clean terminals, drive twenty minutes, and retest. If it still dies, replace the battery or have the alternator tested.
What order do I remove jumper cables?
Reverse of connection: engine-ground black first, then donor negative, donor positive, and dead positive last. Keep clamp ends apart.
Comments
Questions, corrections, and what worked for you. Comments are reviewed before they appear.