How to Remove Grease from Kitchen Cabinets
Remove cooking grease from cabinet doors, drawer fronts, and hardware — about 45 quiet minutes. Turn on ventilation, spot-test on a hidden edge, dry-wipe dust first, wipe with a nearly dry cloth top to bottom, rinse, and dry immediately so seams never soak. Read one step at a time. Start with the preflight. Yellow sticky film above the stove after Step 12? See heavy buildup. Painted cabinets and the spot test hazed? See painted finish.
Tips for reading this guide
- One step at a time. Read the green caption, the Why line, then the bullets.
- Move on when the green done line is true — then go to the next step.
- Damp, not dripping. Wring the cloth nearly dry — soaking cabinet seams swells MDF and ruins the box.
- Spot-test first. Try your mix on a hidden edge before wiping a whole door — painted finishes can haze or peel.
- Still sticky above the stove, or finish looks cloudy? Jump to the matching branch below.
- Need a helper? Ask someone you trust to hold a step stool, pass cloths, or steady you if upper cabinets feel awkward.
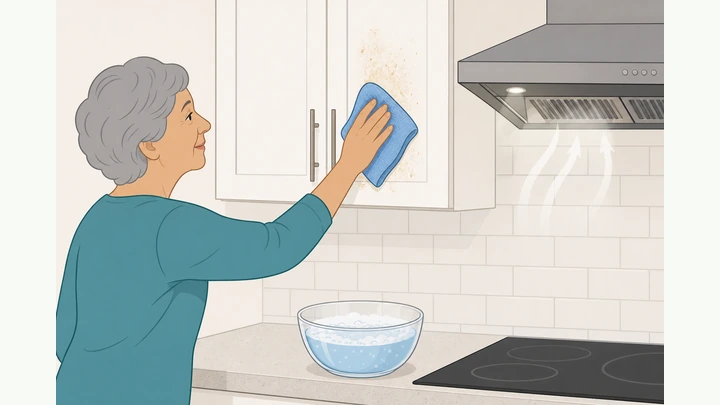
Things You'll Need
- Rubber gloves — keep them on for the whole clean
- Warm water in a bowl or small bucket
- Few drops of dish soap OR a label-safe degreaser diluted per bottle — pick one route
- Several microfiber cloths — separate for damp wipe, rinse pass, and final dry
- Drop cloth or old towels under the cabinet work area
- Soft nylon brush and baking soda — only if heavy yellow buildup branch is needed
- Screwdriver or drill bit if removing knobs or pulls
- Range hood fan or open window for ventilation
- About 45 quiet minutes for a typical kitchen run of upper and lower fronts
Where are you stuck?
Follow Start here for a full wipe-down of doors, drawers, and hardware. Jump to a branch if yellow buildup survives the fingertip test, or if a painted finish hazed on the spot test.
Start hereClear counter → hardware off → dry-wipe → mix solution → damp wipe → rinse → dry → repeat → hardware → touch zones → fingertip test
Preflight — fan on, gloves on, degreaser chosen, hidden-spot test passed, drop cloth ready.
Fan or window open · gloves on · one cleaner chosen · spot test on hidden edge · drop cloth ready.
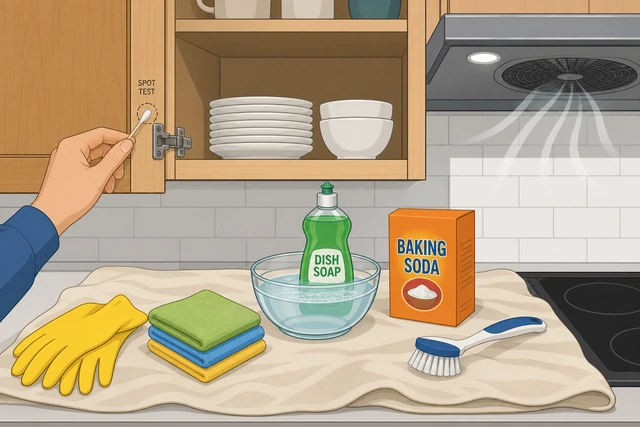
Ventilation keeps fumes manageable, and a hidden-spot test is the only safe way to learn whether your mix clouds or lifts a painted finish before you wipe a whole door.
- Fan or window open? Turn on the range hood or open a window before any cleaner goes on the cabinets.
- Gloves on? Rubber gloves are on before you touch degreaser or greasy cloths.
- One cleaner chosen? Warm water + a few drops of dish soap OR a label-safe degreaser per the bottle — pick one.
- Spot test passed? Dab the mix on a hidden edge (inside door lip or underside); no haze, peel, or color lift after 2 minutes.
- Drop cloth ready? Old towels or a drop cloth are set to catch drips on the counter.
Fan or window is open, gloves are on, one cleaner is chosen, the hidden spot shows no haze or peel, and a drop cloth is ready.
Skip undiluted vinegar, TSP, citrus cleaners, and steel wool on painted or factory-finished cabinets — they strip, cloud, or micro-scratch the finish so grease sticks worse next time. Cabinets painted or laminate? If the spot test hazed, go to Painted finish before Step 6.
Clear the counter and lay a drop cloth.
Move items off counter under cabinets · lay drop cloth or old towels · drips caught.
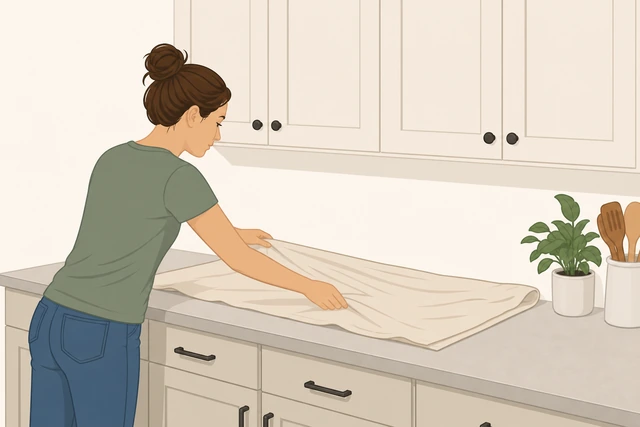
Grease and cleaner drip straight down onto whatever sits on the counter — clearing first keeps food, appliances, and the counter surface out of the mess.
- Move dishes, appliances, and food off the counter directly under the cabinets you will wipe.
- Lay a drop cloth or stack old towels along the counter edge under the doors.
- Leave yourself room to set down bowls and extra cloths within easy reach.
The counter under your work area is clear and a drop cloth or towels are catching drips.
Remove or mask knobs and pulls.
Unscrew knobs/pulls OR mask them · screw holes and edges reachable · grease behind hardware exposed.

Grease packs behind knobs and along screw holes — leaving hardware on means you clean around the dirtiest spots and re-deposit grease when you reinstall.
- Unscrew knobs or pulls where grease hides behind them, and set screws in a small cup.
- If you cannot remove a pull, mask it with tape but keep the edges around it reachable.
- Check that the area behind each piece of hardware is exposed for wiping.
Hardware is off or masked, screw holes are visible, and grease behind knobs is reachable.
Dry-wipe loose dust and crumbs first.
Dry microfiber · brush dust and crumbs off doors and drawer fronts · no liquid yet.
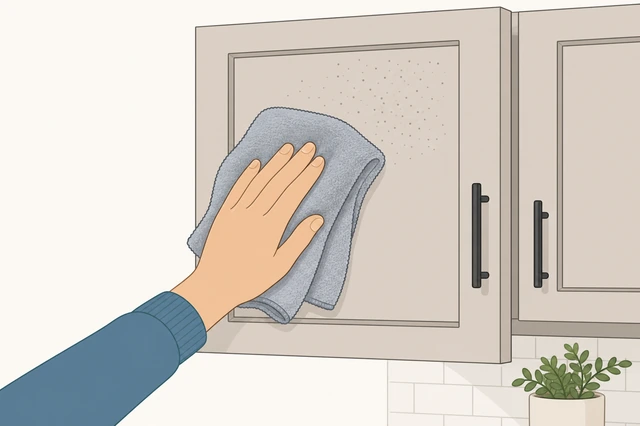
Wetting dusty grease turns it into muddy smears that spread across the whole door — a dry pass first keeps that grit from becoming a film you cannot rinse off.
- Take a dry microfiber and wipe each door and drawer front lightly.
- Knock crumbs and loose dust off edges and corners before any liquid touches the surface.
- Do not skip drawer fronts near the stove — they collect the most airborne grease dust.
Doors and drawer fronts have no loose dust, crumbs, or dry grit sitting on the surface.
Mix warm water with a few drops of dish soap.
Warm water + few drops dish soap OR diluted degreaser per label · slightly warm, not hot.
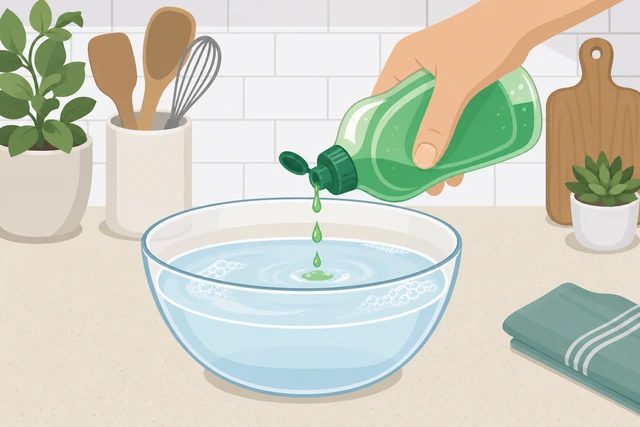
Warm water lifts cooking grease better than cold, but too much soap leaves a filmy residue that feels tacky after it dries — a few drops is the right dose.
- Fill a bowl with warm water — comfortable to touch, not scalding hot.
- Add a few drops of dish soap, OR dilute your degreaser exactly as the label says.
- Swirl gently; the water should look slightly soapy, not thick with suds.
Solution is mixed, slightly warm, and looks lightly soapy or properly diluted — not sudsy.
Skip undiluted vinegar, TSP, citrus cleaners, and steel wool on painted or factory-finished cabinets — they strip, cloud, or micro-scratch the finish so grease sticks worse next time.
Dip the cloth and wring nearly dry.
Soak microfiber · wring firmly · cloth damp with no drips falling.
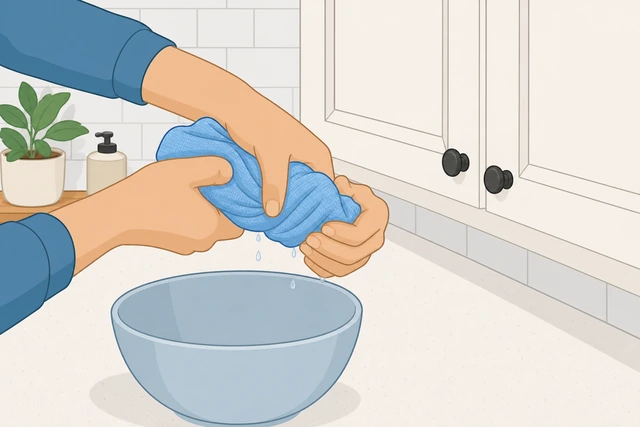
Cabinet boxes — especially MDF and particleboard at seams — swell permanently when soaked; a nearly dry cloth is what cleans grease without wrecking the box.
- Dip a microfiber cloth into the bowl and let it absorb the solution.
- Wring or squeeze firmly until water stops dripping off the cloth.
- Lift it — it should feel damp, not wet enough to leave beads on the door.
The cloth is damp and holds solution but does not drip when lifted.
Wring the cloth nearly dry before it touches cabinet doors — soaking MDF or particleboard seams swells the box and causes permanent damage. Damp, not dripping.
Wipe one door or drawer top to bottom.
One unit at a time · straight passes top to bottom · flip cloth when it turns gray.
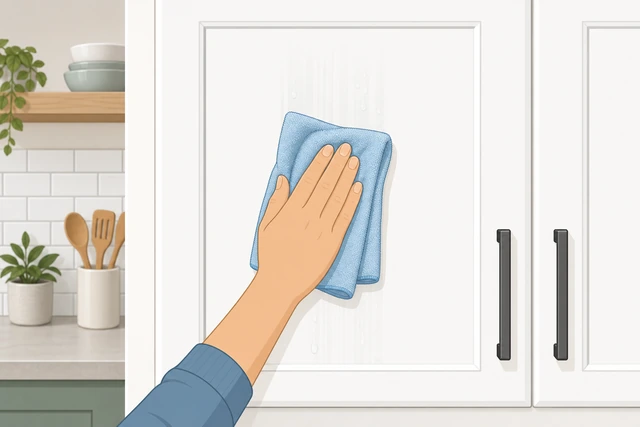
Top-to-bottom passes follow gravity so loosened grease does not run over areas you already cleaned, and flipping the cloth stops you from spreading gray grease back onto the door.
- Pick one door or drawer front and wipe in straight passes from top to bottom.
- Flip the cloth to a clean side as soon as it looks gray or feels greasy.
- Finish the whole unit before moving to rinse and dry in the next steps.
One door or drawer is fully wiped with straight top-to-bottom passes and the cloth was flipped when it turned gray.
Still tacky above the stove or microwave after this pass? Note it — if it survives Step 12, see Heavy buildup.
Rinse the cloth and wipe again to remove soap.
Rinse cloth in clean water · wring nearly dry · second pass lifts soap residue.
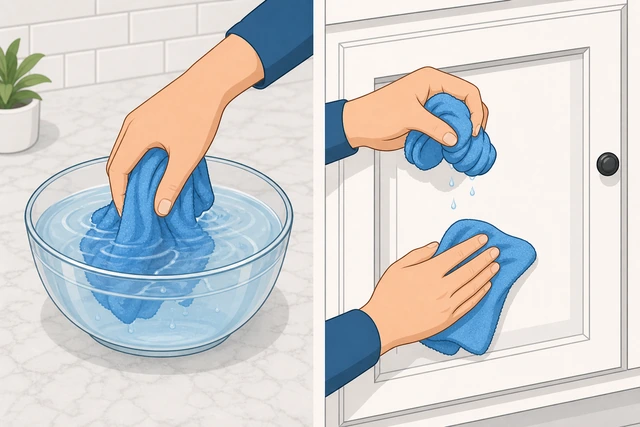
Soap residue dries into a sticky film that attracts new grease — a quick rinse pass is what leaves the door smooth instead of slightly tacky.
- Rinse the cloth in a bowl of clean water (or hold it under the tap).
- Wring nearly dry again — same damp-not-dripping rule as Step 5.
- Wipe the same door or drawer once more to lift soap and loosened grease.
The same unit got a second pass with rinsed, nearly dry cloth and no soap residue is visible.
Dry immediately with a clean dry microfiber.
Fresh dry cloth · wipe door right away · no standing water on seams or edges.
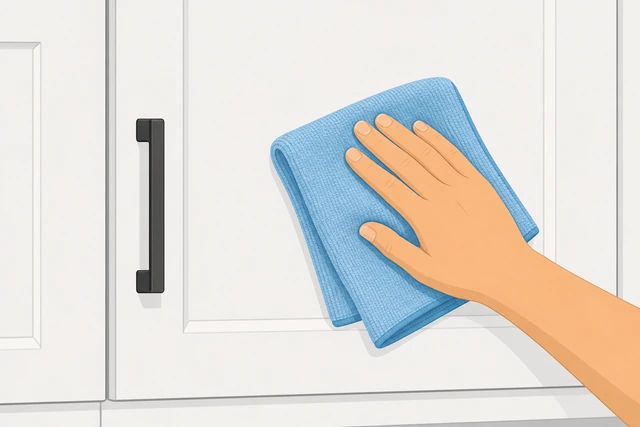
Standing water on seams and edges soaks into MDF faster than you can react — drying within seconds of the wet pass is what protects the box.
- Grab a clean, dry microfiber that has not touched the soap bowl.
- Wipe the same door or drawer immediately — do not let water bead on the surface.
- Pay extra attention to bottom edges and seams where water likes to pool.
That door or drawer is dry to the touch with no standing water on seams or edges.
Wring the cloth nearly dry before it touches cabinet doors — soaking MDF or particleboard seams swells the box and causes permanent damage. Damp, not dripping.
Repeat on the next door and refresh water when gray.
Next door/drawer · repeat Steps 6–8 · dump and remix when water turns gray.
Gray rinse water re-deposits grease on every new door — refreshing the bowls is faster than re-wiping fronts you thought were already clean.
- Move to the next door or drawer and repeat Steps 6–8 on that unit.
- If the wipe or rinse water looks gray or cloudy, dump it and remix fresh solution.
- Keep using a fresh dry cloth for each unit's final dry pass.
You moved to the next unit with clean-looking water and a fresh dry cloth ready.
Clean hardware and reinstall knobs or pulls.
Soak knobs/pulls in bowl · light scrub · dry fully · screw back on.
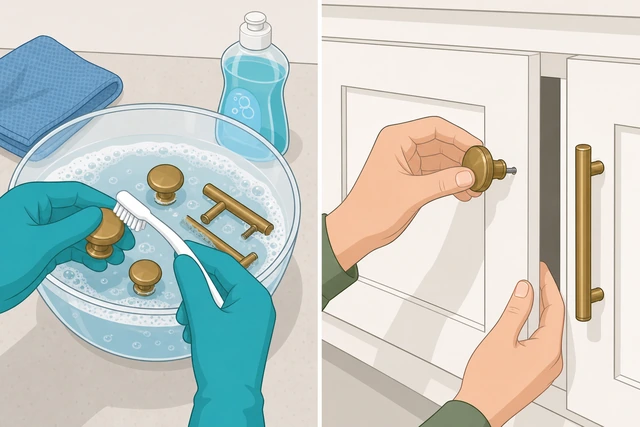
Hardware holds the oldest grease on the cabinet — cleaning it in the bowl while doors dry means grease does not smear back onto clean fronts when you reinstall.
- Drop removed knobs and pulls into the bowl for a few minutes.
- Scrub lightly with a cloth or soft brush, then rinse and dry each piece fully.
- Reinstall with the screws from your cup — do not overtighten painted or plated finishes.
Hardware is grease-free, fully dry, and reattached with screws snug but not stripped.
Wipe handles and high-touch zones.
Drawer edges · handle backs · stove-adjacent fronts · microwave-adjacent spots.
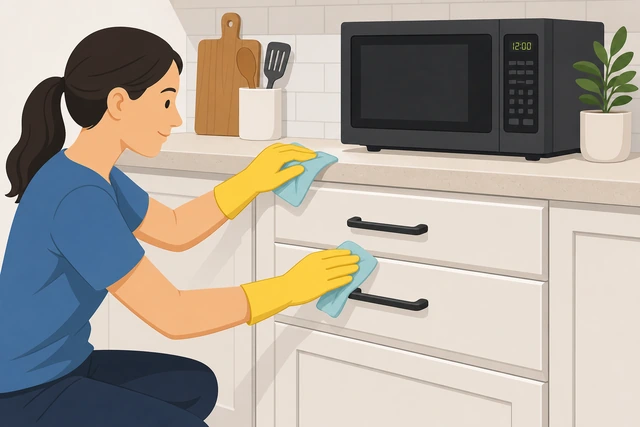
Hands grab the same edges and handle backs hundreds of times a week — skipping them leaves the stickiest grease on the spots you touch most.
- Wipe the back side of handles and pulls you reinstalled.
- Run a damp-then-dry pass on drawer edges and the frame around the stove.
- Hit fronts adjacent to the microwave where splatter and hand grease collect.
Handle backs, drawer edges, and stove-adjacent fronts are wiped and dry with no tacky spots.
Do a final visual and fingertip test.
Scan all fronts for haze or streaks · drag fingertip · no sticky drag anywhere.
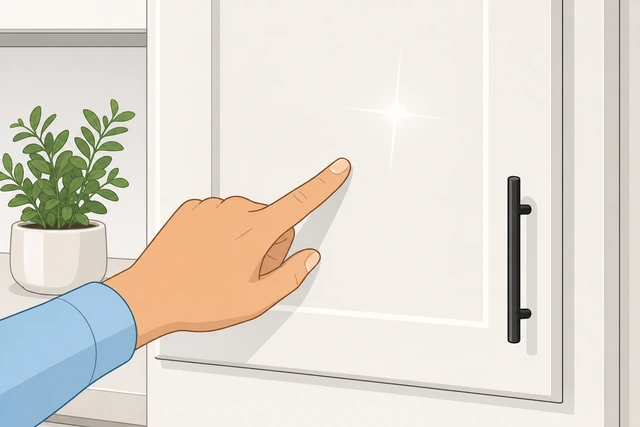
A visual pass catches haze and streaks, but only a fingertip drag reveals the thin tacky film that still grabs skin after a wipe-down looks fine.
- Stand back and scan every door and drawer for haze, streaks, or missed corners.
- Lightly drag a clean fingertip across each front — it should glide, not stick.
- Note any sticky zones above the stove for the heavy-buildup branch if needed.
No haze or streaks remain and no front feels sticky when you drag a fingertip across it.
Sticky yellow film still above the stove or microwave? → Heavy buildup.
Heavy buildupSticky yellow or orange film remains above the stove or microwave after Step 12
Apply baking-soda paste and let it dwell 5–10 minutes.
Thick paste on sticky spots only · baking soda + few drops dish soap · timer 5–10 min.
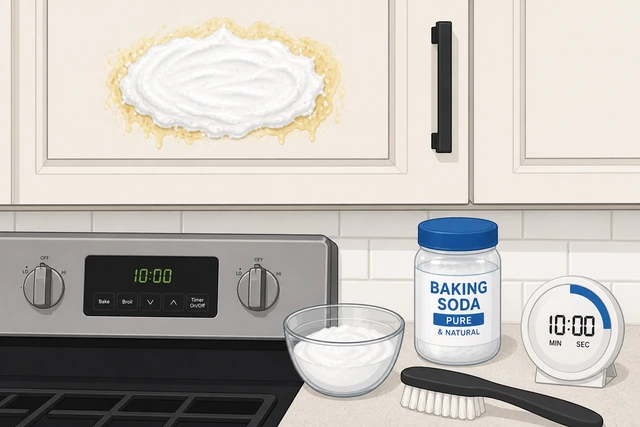
Years of cooking splatter needs dwell time to break down — a light wipe cannot penetrate built-up film, but a short paste soak loosens it without flooding the door.
- Mix baking soda with a few drops of dish soap into a thick paste — not runny.
- Spread the paste only on the still-sticky yellow or orange spots above the stove.
- Set a timer for 5–10 minutes and let it sit — do not scrub yet.
Paste covers the sticky spots and has dwelled for 5–10 minutes without drying out completely.
Wring the cloth nearly dry before it touches cabinet doors — soaking MDF or particleboard seams swells the box and causes permanent damage. Damp, not dripping.
Scrub with a soft nylon brush, then rinse and dry.
Soft nylon brush along grain · light pressure · rinse cloth pass · dry immediately.
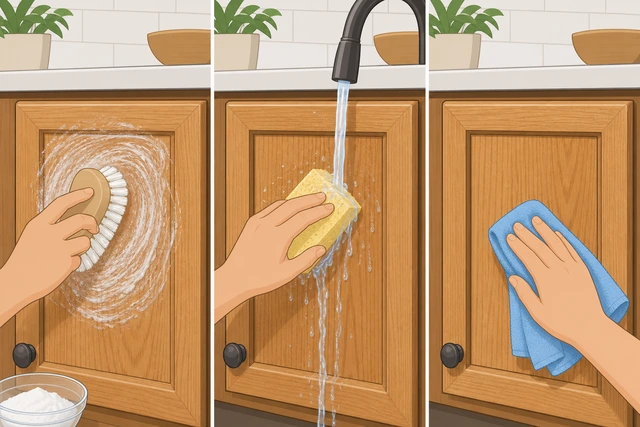
A soft nylon brush works the paste into the film along the grain without scratching gloss paint, and the same rinse-and-dry sequence prevents soapy residue from returning.
- Scrub gently with a soft nylon brush along the wood grain or door direction.
- Rinse a cloth in clean water, wring nearly dry, and wipe the spot to remove paste.
- Dry immediately with a clean dry microfiber — same fast dry rule as the main path.
The treated spot is scrubbed, rinsed, and dry with no paste residue and noticeably less tack.
Film unchanged after two full paste-and-scrub rounds, or the finish looks dull or cloudy? Stop scrubbing — that may need a pro refinish, not more abrasion at home.
Painted finishPainted or laminate cabinets and the spot test showed haze, color lift, or peel
Switch to plain warm water with a tiny amount of dish soap.
Fresh bowl · warm water · one or two drops soap only · no vinegar, TSP, or citrus.
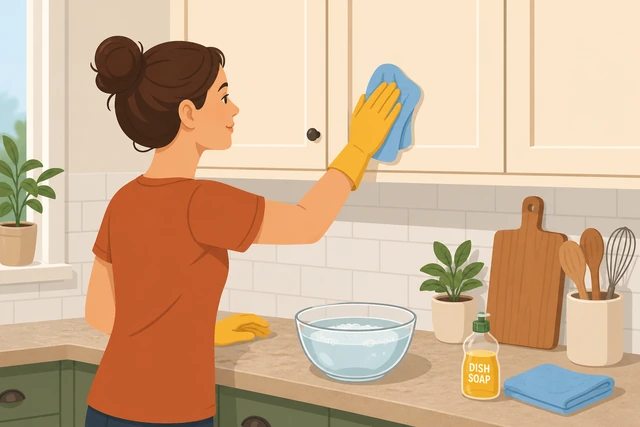
Painted and laminate finishes react to strong acids and solvents — the weakest mix that still cuts grease is the only safe chemistry when a spot test already warned you.
- Dump any stronger mix and fill a bowl with plain warm water.
- Add only one or two drops of dish soap — not a squirt, not degreaser.
- Keep vinegar, TSP, citrus cleaners, and undiluted degreaser off the painted surface.
A fresh bowl holds plain warm water with just a drop or two of dish soap — no harsh products nearby.
Skip undiluted vinegar, TSP, citrus cleaners, and steel wool on painted or factory-finished cabinets — they strip, cloud, or micro-scratch the finish so grease sticks worse next time.
Blot briefly, dry within 30 seconds, and stop if peel appears.
Blot don't soak · one short pass · dry cloth within 30 seconds · stop on any peel or bubble.
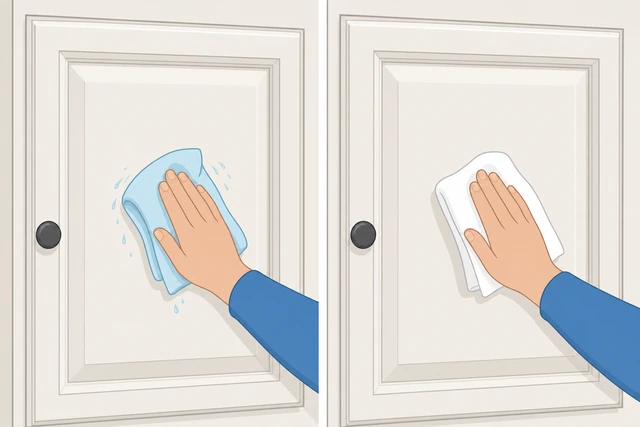
Painted MDF fails when it stays wet — blotting with immediate drying limits contact time so color lift and bubbling do not spread across the whole door.
- Dip the cloth, wring extra-dry, and blot the greasy area — do not soak or flood it.
- Follow with a dry cloth within 30 seconds so no water sits on the paint.
- Stop immediately if you see peel, bubble, or color lift — dry the area and plan touch-up paint.
Greasy spots were blotted with minimal contact time and dried within 30 seconds with no new peel or haze.
Any peel, bubble, or color lift after blotting? Stop wetting that door — let it dry fully and touch up paint before cleaning again.
When to get help
- Ask a trusted person to steady a step stool, pass cloths, or spot-check upper doors if reaching them feels awkward.
- Sticky film unchanged after two full paste-and-scrub rounds, or the finish looks dull and cloudy? Stop scrubbing and consider a professional cabinet refinish.
- Any peel, bubble, or color lift on painted doors? Stop wetting, let the area dry, and plan touch-up paint before cleaning again.
- MDF or particleboard edges swollen, crumbling, or doors not closing flat? That is water damage — call a cabinet repair pro rather than more wet cleaning.
- Finish is cracked or flaking across many doors? A refinish or replacement is the real fix — household degreasing will not restore the coating.
When This Doesn't Work
- Spot test already showed haze, peel, or color lift. Do not continue the main-path mix — switch to Painted finish or stop and plan touch-up paint.
- Yellow sticky film survives two paste-and-scrub rounds above the stove. That buildup may be baked on past household cleaning — see Heavy buildup once more, then consider a pro refinish if film remains.
- Cabinets are raw wood with no sealed finish. Water and degreaser raise the grain — use a wood-care product matched to unfinished wood or consult the cabinet maker.
- MDF or particleboard edges are already swollen or crumbling. That is water damage, not grease — stop wet cleaning and address replacement or repair before wiping again.
- Grease is inside a vent hood duct or on ceiling paint. Flat ceiling paint and duct interiors need different tools — this guide covers cabinet doors, drawers, and hardware only.
- Finish is cracked, alligatored, or flaking across many doors. Cleaning will not restore the coating — plan a refinish or replacement rather than repeated scrubbing.
Warnings
- Never soak cabinet doors or seams. Wring cloths nearly dry — MDF and particleboard swell permanently when water sits on edges.
- Do not use undiluted vinegar, TSP, citrus cleaners, or steel wool on painted or factory-finished cabinets. They strip, cloud, or scratch the finish so grease sticks worse afterward.
- Do not skip the hidden-spot test on painted or older cabinets — one wrong mix can damage a whole door.
- Do not leave hardware on when grease packs behind knobs — reinstalling dirty pulls re-deposits grease on clean doors.
- Do not scrub heavy buildup with abrasive pads or hard brushes on gloss finishes — micro-scratches trap grease permanently.
- Keep ventilation running for the full session — degreaser fumes build up quickly in a small kitchen.
Tips
- Wipe the backsplash and stove-adjacent fronts weekly with a barely damp cloth — it prevents the yellow film that needs the heavy-buildup branch.
- Flip the microfiber to a clean side the moment it turns gray — that single habit stops grease from smearing back onto doors.
- Remove knobs once a season even if they look fine — grease behind pulls is the most common reason clean doors feel sticky again within days.
- Change bowl water when it looks gray, not when it smells — by then you have already re-deposited grease on a door.
- Dry within seconds of every wet pass — speed matters more than product choice for keeping MDF seams intact.
FAQ
What is the best cleaner for greasy kitchen cabinets?
Warm water with a few drops of dish soap is the safest default for most finishes. For heavy buildup above the stove, a baking-soda paste with a few drops of soap and a 5–10 minute dwell works — see the heavy-buildup branch. Skip undiluted vinegar and TSP on painted cabinets.
Can I use vinegar to cut grease on cabinets?
Diluted vinegar can work on some sealed wood or laminate, but undiluted vinegar clouds or strips many painted and factory finishes. Always spot-test on a hidden edge first — if you see haze, use the painted-finish branch with plain water and a tiny amount of dish soap.
Why do my cabinets still feel sticky after wiping?
Usually too much soap left behind, a dripping cloth that did not get a rinse pass, or grease behind hardware that was never removed. Make sure you rinse, dry immediately, and clean knobs off the doors. Sticky yellow film above the stove needs the heavy-buildup branch.
Is it safe to use degreaser on wood cabinets?
Only if the label says it is safe for your finish and you dilute it as directed. Spot-test on a hidden edge, wring the cloth nearly dry, and dry the surface within seconds. Painted or laminate cabinets often do better with plain water and one or two drops of dish soap.
Do I need to remove cabinet hardware to clean grease?
You should remove or mask knobs and pulls when grease hides behind them — that is the most skipped spot and the main reason clean doors feel tacky again after hardware is touched. Soak removed pieces in the bowl while you wipe the doors.
Comments
Questions, corrections, and what worked for you. Comments are reviewed before they appear.