How to Clean a Toilet
Clean a toilet bowl, seat, tank, and base from top to bottom — about 30 minutes including a short dwell time. Pick one cleaner chemistry, wet the bowl, apply, let it dwell, scrub rim-to-trapway, then disinfect the tank, seat, hinges, base, and floor before rinsing the brush. Read one step at a time. Start with the preflight. Stubborn mineral ring at the waterline? See hard-water ring. Water rising or not draining? See clogged or overflowing.
Tips for reading this guide
- One step at a time. Read the green caption, the Why line, then the bullets.
- Move on when the green done line is true — then go to the next step.
- Pick ONE cleaner for the bowl — commercial toilet cleaner OR baking soda + vinegar — and never add bleach on top of it.
- Never mix bleach with ammonia or vinegar. That combination makes toxic gas. If in doubt, rinse and flush before switching products.
- Orange/gray ring that won't budge, or water not draining? Jump to the matching branch below instead of scrubbing harder.
- Need a helper? Ask someone you trust to hold the window open, fetch supplies, or check on you if fumes bother you.
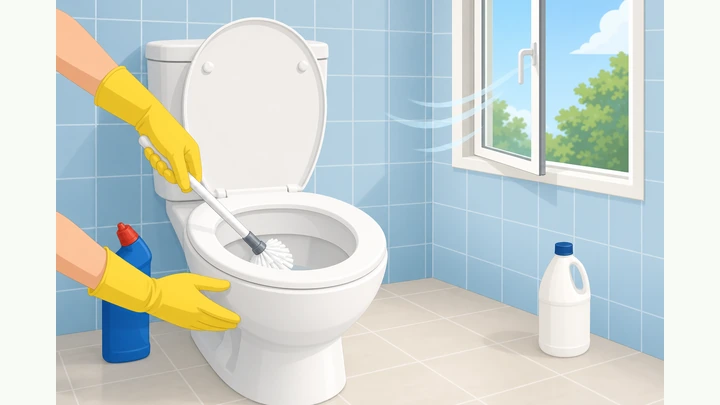
Things You'll Need
- Rubber gloves — keep them on for the whole clean
- Toilet brush with a stiff-bristle head and a holder
- ONE bowl cleaner: commercial toilet bowl cleaner or baking soda + white vinegar/dish soap — never both, never plus bleach
- Disinfectant spray or wipes for the tank, seat, and handle
- Old toothbrush or a folded cloth corner for the hinge gap
- Microfiber cloths or disposable wipes for the base and floor
- Open window or running exhaust fan for ventilation
- About 30 quiet minutes, including a 10–15 minute dwell time
Where are you stuck?
Follow Start here for a full top-to-bottom clean. Jump to a branch if a mineral ring won't come off, or if the bowl won't flush normally.
- I want to clean the toilet from scratch Wet · apply one cleaner · dwell · scrub · disinfect · rinse
- An orange, brown, or gray ring won't come off Lower water · vinegar soak 30–60 min · wet pumice stone
- Water is rising, draining slowly, or overflowing Stop water source · let settle · plunge with flange plunger
Start hereWet bowl → apply one cleaner → dwell → scrub rim-to-trapway → rinse → disinfect tank/seat/hinges → base & floor → rinse brush
Preflight — all four checks must be YES before you apply any cleaner.
Gloves on · window open or fan on · ONE chemistry chosen · no bleach nearby on the vinegar route.
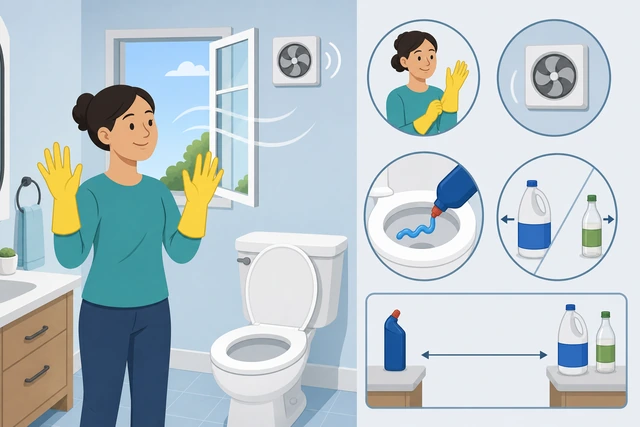
Fumes build up fast in a small bathroom, and mixing chemistries by accident is the single biggest safety risk in this job.
- Gloves on? Rubber gloves are on before you touch any cleaner or the brush.
- Air moving? A window is open or the exhaust fan is running for the whole clean.
- One chemistry chosen? Commercial toilet cleaner OR baking soda + vinegar/dish soap — pick one for the bowl.
- No bleach nearby? If you are going the vinegar/baking-soda route, bleach stays capped and out of reach.
All four checks are YES — gloves on, air moving, one cleaner chosen, and no bleach on the acid/vinegar route.
Never mix bleach with an ammonia-based toilet cleaner or with vinegar/acid-based cleaner in the bowl — the combination makes toxic chlorine or chloramine gas. Pick one chemistry per session.
Flush once with the lid up to wet the bowl.
Lid up · flush · confirm water drains and refills at a normal level.
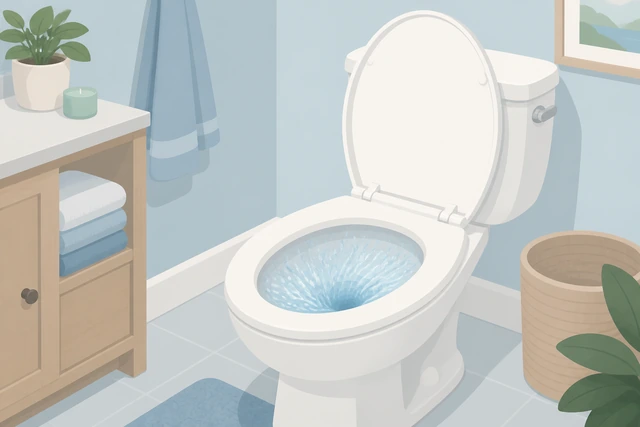
A wet bowl gives the cleaner something to cling to, and this flush is your first check that drainage is normal before you add any product.
- Lift the lid and flush once so the bowl walls and rim get wet.
- Watch the water level — it should drop and refill normally, not rise or drain slowly.
- Do not apply cleaner yet — this flush is a wet-and-check step only.
The bowl surfaces are wet and the water drained and refilled at a normal level.
Water rising instead of draining, or draining very slowly? → Clogged / overflowing.
Apply your one chosen cleaner in a ring under the rim.
Gel: squeeze a ring under the rim, let it drip down · Powder route: sprinkle baking soda, add vinegar.
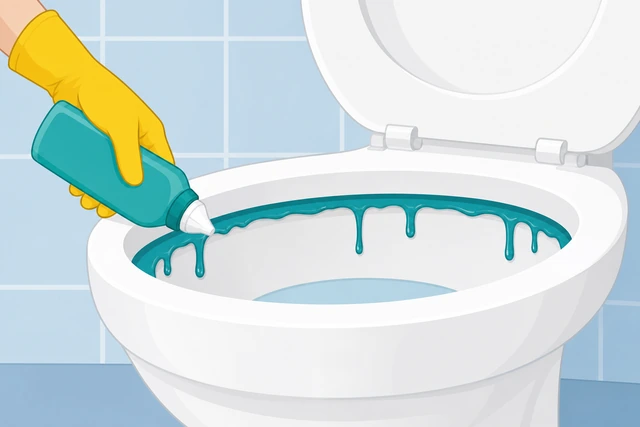
Applying under the rim lets gravity carry the product down the whole bowl wall, and this is the step where an accidental bleach mix is most likely — so it gets its own warning.
- Commercial gel: squeeze a ring of cleaner just under the rim so it drips down the sides.
- Baking-soda route: sprinkle baking soda around the bowl, then add white vinegar or a little dish soap.
- Do not add bleach on top of either product — pick one chemistry and stop there.
Cleaner visibly coats the rim and upper bowl walls — no bleach has touched this bowl today.
Never mix bleach with an ammonia-based toilet cleaner or with vinegar/acid-based cleaner in the bowl — the combination makes toxic chlorine or chloramine gas. Pick one chemistry per session.
Let the cleaner dwell — do not scrub yet.
Vinegar/baking soda ~10–15 min · most gels 5–10 min · check the label · product still glistening, not dried.
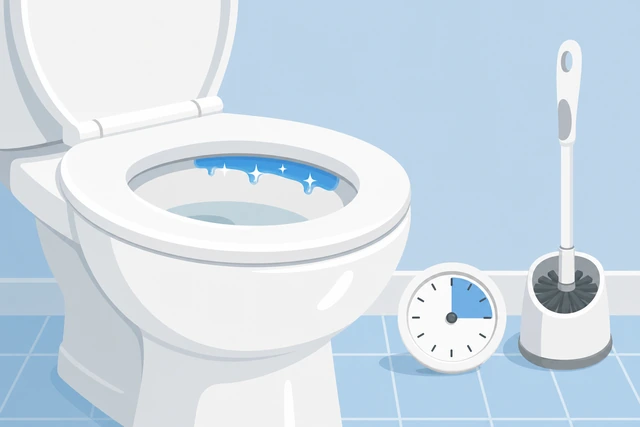
Dwell time is what actually breaks down buildup — scrubbing early just moves grime around and makes the product look like it failed.
- Check the product label for its recommended contact time.
- Set a timer for about 10–15 minutes (vinegar/baking soda) or 5–10 minutes (most gel cleaners).
- Leave the brush aside — no scrubbing during this wait.
The timer finished and the product still looks glistening on the bowl, not dried out.
Scrub rim, walls, waterline, and the trapway opening.
Start under the rim jets · work down the sides · press into the trapway opening · finish the waterline ring.
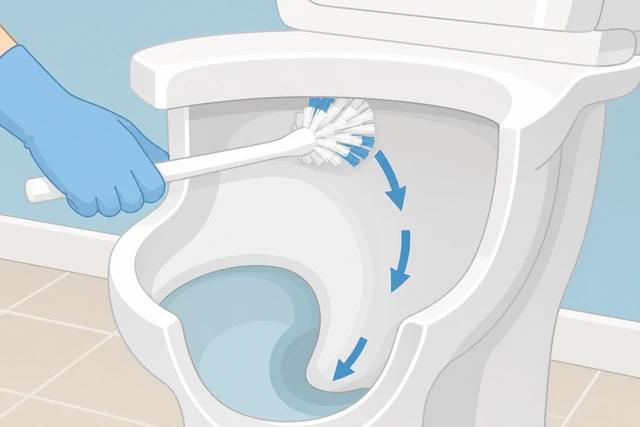
Buildup collects in four specific spots — the rim jets, the side walls, the trapway at the bottom, and the waterline — so a thorough pass covers all four, not just what you can see easily.
- Start under the rim where the flush jets are, then work the brush down the side walls.
- Press the brush into the trapway/siphon opening at the bottom of the bowl.
- Finish with a few passes right at the waterline ring, where residue collects most.
Rim, walls, and waterline feel smooth under a fingertip test on the brush — no grit or film left.
Flush to rinse the bowl and the brush together.
Flush · hold the brush under the rushing water briefly · water should run clear.
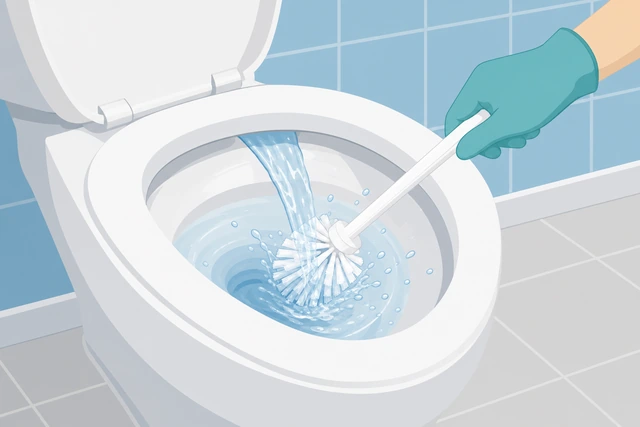
Rinsing the brush in the same flush saves a step and keeps loosened grime from just sitting back down in the bowl.
- Flush the toilet as you normally would.
- Hold the brush under the rushing water for a few seconds to rinse the bristles.
- Watch the water run out — it should look clear, not cloudy or streaked.
The water runs clear after the flush and the brush is visibly rinsed.
Orange, brown, or gray ring still visible at or below the waterline? → Hard-water ring.
Spray and wipe the tank lid, tank body, and flush handle.
Disinfectant spray or wipe · tank lid · tank body · flush handle · wipe until no grime residue remains.
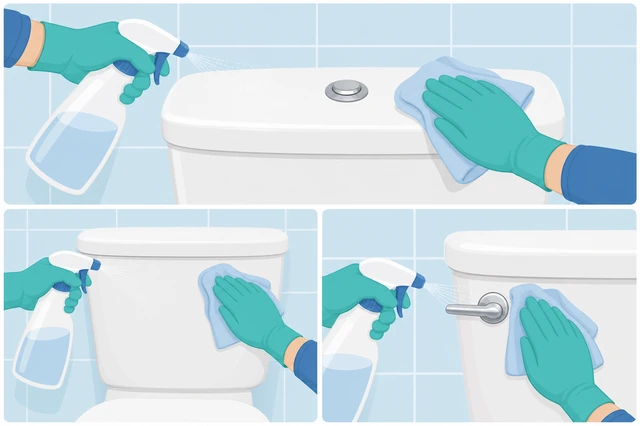
The flush handle and tank lid are touched by every hand that uses the toilet, so they need the same disinfecting attention as the bowl.
- Spray or wipe disinfectant across the tank lid and the tank body.
- Give the flush handle extra attention — it is touched most often.
- Wipe dry until no dust or grime residue is left on any surface.
Tank lid, tank body, and handle are wiped clean with no dust or grime residue.
Lift the seat and wipe its top, underside, and the lid underside.
Seat top · underside of seat · underside of lid · all three surfaces wiped.
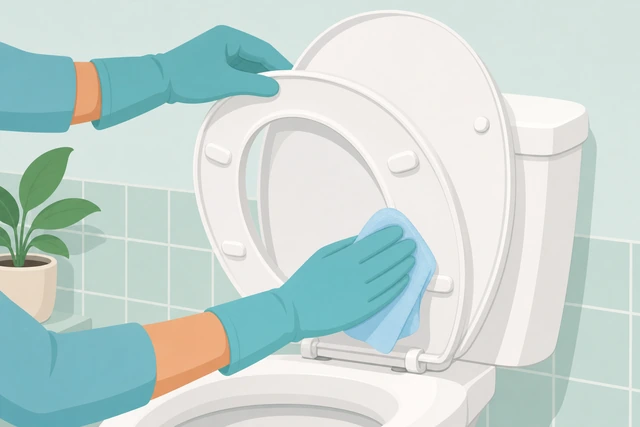
The seat top gets cleaned automatically by habit, but the two undersides are where splash residue actually collects.
- Spray or wipe the top surface of the seat first.
- Lift the seat and wipe the underside of the seat.
- Wipe the underside of the lid as well — it is often skipped entirely.
Both sides of the seat and the underside of the lid are wiped with no visible residue.
Wipe the hinges where the seat meets the tank.
Old toothbrush or folded cloth corner · get into the hinge gap on both sides.
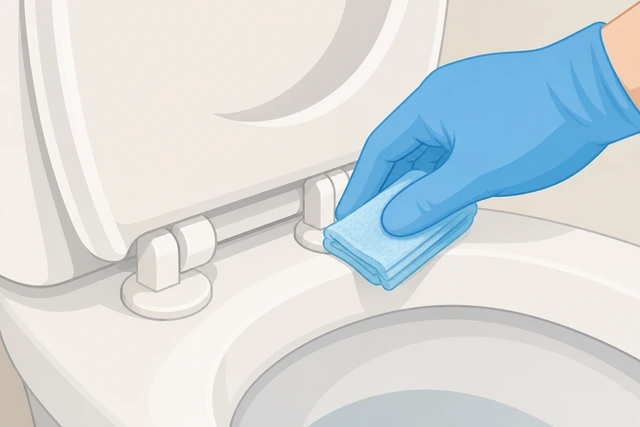
The hinge gap is the single most common spot skipped in a standing clean, and it is usually the source of a lingering odor even after the bowl looks spotless.
- Use an old toothbrush or fold a cloth corner into a thin edge.
- Work it into the hinge gap on both sides where the seat attaches to the tank.
- Wipe away the yellow-brown buildup that typically collects there.
The hinge area is free of the yellow-brown buildup that commonly hides there.
Wipe the exterior bowl, base, and behind the toilet.
Outside of the bowl · base where it meets the floor · surface behind the toilet.
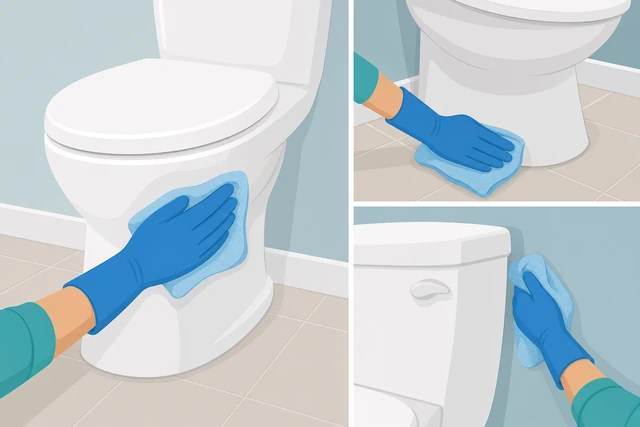
Drip marks and splash land on the exterior bowl and base far more than most people expect, and the space behind the toilet is easy to forget entirely.
- Wipe down the outside of the bowl from the tank to the base.
- Wipe the base where it meets the floor, all the way around.
- Wipe the wall-facing surface behind the toilet as well.
Base and rear surfaces are wiped clean with no drip marks left.
Wipe the floor immediately around the base.
Fresh cloth or disinfectant wipe · front and both sides of the base.
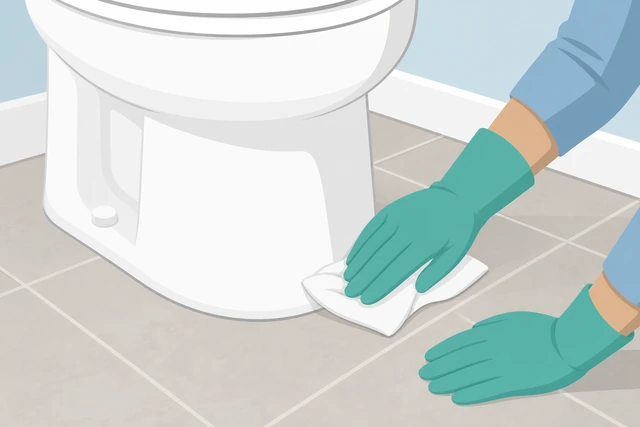
Floor-level grit and odor sit right where feet stand, so this pass is what actually removes the smell most people blame on the bowl.
- Grab a fresh cloth or a new disinfectant wipe for the floor.
- Wipe the floor directly in front of the base first.
- Wipe both sides of the base as well, working outward from the toilet.
The floor around the base is free of grit or residue at floor level.
Rinse and store the brush, then wash your hands.
Rinse under clean water · shake out excess · return to holder to air-dry · peel gloves · wash hands.
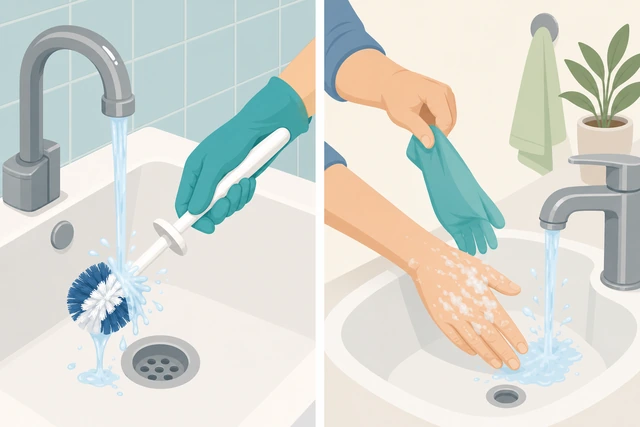
A brush stored dripping wet grows mildew in its holder, and washing hands last keeps any cleaner residue off everything you touch next.
- Rinse the brush under clean running water until it looks clean.
- Shake out excess water, then set it back in its holder to air-dry.
- Peel off your gloves and wash your hands well before touching anything else.
The brush is rinsed and back in its holder, gloves are off, and hands are washed.
Step back and do a visual and sniff check.
Bowl · seat · base · floor · no rings, no streaks, no lingering odor.
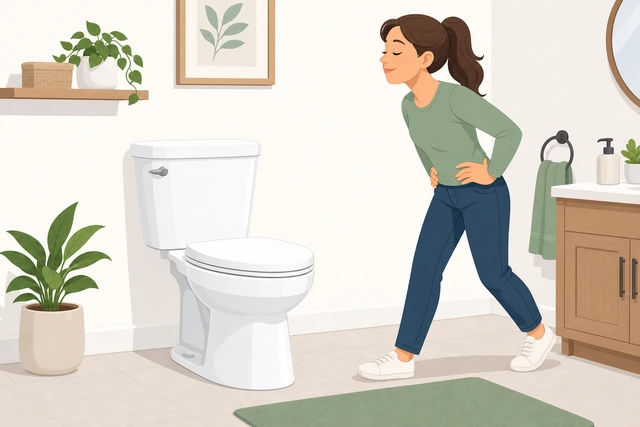
A final look-and-smell pass is the only way to confirm the hinge gap, base, and floor were actually reached, not just the parts that are easy to see standing up.
- Look at the bowl, seat, base, and floor for any missed rings or streaks.
- Take a normal breath near the seat and hinge area to check for lingering odor.
- Touch up any spot you notice before you consider the job finished.
No visible rings or streaks remain, and there is no lingering odor.
Hard-water ringOrange, brown, or gray mineral ring that survives a normal clean
Drain the bowl partially, then soak the ring with vinegar.
Siphon or shut valve + flush to lower water · cover the exposed ring with vinegar-soaked paper towels · 30–60 min soak.
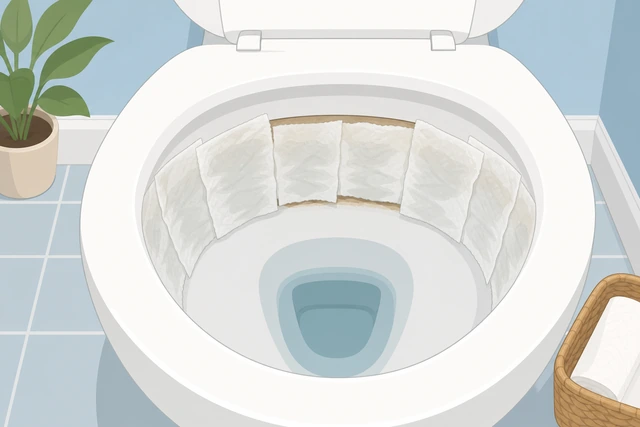
Standard cleaners are not formulated to dissolve mineral scale, so the ring needs a longer acid soak with the water level lowered so it actually reaches the deposit.
- Lower the water level: siphon some out, or shut the supply valve and flush once to drain most of the bowl.
- Cover the exposed ring with paper towels soaked in straight white vinegar, or use a citric-acid/scale cleaner.
- Let it soak for 30–60 minutes — this dwell time is what actually loosens mineral scale.
The ring has soaked for 30–60 minutes and is exposed above the lowered water line.
Scrub wet with a pumice stone, then refill and repeat if needed.
Pumice stone kept wet · light pressure, one direction · refill, flush, repeat once if faint ring remains.
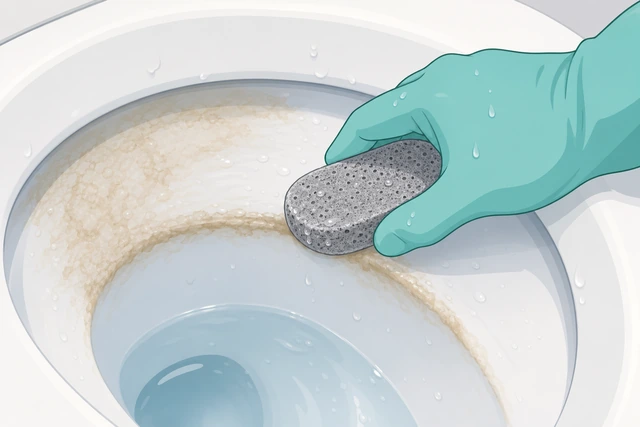
A dry pumice stone or hard scrubbing pressure scratches the porcelain glaze permanently, so light pressure with a wet stone is what removes scale without damaging the surface underneath.
- Scrub the softened ring with a pumice stone or scale-safe brush, keeping the stone wet at all times.
- Use light pressure in one direction only — never scrub dry or press hard.
- Refill the bowl and flush; repeat the soak-and-scrub once if a faint ring remains.
The ring is gone or much lighter after refilling, with no scratches on the porcelain.
Ring doesn't lighten after two soak-and-scrub rounds, or the porcelain looks etched or dull? Stop abrasive scrubbing — that may be permanent glaze damage, not buildup — and consider a professional descale.
Clogged / overflowingWater rises, drains slowly, or the bowl is actively overflowing
Stop flushing immediately and stop the water rising.
No more flushing · remove tank lid, push flapper down OR turn off the shut-off valve · let level settle.
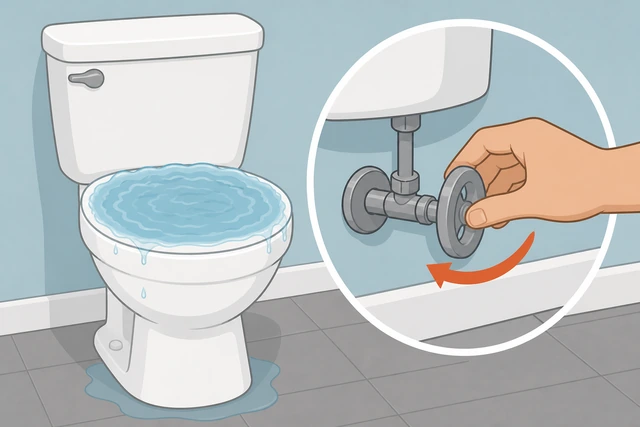
Continuing to flush a bowl that isn't draining pushes water toward the rim and onto the floor — stopping the water source is the only move that matters right now.
- Stop flushing right away — do not flush again to "see if it clears."
- Water rising toward the rim? Remove the tank lid, push the flapper down, or shut off the valve behind the toilet.
- Let the water level settle and recede before you add any more cleaner.
The water source is stopped and the level has settled or started to recede.
Plunge with a flange plunger, then resume the main path.
Flange (toilet) plunger · firm even strokes · keep enough water to seal the head · resume Step 1 once draining is normal.
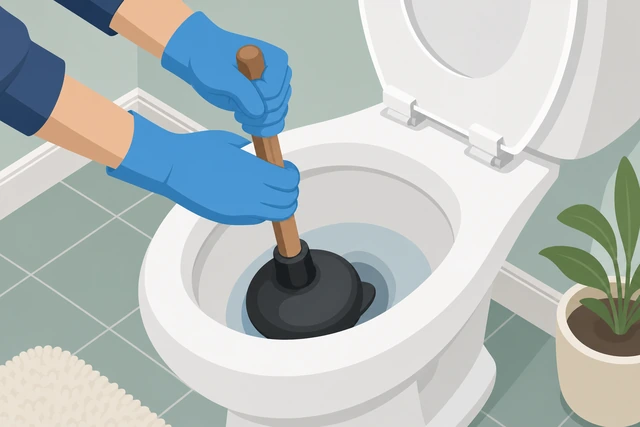
A flange plunger seals the trapway properly, and firm even strokes clear most clogs without splashing caustic cleaner that may still be in the bowl.
- Use a flange (toilet-style) plunger, not a flat sink plunger.
- Plunge with firm, even strokes, keeping enough water in the bowl to seal the plunger head.
- Once drainage is restored to normal, resume the main path from Step 1.
Drainage is back to normal — the bowl fills and empties on a flush like usual.
Plunging doesn't restore normal drainage after several attempts, other drains back up at the same time, or sewage/black water is present? Shut off the water at the valve and call a plumber — do not keep adding chemical cleaner to a non-draining bowl.
When to get help
- Ask a trusted person to hold the window/fan setup, fetch supplies, or check on you if fumes ever feel strong.
- If you smell a strong chemical odor or feel dizzy or short of breath, leave the room, get fresh air, and do not mix any more products.
- Plunging doesn't clear the clog after several tries, other drains back up too, or sewage is present? Shut off the water and call a plumber.
- Ring won't lighten after two soak-and-scrub rounds, or the porcelain looks etched? Stop scrubbing — get a professional descale instead of forcing it.
- Cracked tank, leaking base, or a wobbling bowl is a plumbing repair — call a plumber rather than continuing to clean around it.
When This Doesn't Work
- Bleach was already used in the bowl. Flush several times and let it run clear before adding vinegar, baking soda, or an ammonia-based product — never layer them.
- Toilet is actively overflowing right now. Stop and go straight to Clogged / overflowing before you clean anything.
- Porcelain looks etched, dull, or scratched. That is permanent glaze damage from past abrasive scrubbing, not a stain a cleaner can fix — a normal clean routine is still safe, but the mark will not lift.
- Well water with heavy iron or sulfur staining. Household vinegar may only fade, not remove, severe iron staining — a whole-house water treatment addresses the root cause.
- Cracked tank, leaking base, or a wobbling bowl. That is a plumbing repair, not a cleaning task — shut off the water and call a plumber before continuing.
- Someone in the home is pregnant or has asthma/COPD. Have another household member do the cleaning, or use unscented, low-fume products with extra ventilation.
Warnings
- Never mix bleach with an ammonia-based cleaner or with vinegar/acid-based cleaner in the bowl. The combination produces toxic chlorine or chloramine gas. Pick one chemistry per session and rinse thoroughly before switching.
- If you smell a strong chemical odor or feel dizzy, lightheaded, or short of breath while cleaning, leave the room immediately, get fresh air, and do not go back in until fumes have cleared.
- Always keep a window open or the exhaust fan running for the full clean — small bathrooms trap fumes quickly.
- Do not use steel wool, a dry pumice stone, or abrasive powder on porcelain — they scratch the glaze permanently, which then holds stains and bacteria more easily.
- Do not plunge or add more cleaner to a toilet that is actively overflowing — stop the water source first (see the clogged/overflowing branch).
- Wear rubber gloves for the entire clean, and wash your hands thoroughly when you are finished, even if gloves were worn throughout.
Tips
- Clean weekly if possible — a light weekly pass takes less time than fighting a mineral ring or heavy buildup every few weeks.
- Drop a small amount of cleaner in before bed and let it dwell overnight for a deeper clean with almost no extra effort.
- Keep a dedicated brush and holder per toilet if you have more than one bathroom — it avoids cross-contamination and saves a trip.
- A pumice stone is safe on porcelain when kept wet, but never on colored or textured fixtures — check the fixture's care instructions first.
- If odor returns quickly after cleaning, recheck the hinge gap and the floor around the base — those two spots are the most common repeat offenders.
FAQ
Can I use bleach instead of vinegar or a commercial cleaner?
Yes, bleach alone can be used in the bowl, but never combine it with vinegar, baking soda mixed with acid, or an ammonia-based cleaner. Flush thoroughly to clear any other product before adding bleach, and never add another chemistry on top of it.
How long should I let the cleaner sit before scrubbing?
About 10–15 minutes for vinegar or baking soda, and 5–10 minutes for most gel cleaners — check your product's label. Scrubbing too early is the most common reason a clean 'doesn't work.'
Why does my toilet still smell after I clean the bowl?
The hinges where the seat meets the tank, and the floor right around the base, are the two most commonly skipped spots. Wipe both in every session — see Steps 8 and 10.
What removes a stubborn ring at the waterline?
That is usually mineral scale, not dirt. See the hard-water ring branch: lower the water level, soak with vinegar or a citric-acid cleaner for 30–60 minutes, then scrub gently with a wet pumice stone.
The bowl isn't draining right — can I keep cleaning?
No — stop adding cleaner and flushing. Go to the clogged/overflowing branch: stop the water source, let the level settle, then plunge with a flange plunger before resuming the clean.
Comments
Questions, corrections, and what worked for you. Comments are reviewed before they appear.