How to Find IP Address
Find your computer’s local IPv4 address in Windows Settings, understand how it differs from your public IP, and optionally confirm with ipconfig. Read one step at a time. Start with preflight. Prefer Command Prompt? Windows ipconfig. On a phone? Phone IP. VPN weirdness? VPN mismatch.
Tips for reading this guide
- One step at a time. Read the green caption, the Why line, then the bullets.
- Move on when the green done line is true — then go to the next step.
- Local IP is for your home Wi‑Fi devices; public IP is what websites see.
- On a phone? Phone IP.
Things You'll Need
- Windows PC
- Wi-Fi or Ethernet connection
- Optional phone
- Optional web browser
Where are you stuck?
Follow Start here for Windows local IP. Jump for ipconfig, phone, or VPN issues.
Start hereSettings → adapter properties → IPv4 → local vs public
Preflight — Windows PC on Wi‑Fi or Ethernet; know whether you need local (home network) or public (internet) IP.
PC online · know local vs public goal.
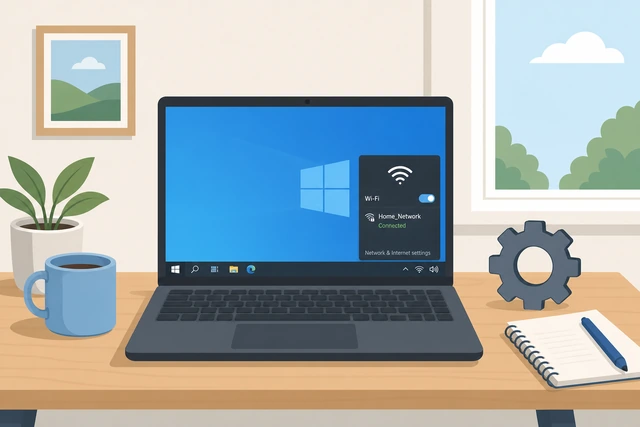
Local and public IPs solve different problems — mixing them wastes time.
- Connect to Wi‑Fi or Ethernet.
- Decide: printer/router setup needs local IP; “what’s my IP” websites show public IP.
- Have a note app ready to copy the number.
You are online and know which kind of IP you need.
Open Windows Settings, then Network & internet.
Settings → Network & internet.
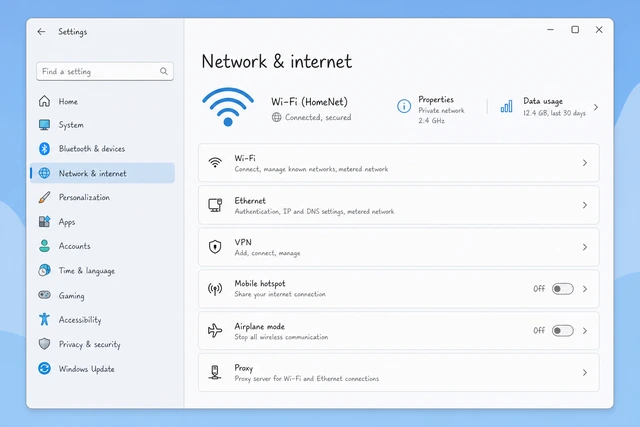
Network settings are where Windows stores the adapter’s addresses.
- Click Start → Settings (gear).
- Click Network & internet.
- Stay on this PC (not a phone settings page).
Network & internet settings are open.
Open Wi‑Fi (or Ethernet) and open the active connection’s properties.
Wi‑Fi or Ethernet → active connection properties.
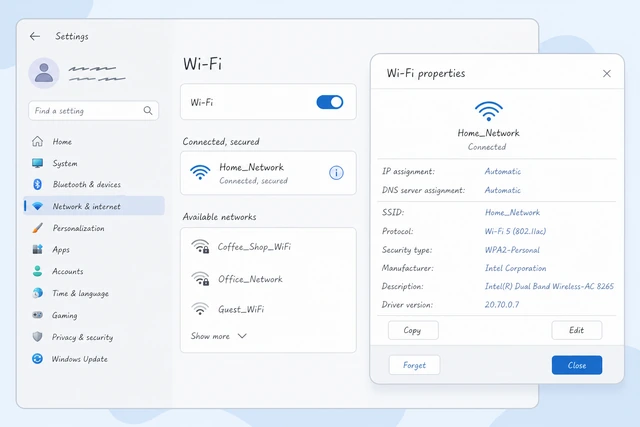
The active adapter is the one that actually has your LAN address.
- If on Wi‑Fi: click Wi‑Fi, then Hardware properties or the network name properties (wording varies by Windows version).
- If on Ethernet: click Ethernet, then the connection properties.
- Confirm the connection shows Connected.
You are viewing properties for the connected adapter.
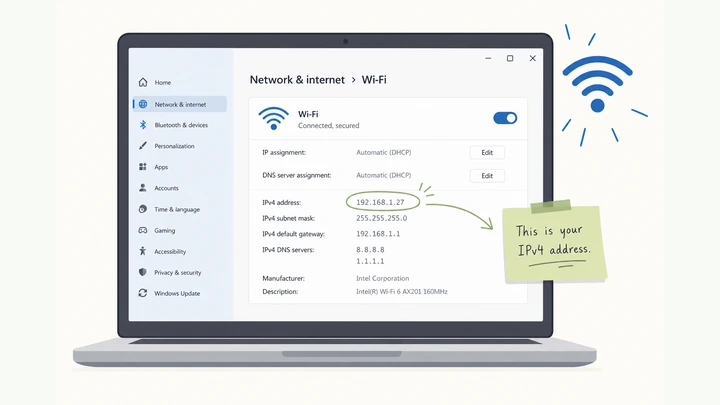
Find the IPv4 address — usually looks like 192.168.x.x or 10.x.x.x.
IPv4 address · often 192.168… or 10… · copy it.
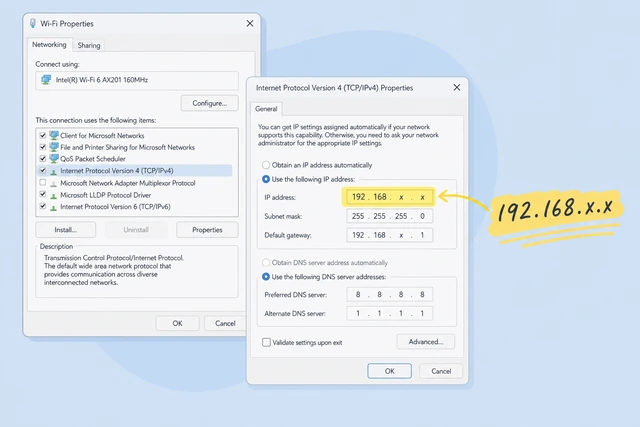
IPv4 is what most home routers, printers, and NAS devices expect.
- Scroll to IPv4 address.
- Copy the four-number address (example pattern 192.168.1.23).
- Ignore IPv6 for most home tasks unless a guide specifically asks for it.
You can read/write your local IPv4 address.
Note Default gateway if you need the router’s address.
Default gateway · usually your router’s LAN IP.
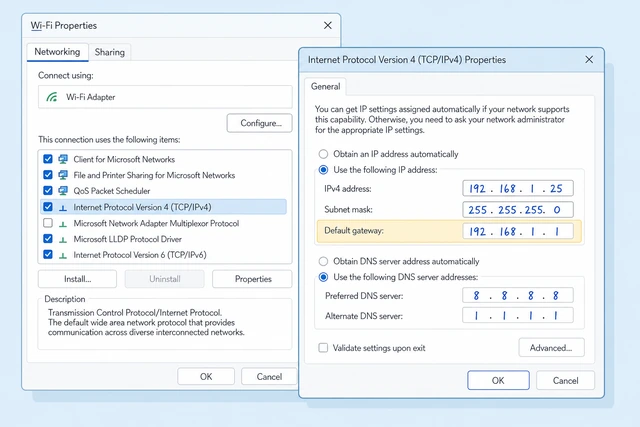
Router admin pages are reached via the gateway, not your PC’s own IP.
- Find Default gateway in the same properties list.
- It often looks similar to your IP but ends in .1.
- Save both IP and gateway if you are doing home networking.
You know the gateway address or confirmed you do not need it.
Remember: this local IP is not what websites see as your public IP.
Local IP = home network · Public IP = internet face.
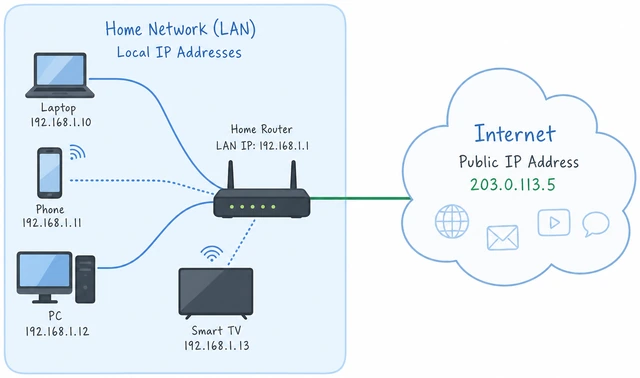
Giving a website your 192.168 address will not help them reach you from outside.
- Local IP is for devices on your Wi‑Fi.
- Public IP is assigned by your ISP to the whole home connection.
- Routers translate between them (NAT).
You can explain local vs public in one sentence.
Optional: check your public IP in a browser “what is my IP” page.
Browser what-is-my-ip · shows public address.
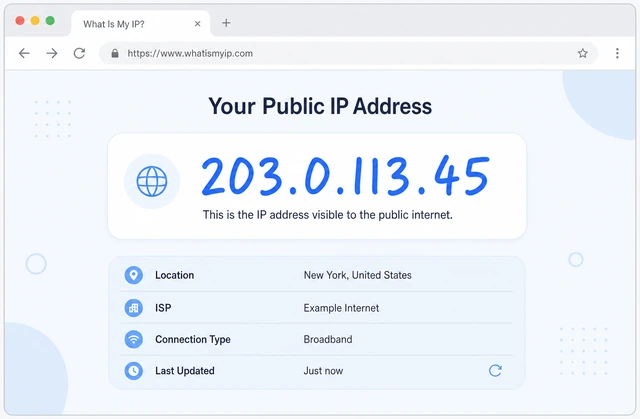
Public IP is useful for remote access setups and ISP troubleshooting.
- Open a reputable what-is-my-ip page in your browser.
- Copy the public IPv4 shown.
- Do not confuse it with the Settings local IP.
- Address looks wrong because of VPN? → VPN mismatch.
You have a public IP from a browser check, or you skipped because you only need local.
Optional: confirm with Command Prompt using ipconfig.
ipconfig · IPv4 Address under your adapter.
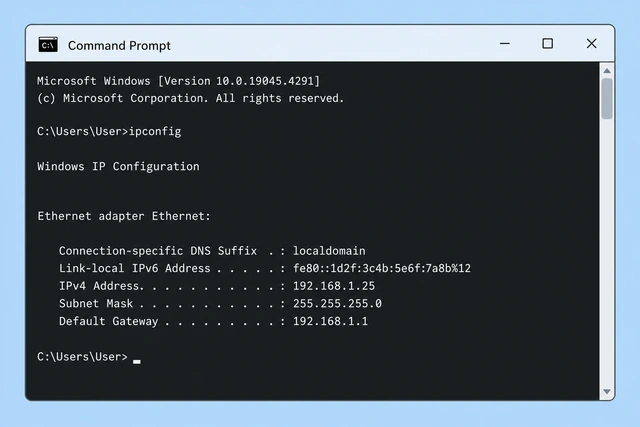
ipconfig is the classic double-check when Settings wording is confusing.
- Press Win+R, type cmd, Enter.
- Type ipconfig and press Enter.
- Find Wireless LAN or Ethernet adapter → IPv4 Address.
- Want more detail? → Windows ipconfig.
ipconfig shows the same local IPv4 (or you skipped this optional check).
Save the address for the task that needed it (printer, port forward, support ticket).
Paste into notes · label local or public · done.
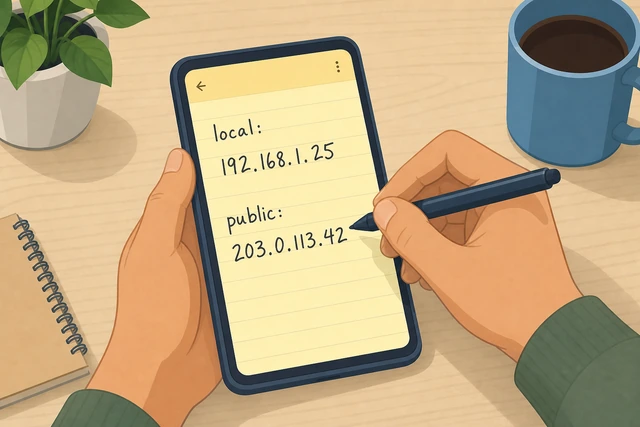
IPs can change after reconnect — label which one you copied and when.
- Paste into notes with a label: Local or Public.
- Add today’s date.
- On phones instead? → Phone IP.
The IP is saved and labeled for the job you needed it for.
Windows ipconfigYou prefer Command Prompt details
Open Command Prompt.
Open cmd · black terminal window.
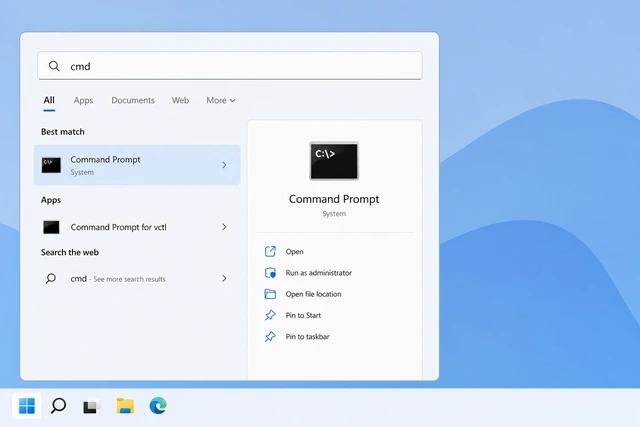
ipconfig only runs in a command shell.
- Win+R → cmd → Enter.
- Or search Command Prompt.
Command Prompt is open.
Run ipconfig.
Type ipconfig · Enter.
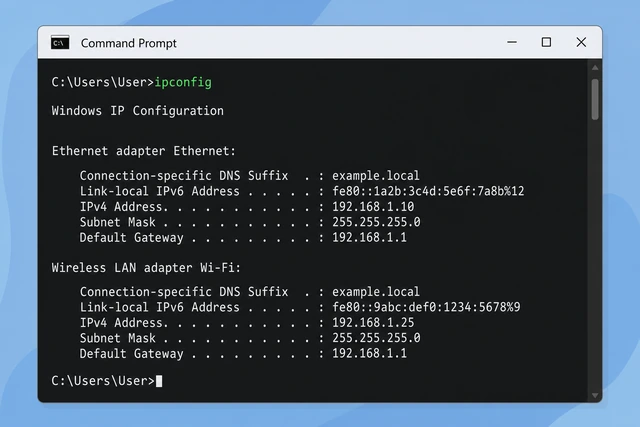
Basic listing shows IPv4 per adapter.
- Type ipconfig.
- Press Enter.
Output lists adapters.
Locate the active Wi‑Fi or Ethernet adapter block.
Find Wireless LAN or Ethernet · skip disconnected.
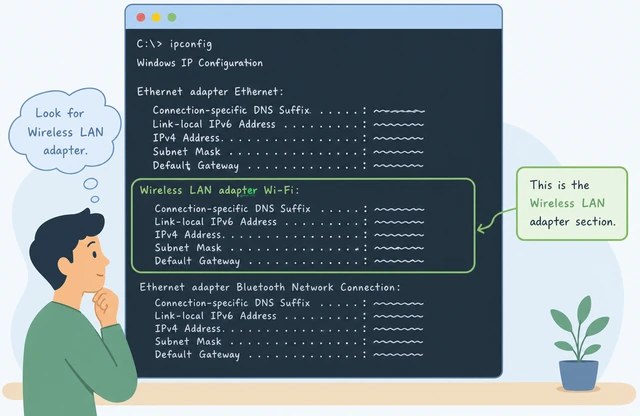
Disconnected adapters show media disconnected.
- Scroll to the connected adapter.
- Ignore Bluetooth/vEthernet unless that is your path.
You found the active adapter block.
Read IPv4 Address and Default Gateway.
Copy IPv4 · note Gateway.
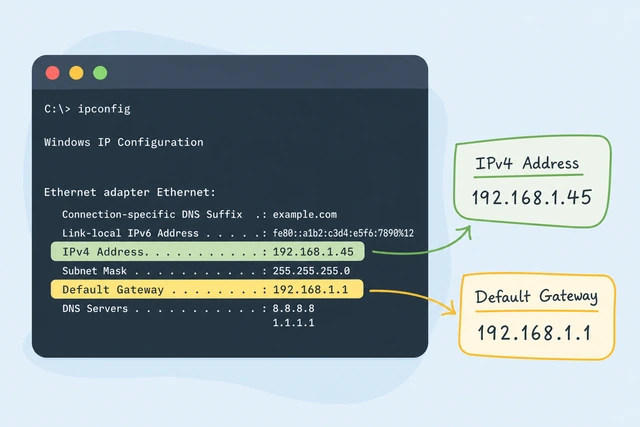
These two cover most home networking needs.
- Copy IPv4 Address.
- Note Default Gateway.
Both values are recorded.
Optional: ipconfig /all for DNS servers.
ipconfig /all · DNS lines appear.
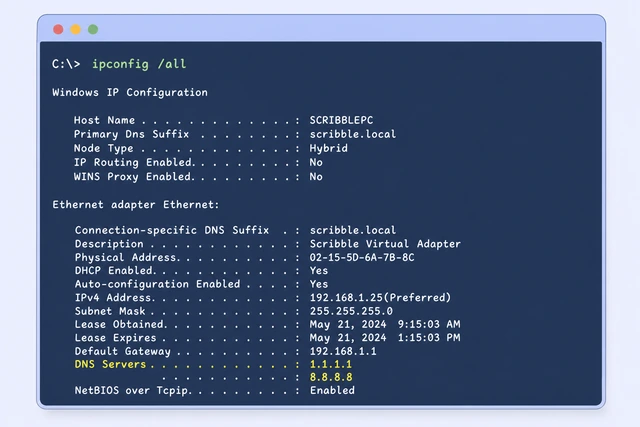
DNS details help when pages fail to resolve.
- Type ipconfig /all.
- Find DNS Servers under the adapter.
DNS info is available if needed.
Phone IPYou need the IP on iPhone or Android
Connect the phone to the same Wi‑Fi network.
Same Wi‑Fi · Connected.
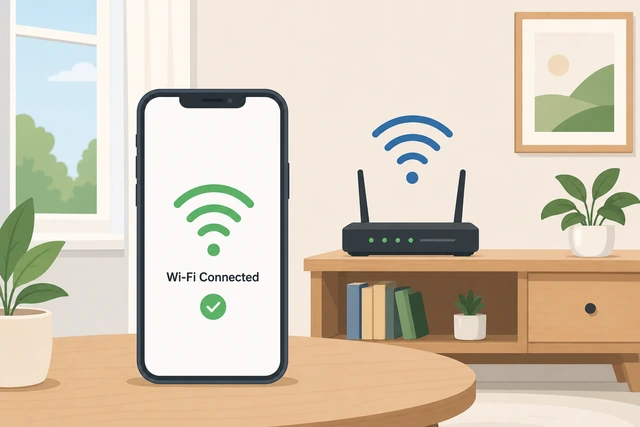
Cellular data IPs are not your home LAN address.
- Join the home Wi‑Fi.
- Confirm Wi‑Fi is on.
Phone is on the target Wi‑Fi.
iPhone: Settings → Wi‑Fi → tap the info (i) beside the network.
Wi‑Fi → (i) → IP Address.
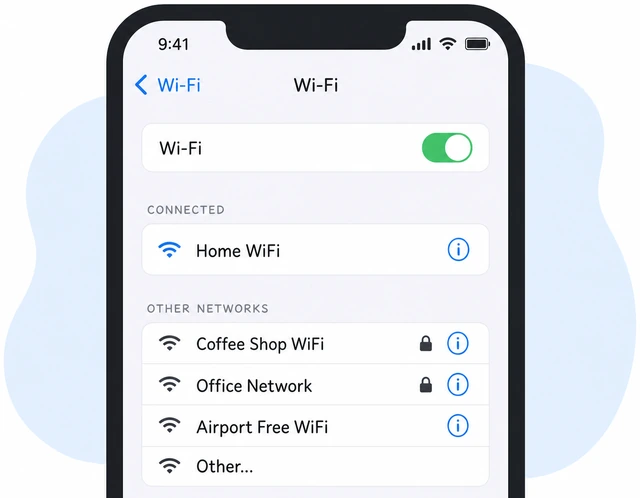
iOS hides IP behind the network info button.
- Open Settings → Wi‑Fi.
- Tap the i icon.
- Find IP Address.
iPhone shows the LAN IP (or skip if Android).
Android: Settings → Network & internet → Wi‑Fi → gear on the network → Advanced.
Network details → IP address.
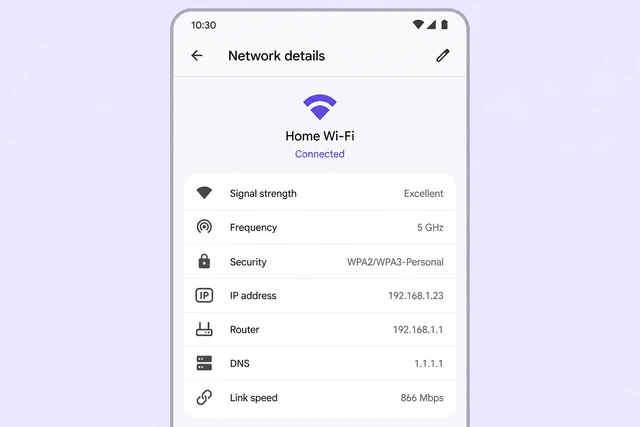
Android paths vary by maker but gear/details is common.
- Open Wi‑Fi settings.
- Open the connected network details.
- Find IP address.
Android shows the LAN IP (or you used iPhone).
Copy the IPv4-looking address for local device setup.
Copy local IP · label it phone.
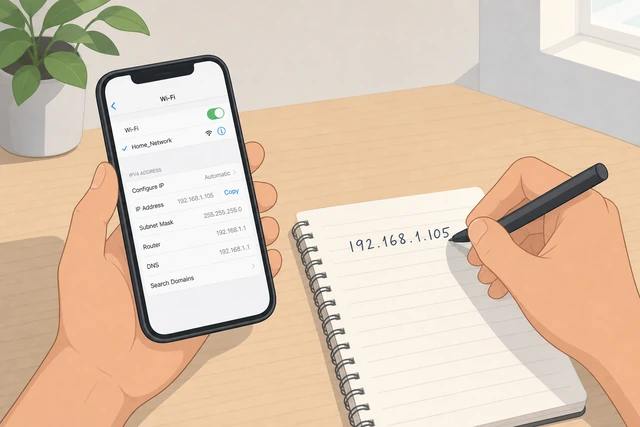
Phones also get DHCP leases that can change.
- Copy the address.
- Label phone + date in notes.
Phone local IP is saved.
For public IP on phone, use a browser what-is-my-ip page on cellular or Wi‑Fi as needed.
Browser public IP · note Wi‑Fi vs cellular differs.
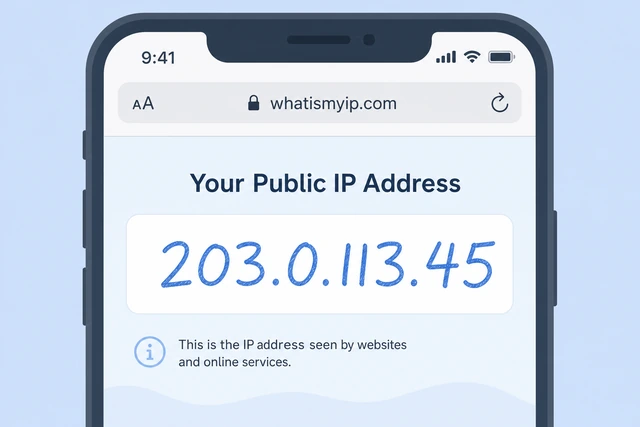
Cellular public IP is not your home ISP IP.
- Open a what-is-my-ip page.
- Note whether you are on Wi‑Fi or cellular.
Public IP context is clear.
VPN mismatchThe IP looks wrong or not on your home range
Check whether a VPN app is connected.
VPN connected? · that changes public and sometimes local routing.
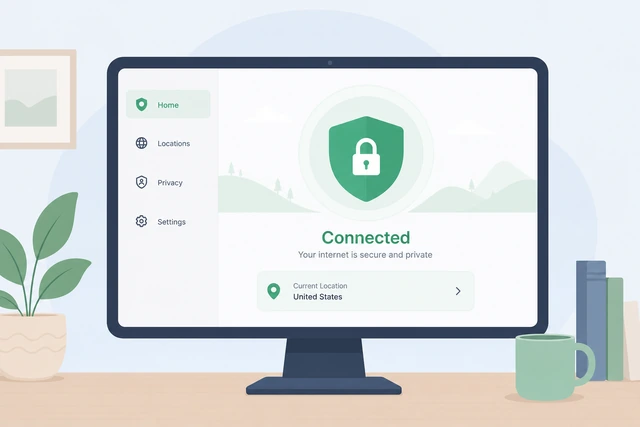
VPNs intentionally hide or reroute your address.
- Look for a VPN icon in the taskbar.
- Open the VPN app status.
You know if VPN is on.
Disconnect the VPN temporarily.
Disconnect VPN · recheck IPs.
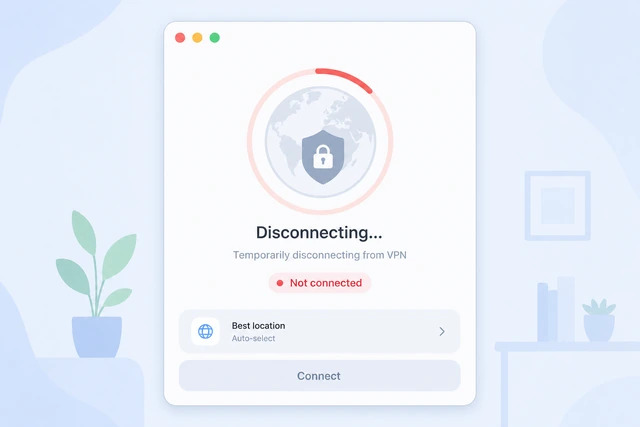
You need the real home path for local device setup.
- Disconnect.
- Confirm status shows Not connected.
VPN is disconnected.
Recheck local IP in Settings and public IP in a browser.
Recheck both · compare to before.
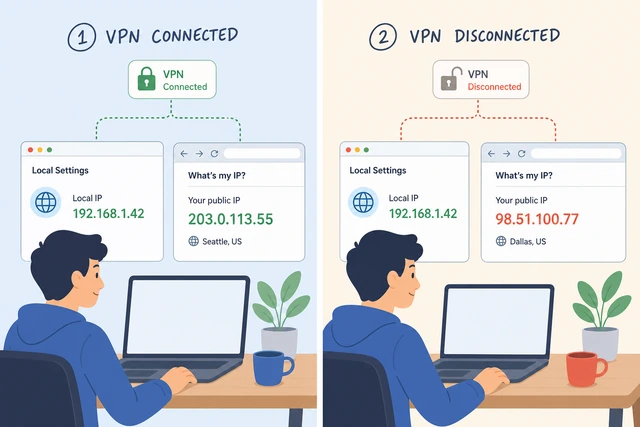
Addresses often snap back to ISP/home values.
- Refresh Settings properties.
- Refresh the what-is-my-ip page.
New addresses are recorded.
If you still need VPN for privacy, reconnect after you finish the local setup task.
Finish local task · then reconnect VPN.
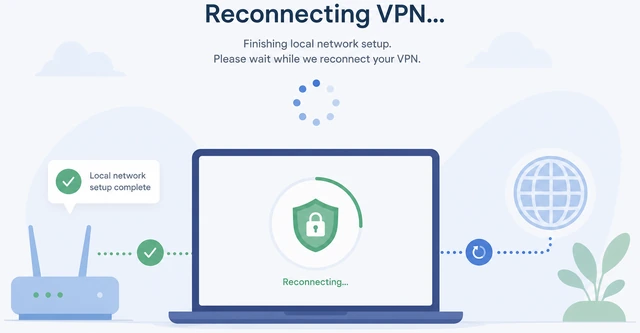
Leaving VPN off longer than needed is optional preference.
- Complete printer/router steps.
- Reconnect VPN.
VPN policy is intentional again.
Corporate VPN may force all traffic — ask IT if you cannot see home LAN devices.
Work VPN · ask IT · may block LAN discovery.
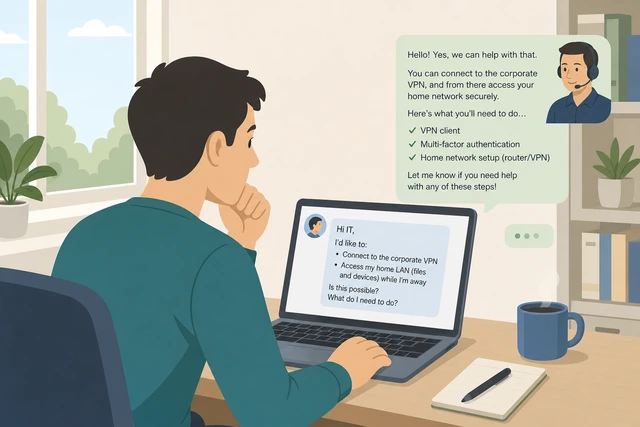
Some work VPNs isolate you from home printers on purpose.
- Contact IT.
- Ask about split tunneling if allowed.
You have an IT path if work VPN blocks LAN.
When to get help
- ISP outages or CGNAT inbound problems — contact your ISP.
- Work device policies — contact your IT admin before changing VPN settings.
When This Doesn't Work
- Mac. Use System Settings → Network instead — labels differ.
- No network connection. Connect first; there is no useful LAN IP offline.
- Carrier-grade NAT / CGNAT. Public IP may not accept inbound connections — ISP issue.
Warnings
- Do not post your full public IP in public forums with identifying home details.
- Do not disable security software casually to “fix networking.”
- Local 192.168 addresses are not reachable from the open internet by default.
Tips
- Screenshot the Settings properties page so you do not mistype digits.
- Home IPs often change after router reboot unless you set a reservation.
- For printer setup, you almost always want the printer’s local IP, not your public IP.
FAQ
Why does my IP start with 192.168?
That is a common private LAN range used inside homes. It is normal.
Which IP do I give tech support?
Ask which one they want. Device setup on your Wi‑Fi usually needs local; ISP tickets often want public.
What about IPv6?
Many home tasks still use IPv4. Use IPv6 only when a guide specifically asks for it.
Comments
Questions, corrections, and what worked for you. Comments are reviewed before they appear.