How to Set Up Two-Factor Authentication
Turn on Google 2-Step Verification with a phone authenticator app in about 15 minutes — install the app, scan the QR, save backup codes, then prove a full sign-in. Read one step at a time and finish each before the next. Start with the 30-second preflight. Codes rejected? See code rejected. Can't scan the QR? Use manual key. Already on but no backups? Use get backup codes. Other sites (Microsoft, GitHub, banks) use the same pattern: Security → 2FA → Authenticator → backup codes.
Tips for reading this guide
- One step at a time. Read the green caption, the Why line, then the bullets.
- Move on when the green done line is true — then go to the next step.
- 2FA / 2-Step means a password plus a second proof (usually a phone code).
- Authenticator is an app that shows a new 6-digit code about every 30 seconds — it does not need cell signal once set up.
- Codes rejected, can't scan the QR, or no backup codes? Jump to the matching branch below.
- Need a helper? Ask someone you trust to sit with you for Steps 6–8 so the QR scan and backup codes are not rushed.
Things You'll Need
- A smartphone you can unlock (iPhone or Android)
- Your Google email and password that work today
- Computer or phone browser for myaccount.google.com
- Official authenticator app: Google Authenticator, Microsoft Authenticator, or Authy (from App Store / Google Play only)
- Paper + pen, or a password manager, to store backup codes offline
- Quiet 10–15 minutes — do not rush the backup-codes step
Where are you stuck?
Follow Start here for a first-time setup. If codes fail, the QR will not scan, or you never saved backup codes, jump to the matching branch.
Start hereGoogle Account → authenticator app → backup codes → test login
30-second preflight — all five checks must be YES.
Phone unlocks · Google password works · store ready · paper or vault · 15 quiet minutes.
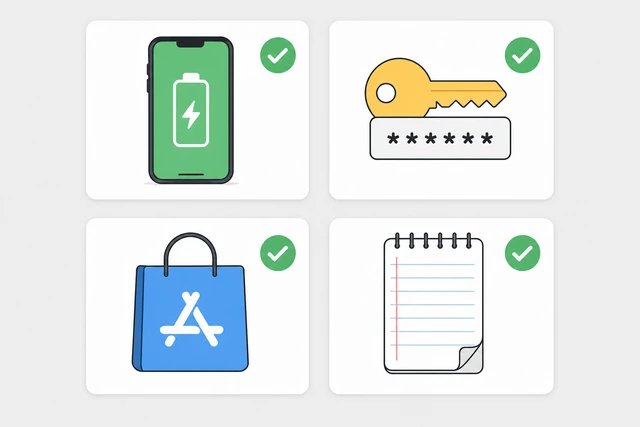
Setup can lock you out of your own account if the phone dies mid-wizard or you skip backup codes — checking first keeps a recovery path.
- Phone ready? Battery above ~20%, and you can unlock it yourself.
- Password works now? You know the Google password for the email you are protecting — reset it first if you are guessing.
- Official store only? You will install from Apple App Store or Google Play — not a random APK link.
- Backup storage? Have paper, a printed PDF, or an open password-manager vault ready before Google shows codes.
- Time? Block 10–15 minutes without multitasking.
All five checks are YES — you are ready to confirm a normal Google sign-in next.
All YES? Continue to Step 1.
Confirm you can sign in with your password alone.
Open Gmail or myaccount.google.com — inbox or account home must load.
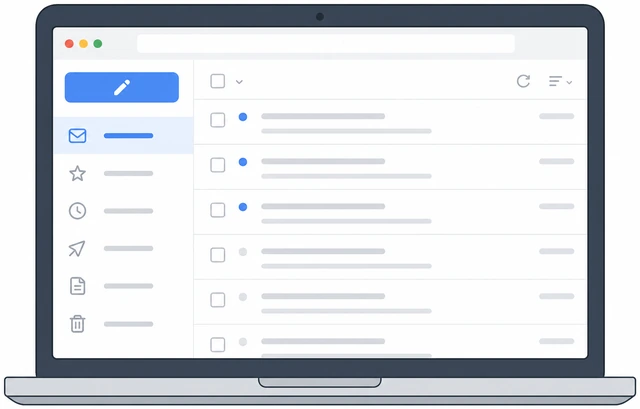
If password sign-in already fails, turning on 2FA multiplies the problem — fix password access first.
- On a computer or phone browser, go to gmail.com or myaccount.google.com.
- Sign in with the Google email you want to protect and your password.
- Stop when you see your inbox, or the Google Account home / Security page — not an error screen.
You are signed in and can see inbox or Google Account home without any second-step code yet.
Wrong password loop? Reset the Google password on a device you already trust, then return here.
Install an authenticator app from the official store.
App Store / Play → Google Authenticator (or Microsoft / Authy) → Install → Open.
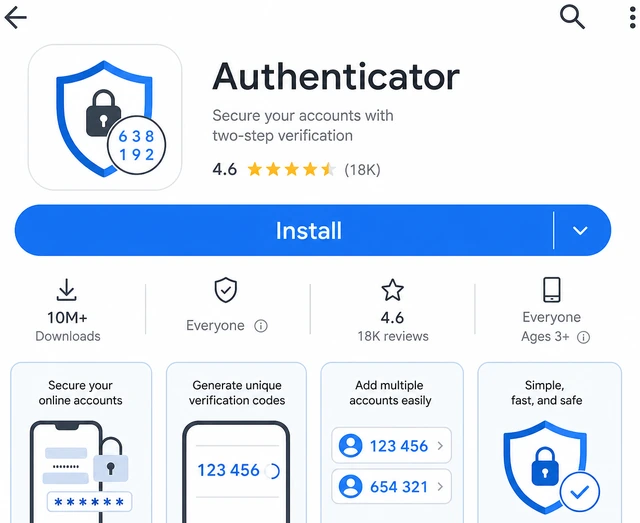
A real authenticator makes time-based codes offline; fake store listings can steal logins — stick to the named developer apps.
- Open the App Store (iPhone) or Google Play (Android).
- Search Google Authenticator, Microsoft Authenticator, or Authy — publisher should match the brand name.
- Tap Get / Install, wait until it finishes, then open the app once so it launches cleanly.
The authenticator app icon opens to its home screen (empty list is fine).
Already installed? Open it once and continue — skip the download.
Open Google Account Security → 2-Step Verification.
myaccount.google.com → Security → 2-Step Verification.
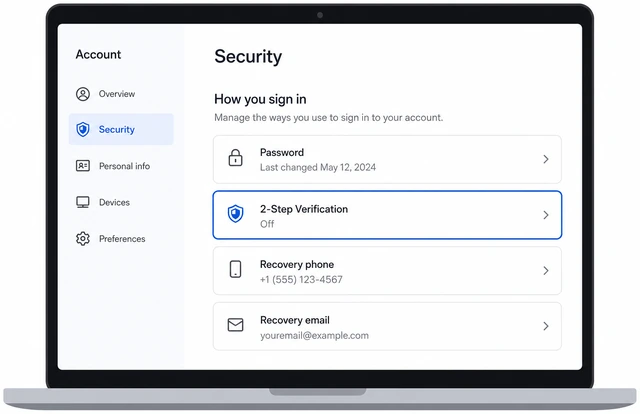
2-Step lives under Security — starting from the wrong menu is how people turn on SMS-only by accident or leave the page mid-flow.
- In the browser, go to https://myaccount.google.com/security (or Account → Security).
- Scroll to How you sign in to Google.
- Click or tap 2-Step Verification.
You see the 2-Step Verification page (Off/On status or a Get started button).
Start 2-Step Verification and pass Google's re-check.
Get started / Turn on → re-enter password or approve phone prompt.
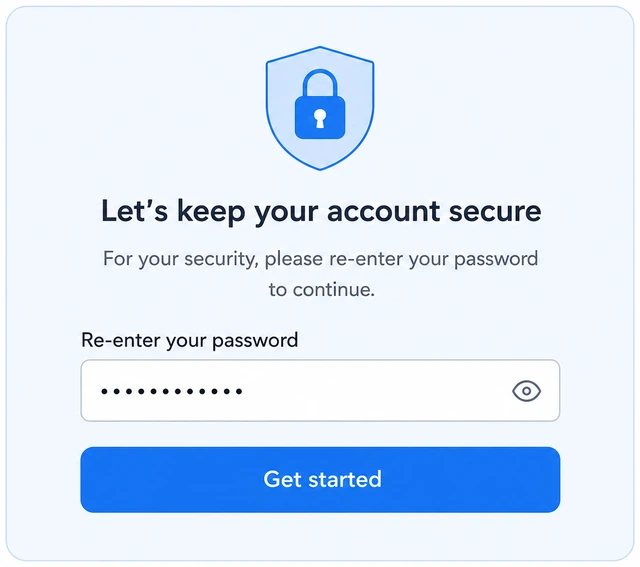
Google re-checks that it is really you before it can attach a second factor that later locks everyone else out.
- Tap Get started or Turn on 2-Step Verification.
- Re-enter your password, or tap Yes on a Google prompt on a signed-in phone.
- Follow prompts until you reach a screen that lists second-step options (phone, authenticator, etc.).
The setup wizard continues past the sign-in challenge — you are choosing or adding a second step.
Stuck on an old recovery phone you no longer have? Finish what you can with authenticator + backup codes, then update recovery options afterward.
Choose Authenticator app — not text-message as your only method.
Add authenticator app → Set up authenticator → show QR screen.
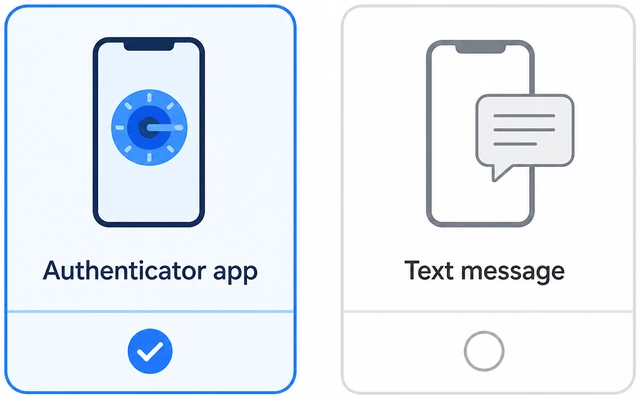
Authenticator codes work without cell service and resist SIM-swap better than SMS-only — treat text as backup, not the sole key.
- Look for Authenticator app and choose Set up / Add.
- If Google asks for SMS first, finish the minimum, then still add Authenticator.
- Stop when you see a QR code and a Can't scan it? link.
A QR code (or "Can't scan it?" secret) is visible on the Google setup screen.
Prefer SMS only for now? You can finish SMS, but return later to add Authenticator — SMS-only is weaker.
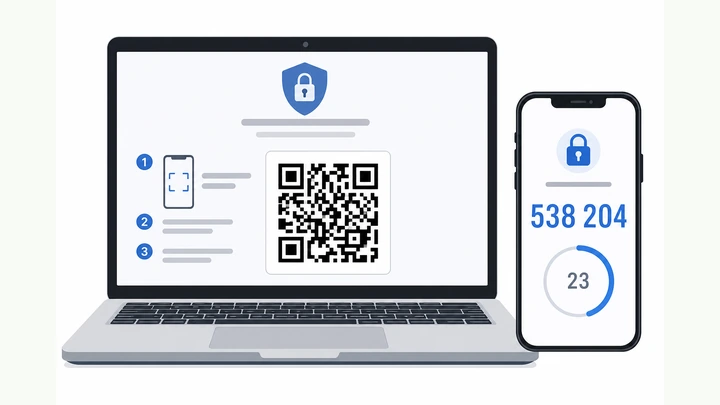
Add the account in your authenticator — scan the QR.
Authenticator + → Scan QR → label Google + your email → live 6 digits.
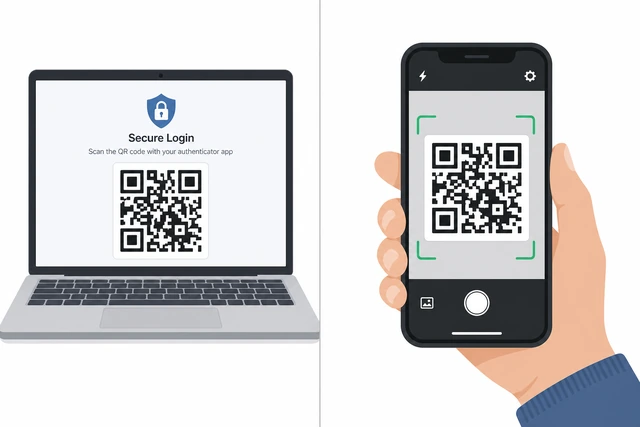
The QR copies a secret key into the app — after that, codes are generated on your phone without Google sending a text.
- Open authenticator → tap + → Scan a QR code.
- Point the camera at the Google QR until a new account row appears.
- Name it Google + your email; confirm a live 6-digit code shows.
Authenticator shows a new Google entry with a live 6-digit code.
Camera fails or QR too small? → Can't scan QR.
Enter the current 6-digit code into Google before it expires.
Type the digits now (no spaces) → Next / Verify.
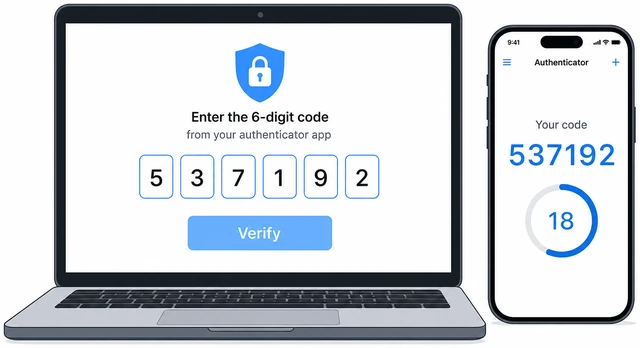
Google checks that the secret landed correctly — a matching code proves the app and account are paired before backup codes appear.
- Watch the progress ring or timer in the authenticator — if fewer than ~5 seconds remain, wait for the next code.
- Type the six digits into Google's box — numbers only, no spaces.
- Click Next / Verify immediately.
Google accepts the code and the wizard advances (no red "wrong code" error).
Code rejected? → Code rejected.
Save every backup code offline.
Show / Download / Print codes → store offline — each code is one-time.
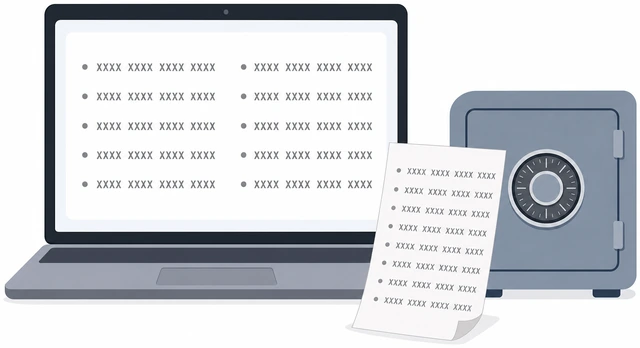
Backup codes are your spare keys when the phone is lost, wiped, or stolen — email drafts alone are easy to lose or phish.
- Open Backup codes → Show / Download / Print.
- Store all codes in a password manager or print them for a safe place at home.
- Do not keep them only as a screenshot on the same phone that can be lost.
You have a complete offline copy of the backup-code set (printout or vault), not just a glance at the screen.
Already had 2FA on with no codes saved? → No backup codes.
Add a backup phone number if Google offers it.
Add recovery / backup phone → verify SMS → or skip if codes are saved.
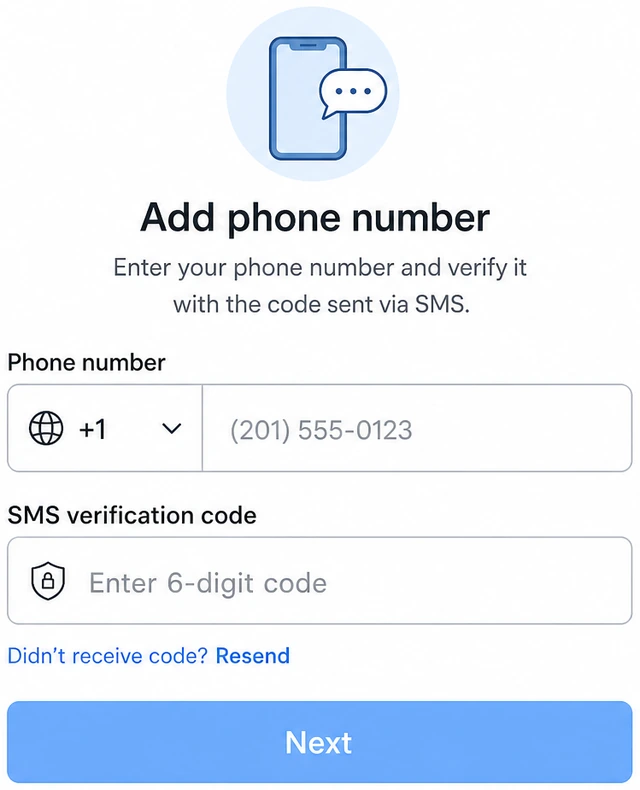
A second recovery path helps if authenticator and paper codes are both unavailable — still keep authenticator as primary day-to-day.
- If Google shows Add a phone number / backup phone, enter a number you control.
- Enter the SMS code Google sends to verify it.
- If you have no spare number, skip — but only after Step 8 backup codes are truly stored.
A verified backup number is listed, or you consciously skipped with backup codes already saved.
Confirm 2-Step Verification shows On.
Security → 2-Step Verification — status must read On / Turned on.
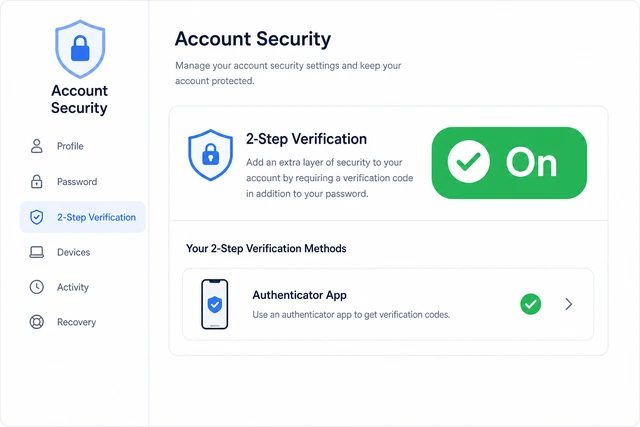
A finished wizard does not always mean the switch stuck — a quick status check catches a canceled or incomplete setup.
- Return to myaccount.google.com/security.
- Open 2-Step Verification again.
- Confirm the status says On (or Turned on), and Authenticator is listed under your second steps.
2-Step Verification status clearly shows On, with authenticator listed.
Sign out and sign back in with a fresh authenticator code.
Sign out or Incognito → password → fresh 6-digit code → inbox opens.
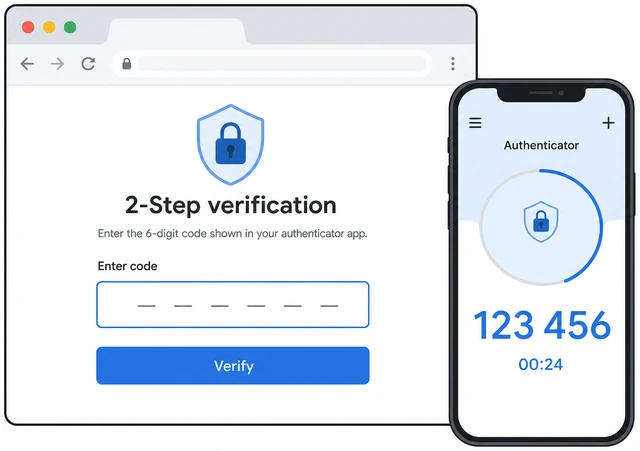
A deliberate test login proves the loop works while you still have the phone and backup codes in hand — not after you lock yourself out later.
- Sign out of Google, or open an Incognito / Private window.
- Sign in with email and password until Google asks for a second step.
- Open the authenticator, wait for a fresh code if needed, type it in, and finish sign-in.
You reached inbox or Account home using password + authenticator code (no backup code needed).
Code fails on login? → Code rejected. Phone unavailable? → No backup codes.
Code rejectedWrong code / invalid — fix time sync and account row
Use a fresh code — digits only, no spaces.
Wait for a new code if timer is low — type six digits only.
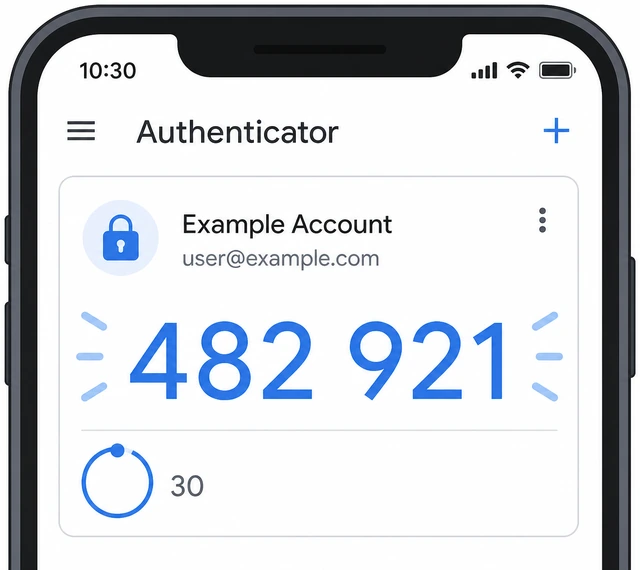
Codes expire about every 30 seconds; half-typed codes and clipboard leftovers are the most common "invalid" mistakes.
- If the authenticator timer is nearly empty, wait until the number changes.
- Type the new six digits with no spaces or dashes.
- Submit once — do not spam Submit with the same dying code.
You submitted one fresh six-digit code cleanly once.
Turn on automatic date and time on the phone.
Settings → Date & time → Set automatically ON → wait 30 sec → new code.
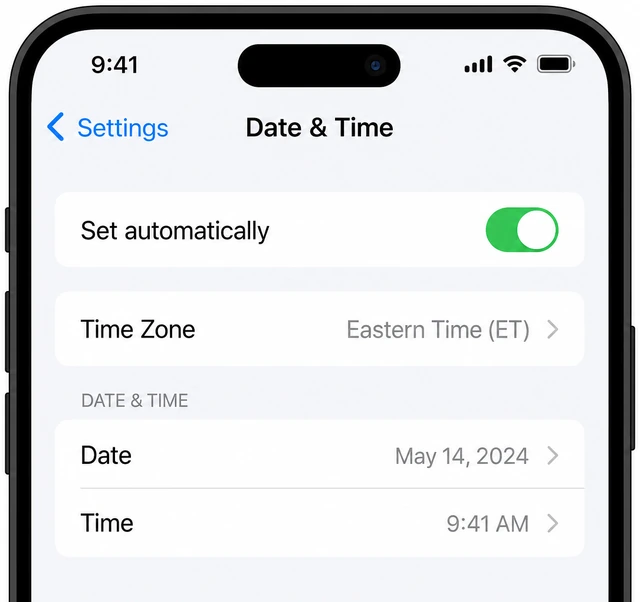
Authenticator codes are time-based — a phone clock set by hand (common after travel) drifts and every code fails.
- Open Settings → Date & time (or General → Date & Time).
- Turn Set automatically ON; wait about 30 seconds on Wi‑Fi or cell data.
- Open authenticator, take the next code, and try Google again.
Automatic time is ON and a new code was tried after the wait.
Confirm you are reading the Google row for this email.
Match the authenticator label to this Google email — not another account.
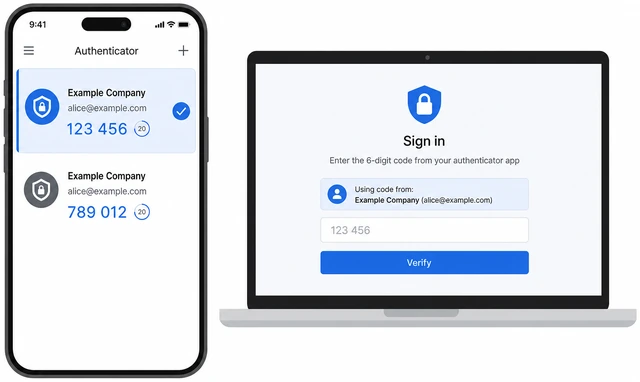
Multiple Google entries produce different codes — the wrong row looks valid but always fails.
- In the authenticator list, find the entry labeled with this Google email.
- If two look alike, open each label and compare to the email on the Google sign-in screen.
- Use that row's code only.
You entered a code from the authenticator row that matches this Google email.
Still fails after auto-time + two fresh codes from the right row? Mid-setup: cancel and restart Step 5. Already On: try a backup code, then Google Account recovery — do not burn every backup code in a panic loop.
Can't scan QRManual setup key instead of camera
Reveal Google's "Can't scan it?" secret key.
Can't scan it? → show long secret key on Google's page.
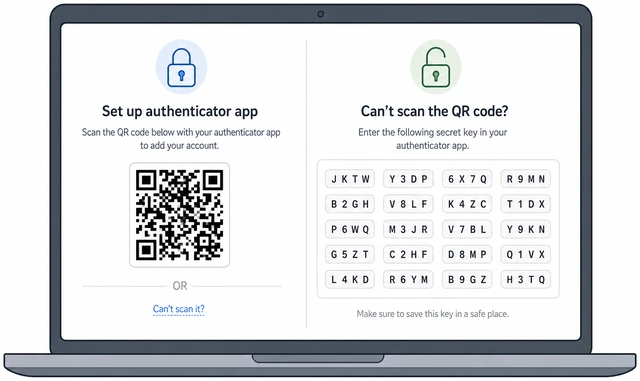
The secret key is the same data as the QR — typing it pairs the app when the camera path fails.
- On the Google authenticator setup page, click Can't scan it? (wording may vary slightly).
- A long secret key (letters and numbers) appears.
- Keep that tab open — you will type or paste the key into the phone next.
The secret key text is visible on Google's page.
Add the account with Enter a setup key / Manual entry.
Authenticator + → Enter key → paste secret → Time based → Add.
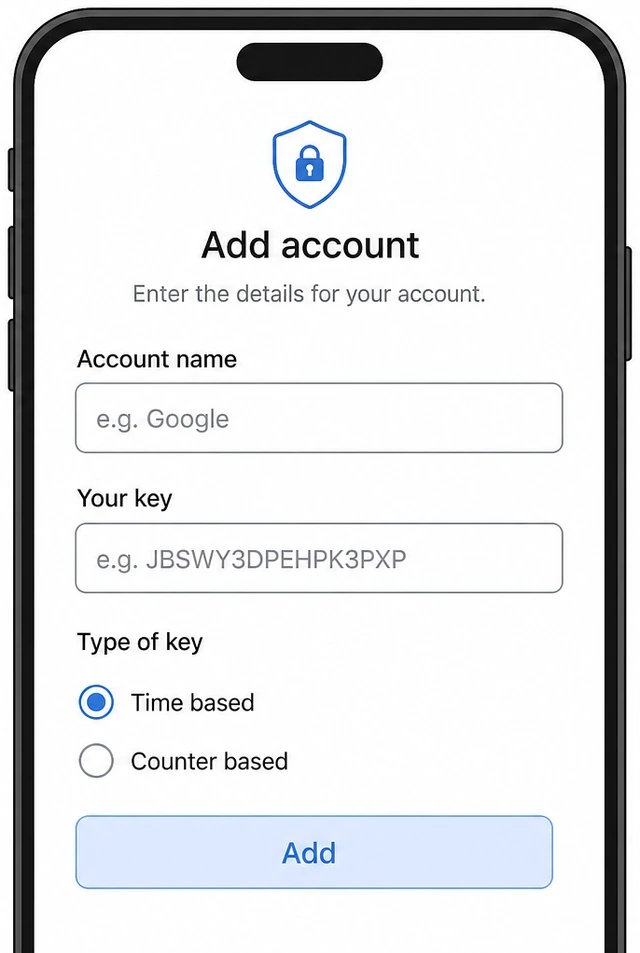
Manual entry avoids camera glare, cracked lenses, and browser zoom issues that block QR scans.
- In the authenticator, tap + → Enter a setup key / Manual entry.
- Name: Google + email. Key: paste the secret (watch O vs 0). Type: Time based.
- Tap Add/Save — then return to main-path Step 7 to confirm the code with Google.
A new row appears with a live 6-digit code — return to main-path Step 7 to confirm it with Google.
Mistyped twice? On Google, cancel and re-open authenticator setup for a fresh key, then enter once slowly.
No backup codesGenerate and store codes while you can still sign in
Sign in while you still have the phone.
Sign in with password + authenticator before the phone is gone.
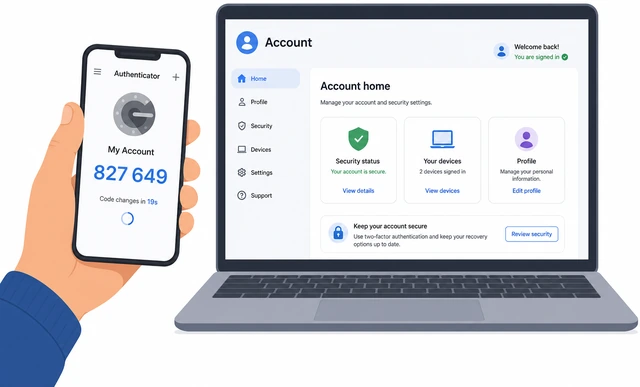
Backup codes can only be viewed when you are already inside the account — wait until after a phone wipe and you may need full account recovery.
- Open myaccount.google.com on a browser.
- Sign in with password and a working authenticator code.
- Do this before factory-resetting or selling the phone.
You are inside Google Account while signed in.
Cannot sign in at all? Use previously trusted devices, recovery email, or Google Account recovery — stop burning guesses.
Show or generate new backup codes and store them offline.
Security → 2-Step → Backup codes → Show / Get new → store offline.
New codes replace old ones — saving the current set offline is the recovery plan when authenticator entries disappear.
- Go to Security → 2-Step Verification → Backup codes.
- Tap Show codes or Get new codes if needed (getting new invalidates the previous set).
- Download, print, or copy into a password-manager vault; put paper somewhere safe.
You have a complete offline copy of the current backup-code set.
Each backup code works once. After using one at login, cross it off the printed list.
When to get help
- Ask a trusted person to sit with you for the QR scan and backup-code save (Steps 6–8).
- If you cannot sign in and have no backup codes, use Google Account recovery — do not keep guessing codes in a loop.
- For a work or school Google account, contact your IT admin — org rules may block personal authenticator apps.
When This Doesn't Work
- Old mail app or desktop client stops after 2FA. Some IMAP/SMTP apps need an App Password from Google Account → Security → App passwords (where offered). Prefer modern apps that support normal Google sign-in.
- Work or school Google account. Your admin may force a company method (security key, prompt only). Follow your org's instructions — this personal Google path may be locked.
- New phone wiped the authenticator. Use a backup code to get in, then reopen authenticator setup and remove the old method after the new phone is paired.
Warnings
- Do not finish setup without saving backup codes — a lost phone with no codes is a common lockout.
- Never share authenticator screenshots, secret keys, or backup codes in chat or email.
- Install authenticator apps only from the official App Store or Google Play — lookalike names are a known scam pattern.
- Do not set your phone clock manually if you rely on authenticator codes; keep automatic date and time on.
Tips
- After Google works, add authenticator 2FA on email, banking, and password-manager accounts the same way — always save that site's backup codes too.
- If your authenticator offers cloud backup or account transfer, turn it on before you switch phones.
- Print backup codes and store them with important papers — digital-only copies vanish when the laptop dies.
FAQ
Is an authenticator app better than text messages?
Yes for most people. Authenticator codes work without cell signal once set up and are harder to steal with a SIM swap. Keep SMS as a backup if you want, but do not rely on SMS alone.
Do I need internet on the phone to get codes?
Not after setup. Time-based authenticator codes are generated on the device. You only need internet on the device that is signing in to Google.
What if I lose my phone?
Sign in with a backup code from your printout or password manager, then remove the old authenticator and set up the new phone. If you have no backup codes, use Google Account recovery.
Comments
Questions, corrections, and what worked for you. Comments are reviewed before they appear.