How to Build a Simple Raised Garden Bed
Build a simple raised garden bed in about 3 hours by choosing a sunny, level site, cutting and pre-drilling a rot-resistant frame, checking it for square and level, then lining and filling it with a real soil mix. Read one step at a time. Start with the preflight. Site slopes or won't sit flat? See Unlevel site. Frame won't square up or a board bowed? See Warped frame. Soil sank or sinkholes formed after filling? See Soil settling.
Tips for reading this guide
- One step at a time. Read the green caption, the Why line, then the bullets.
- Move on when the green done line is true — then go to the next step.
- Square before level. Get the frame's diagonals to match before you worry about the site being perfectly level.
- Don't rush the fill. Watering between soil layers now prevents surprise sinkholes later.
- Site won't sit flat? See Unlevel site. Frame won't square up? See Warped frame. Soil sank after filling? See Soil settling.
- Need help? Ask someone to hold boards steady while you drive screws, or to help measure diagonals on a bigger frame.

Things You'll Need
- Untreated cedar, redwood, or fir boards (2x6 or 2x10) for the frame
- Four corner posts (4x4, cut to your bed's depth) or metal corner brackets
- 3-inch exterior/deck screws
- Drill/driver with a pilot-hole bit
- Circular saw or handsaw, if boards need cutting
- Tape measure and a carpenter's level
- Stakes and string line, for checking the site
- Cardboard (tape and staples removed) or landscape fabric
- Topsoil, compost, and perlite or vermiculite for the soil mix (roughly 60/30/10)
- Garden hose or watering can
- Work gloves
Where are you stuck?
Follow Start here to build the bed from scratch. Jump to a branch if your site, frame, or soil isn't cooperating.
- I need to build a raised garden bed from scratch Clear site · cut & pre-drill · assemble · square & level · line & fill
- My site isn't flat or the frame rocks Confirm slope · level the ground · re-set and backfill
- My frame won't sit square or a board bowed Measure diagonals · loosen · push square · brace and re-fasten
- The soil sank or sinkholes formed after filling Identify the cause · top off · tamp and water · check the barrier
Start hereClear site → cut & pre-drill → assemble → square & level → line & fill
Preflight — pick the site, decide dimensions, and gather materials and tools.
6+ hours of sun · level, root-free ground · dimensions chosen · materials gathered.
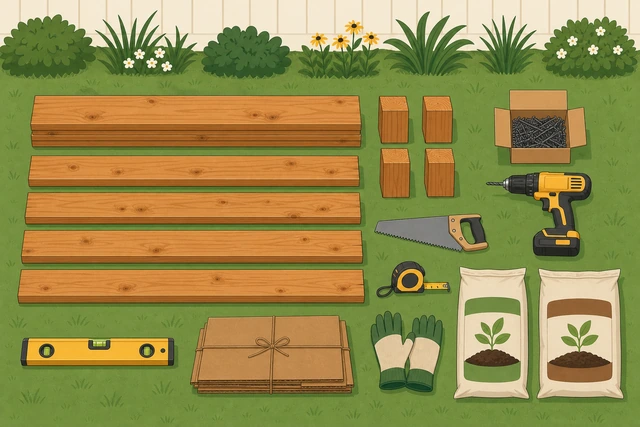
Picking the right site and deciding your dimensions before you cut a single board prevents the two most common regrets: a bed that struggles in shade or root competition, and a frame too wide to reach the center of.
- Choose a site with at least 6 hours of direct sun, reasonably level ground, and no large tree or shrub roots nearby.
- Decide your dimensions — a 4x8-foot bed at least 12 inches deep is a solid default, kept to 4 feet or less in width so you can reach the center from either side.
- Gather untreated cedar or fir boards, corner posts, exterior screws, a drill, saw, tape measure, level, cardboard or landscape fabric, and soil-mix ingredients.
The site is chosen, dimensions are decided, and all lumber, tools, and soil-mix materials are on hand.
Site slopes noticeably or you're unsure the ground is level? See Unlevel site.
Clear and prep the site footprint.
Remove grass, sod, weeds, and debris from the exact bed footprint.
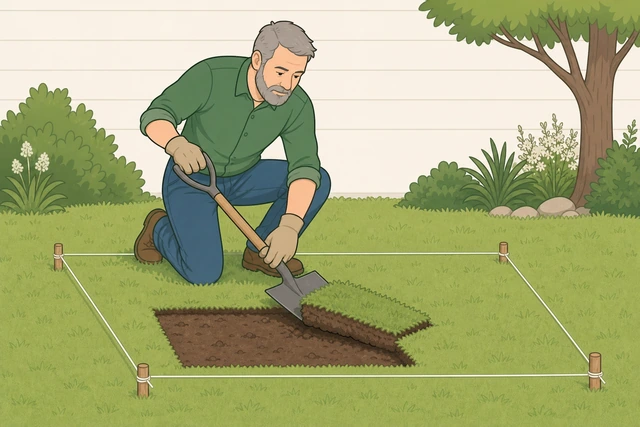
Grass and weeds left underneath will push up through any gaps and compete with your vegetables, and it's far easier to clear the ground now than after the frame and soil are in place.
- Mark the bed's footprint with stakes and string or a tape measure.
- Cut and remove sod or grass with a flat shovel or edger, or plan to smother it with cardboard in a later step.
- Rake the area to remove rocks, roots, and other debris.
The marked footprint is clear of grass, sod, rocks, and debris, or ready to be smothered with cardboard.
Measure and mark your cut list.
Mark every board and post with its exact cut length before cutting anything.
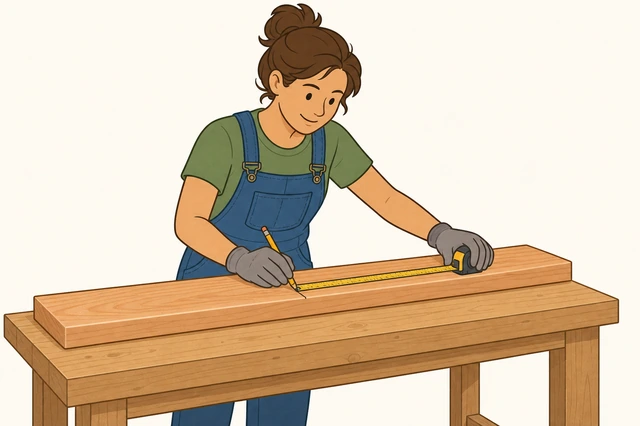
Marking every piece first prevents a common, expensive mistake — cutting a board short because you measured while cutting instead of before.
- Decide the finished outside dimensions (e.g., 4x8 feet) and depth (12 inches is a good default).
- Mark two long boards and two short boards, subtracting board thickness so the outside width comes out correct.
- Mark four corner posts at your chosen depth, such as 12 inches.
Every board and post has a clear pencil mark showing its exact cut length, matching your chosen dimensions.
Cut the boards and corner posts to length.
Cut each piece exactly on its mark with a circular saw or handsaw.
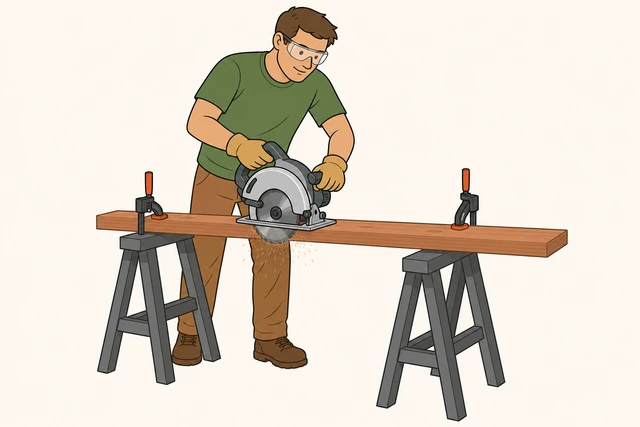
Cutting exactly on the marks now is what makes the frame's diagonals match later — even a half-inch of drift on one board throws the whole rectangle out of square.
- Clamp each board securely before cutting.
- Cut on the outside of your pencil line so the piece doesn't come out short.
- Cut all four corner posts to the same length so the frame sits level on all four corners.
All boards and posts are cut and match the lengths from your cut list.
Pre-drill pilot holes near each board end.
Drill two pilot holes near every end that will meet a corner post.
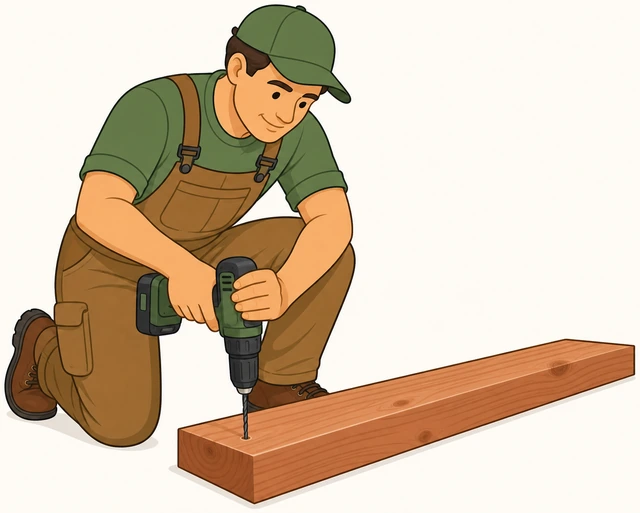
Cedar and fir end grain splits easily under a screw driven straight in, and a split board loses most of its holding strength right at the corner where you need it most.
- Use a drill bit slightly smaller than your screw's shank.
- Drill two pilot holes near each end of every long and short board.
- Keep holes about 3/4 inch from the board edge to avoid splitting.
Two pilot holes are drilled near each end of every board before any screw is driven.
Assemble the first long side onto two corner posts.
Screw one long board to a corner post at each end, flush top and bottom.
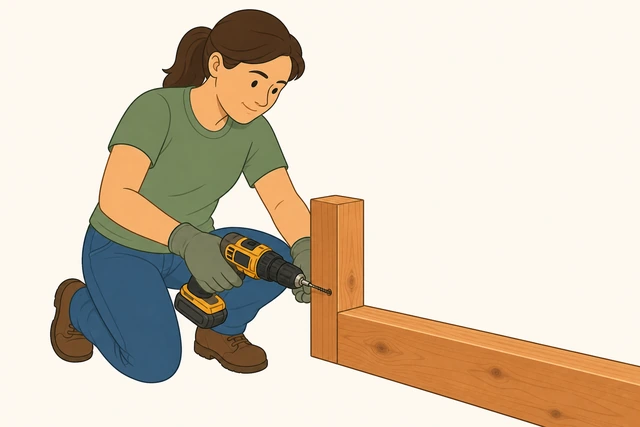
Building each side flat on the ground first is easier and more accurate than trying to hold three loose boards and a post together in midair.
- Lay one long board flat and stand a corner post at each end, flush with the top edge and one face.
- Drive screws through the pre-drilled holes into the post at each end.
- Check that each post sits flush with both the top edge and the outside face of the board.
One long board is solidly screwed to a corner post at each end, both posts flush with the board's top edge.
Assemble the second long side the same way.
Repeat the same post-and-board assembly for the other long side.
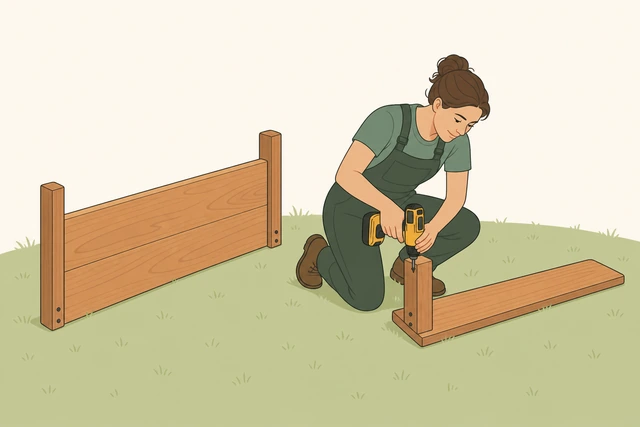
Building both long sides the same way keeps the finished frame symmetrical, so the short end boards will line up evenly when you close the rectangle.
- Lay the second long board flat and attach a corner post at each end the same way as the first.
- Match the post orientation to the first side so the frame will close correctly.
- Set both completed long sides aside, ready to stand up.
The second long board is solidly attached to its own two corner posts, matching the first side.
Stand the long sides up and attach the short ends.
Stand both long sides on edge and screw the short boards between the posts.
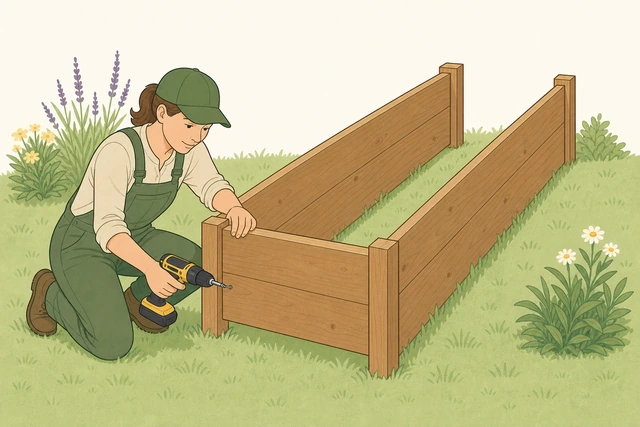
This is the step that actually turns two separate side panels into one connected rectangle, so every screw here carries real structural weight.
- Stand both long sides up on their edge, posts facing inward, roughly 4 feet apart.
- Fit one short board between the posts at one end, flush with the top, and drive screws through the pre-drilled holes.
- Repeat at the other end with the second short board.
All four corners are screwed together and the frame stands on its own as one connected rectangle.
Frame feels loose, twisted, or won't sit flat? See Warped frame.
Check the frame for square by measuring both diagonals.
Measure corner-to-corner in both directions and compare.
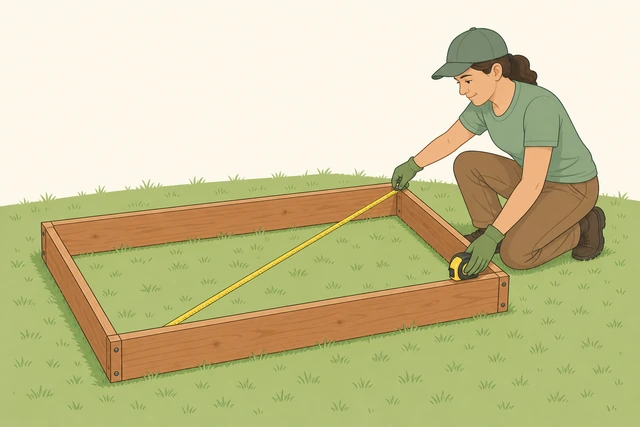
Equal diagonals are the only reliable way to confirm a rectangle is actually square — eyeballing the corners can look fine while the frame is really a parallelogram.
- Measure from one corner diagonally to the opposite corner.
- Measure the other diagonal the same way.
- Compare the two numbers — they should match within about 1/4 inch.
Both diagonal measurements match within about 1/4 inch.
Diagonals don't match, or the frame feels twisted or bowed? See Warped frame.
Move the frame to its final spot and check level.
Set the frame in place and check a level on all four sides.
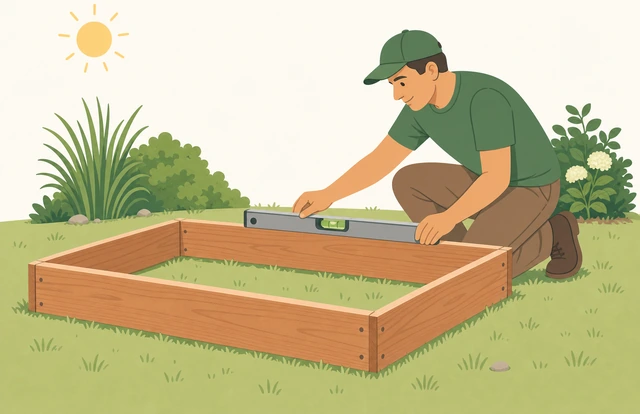
A frame that's level keeps water spread evenly across the soil instead of pooling against one wall, which is what makes that wall rot faster than the rest.
- Carry or slide the frame onto its prepared site.
- Place a carpenter's level along the front, back, and both end boards.
- Note which side, if any, reads low.
A level reads level on all four sides, or you know exactly which side needs adjusting.
Site slopes, or the frame rocks/shows a gap underneath on one side? See Unlevel site.
Line the bottom with cardboard or landscape fabric.
Lay overlapping cardboard, tape and staples removed, or landscape fabric across the bottom.
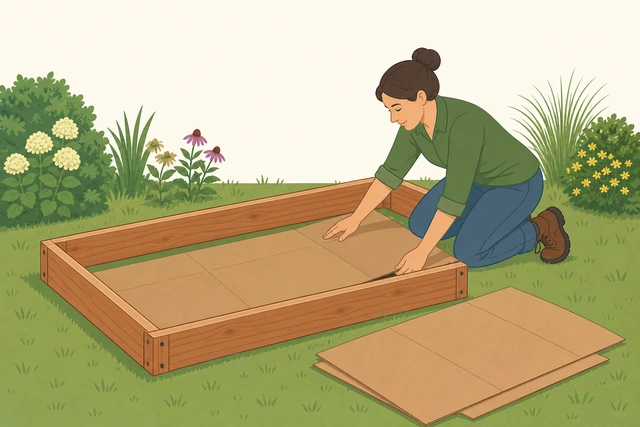
A solid weed barrier now blocks existing grass and weeds from growing up into your new soil, saving you from pulling the same weeds all summer.
- Lay flattened cardboard so pieces overlap by several inches, or roll out landscape fabric to cover the footprint.
- Remove all tape and packing labels from cardboard — they don't decompose.
- Let the edges run slightly up the inside walls or a few inches past the frame.
The entire bottom footprint is covered with no gaps, and all tape or staples are removed from any cardboard used.
Fill the bed in layers, watering between each layer.
Add soil mix a few inches at a time, watering lightly between layers.
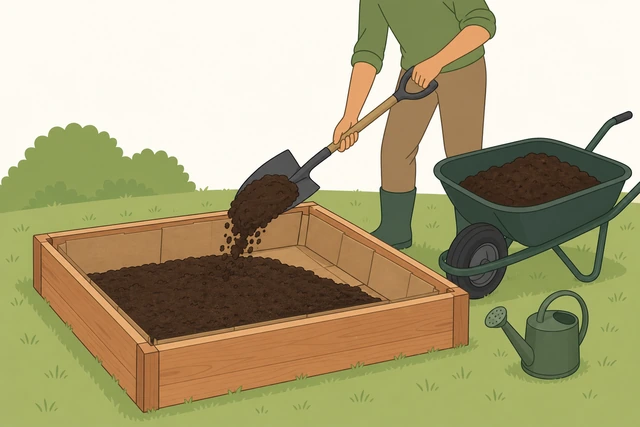
Filling all at once traps dry air pockets that collapse later, while watering between layers settles the mix now instead of leaving you with sudden sinkholes after planting.
- Mix or layer topsoil, compost, and a smaller amount of perlite or vermiculite, roughly 60/30/10.
- Add the mix in layers about 4 to 6 inches deep at a time.
- Water each layer lightly before adding the next.
The bed is filled to near the top in even layers, with each layer dampened before the next was added.
Water the entire bed thoroughly once full.
Soak the whole surface evenly with a hose or watering can.
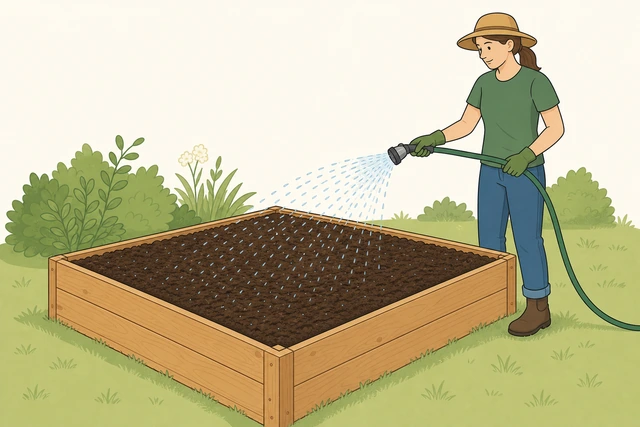
A full, even watering now reveals any dry spots or fast-draining corners while you can still easily add more soil to fix them.
- Water slowly across the entire surface, not just the center.
- Watch for water running off the top instead of soaking in, which means you're going too fast.
- Check corners and edges, which often dry out or drain faster than the middle.
Water soaks in evenly across the whole surface without pooling on top or running off the sides.
Top off settled soil and leave a rim gap.
Refill any low spots and stop about 1 inch below the top edge.
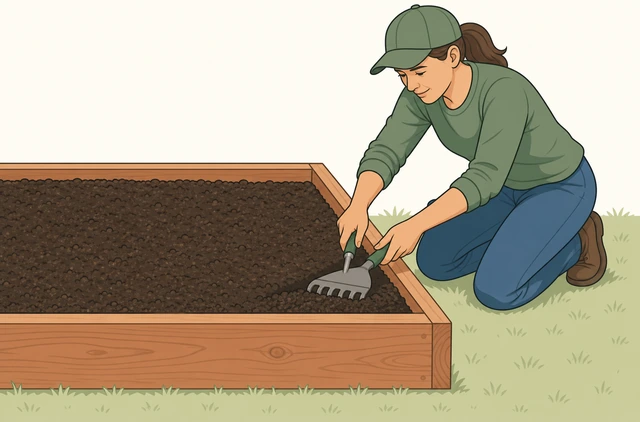
Leaving a small gap below the rim keeps mulch and soil from washing over the edge during heavy rain, and it's easier to add a little more soil now than to dig out overfilled soil later.
- Check the surface for low spots, especially near corners and edges.
- Add more soil mix to bring the surface level.
- Stop filling about 1 inch below the top edge of the frame.
Soil sits roughly 1 inch below the top edge across the whole surface, with no visible low spots.
Soil keeps sinking or a sinkhole reopens after this? See Soil settling.
Do a final check before planting.
Confirm the frame is level, square, and filled evenly before you plant.
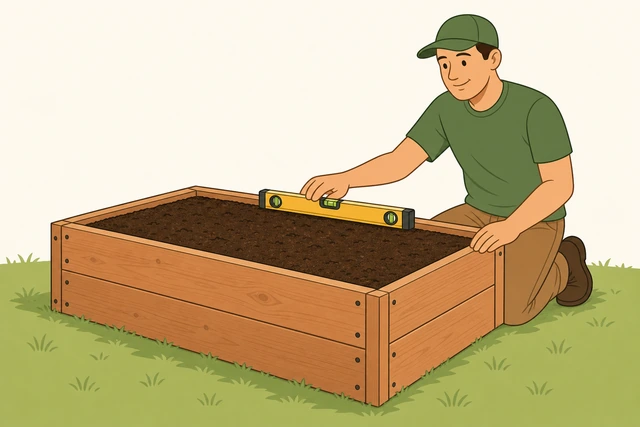
A quick final check catches anything you'd rather fix now, before roots are in the ground, instead of after.
- Recheck the level on all four sides.
- Look across the soil surface for any remaining low spots or gaps at the edges.
- Confirm the frame still feels solid at each corner with no rocking.
The bed reads level, the frame feels solid at every corner, and the soil surface is even and ready to plant.
Unlevel siteGround slopes, or the frame rocks or gaps once placed
Confirm the slope direction and amount.
Use a level or a string line to measure how much the ground drops.
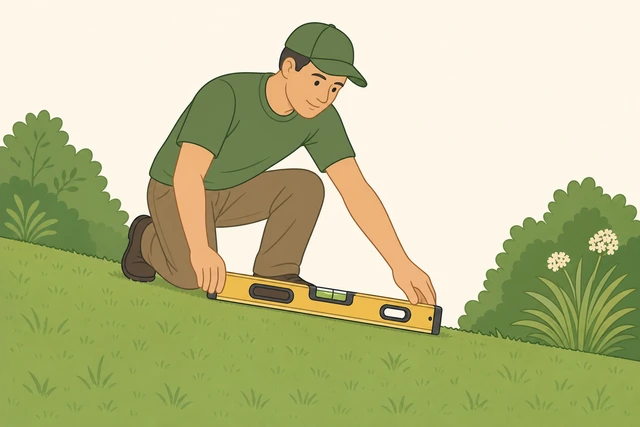
Knowing exactly how much and which direction the ground slopes tells you whether shimming will work or the site needs a different fix entirely.
- Place a level across the site in both directions.
- If it isn't level, note which end reads low and estimate the gap in inches.
- For a clearer read, stretch a string line between two stakes and measure the drop underneath.
You know which side is low and roughly how many inches it drops.
Choose a leveling method for the site.
Decide whether to dig down on the high side or build up the low side.

Digging into the high side keeps the frame's top edge lower and more stable, while building up the low side is faster but needs the extra soil packed firmly so it won't wash away.
- For a small drop, dig out soil on the high side until the ground is close to level.
- For a bigger drop, build up the low side with compacted soil or a base of gravel or pavers instead.
- Match your choice to how much drop you measured in the previous step.
You've chosen and started one leveling method, matched to the amount of slope measured.
Re-set the frame and recheck level on all four sides.
Place the frame back down and check the level again on each side.
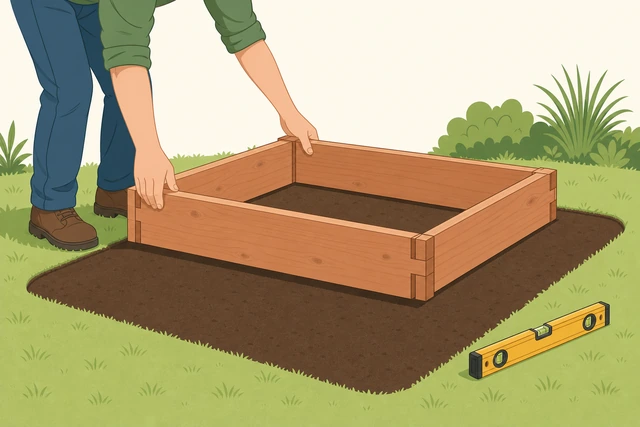
Rechecking after adjusting the ground is the only way to confirm the fix actually worked, instead of assuming it did.
- Set the frame back onto the adjusted ground.
- Check the level along the front, back, and both ends again.
- Repeat the adjustment if any side still reads off.
The level reads level, or very close, on all four sides of the reset frame.
Backfill any remaining gap under the low side.
Pack soil firmly under any edge that still has a gap beneath it.
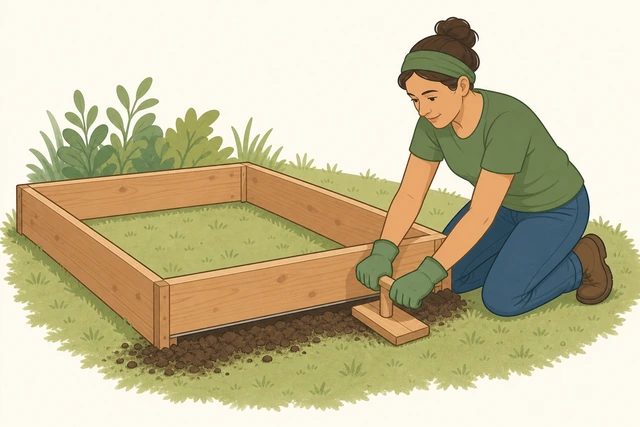
An unsupported gap under one wall lets that section flex under the weight of wet soil, which can crack a joint or tip the frame over time.
- Check under each edge for daylight or gaps between the frame and the ground.
- Pack soil firmly into any gap with a hand tamper or the end of a scrap board.
- Recheck that the frame doesn't rock when you press down on each corner.
No visible gap remains under any edge, and the frame doesn't rock when pressed at any corner.
Recheck for rocking before filling with soil.
Press down on each corner one more time to confirm the frame sits solid.
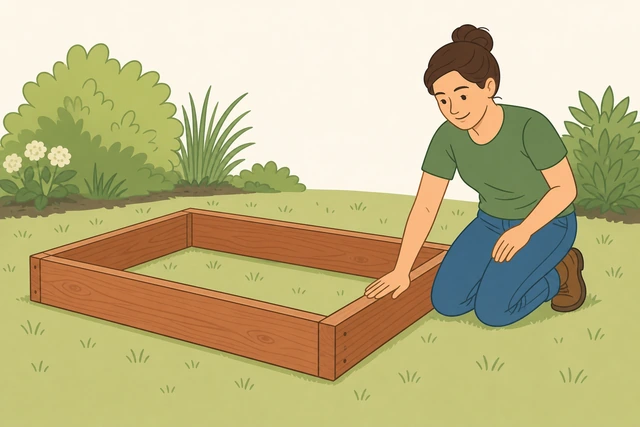
Confirming stability now, before you add hundreds of pounds of soil, is much easier than trying to re-level a full bed later.
- Press firmly on each of the four corners in turn.
- Watch and listen for any rocking or shifting.
- Fix any remaining gap before moving on to lining and filling the bed.
The frame sits solid with no rocking at any corner, ready for lining and filling.
Slope drops more than about 6-8 inches across the bed's length? Consider a stepped or tiered bed, or a different site, instead of shimming this steep a grade.
Warped frameDiagonals don't match, a corner isn't square, or a board bows
Re-measure both diagonals to confirm the rack.
Measure corner-to-corner in both directions again and note the difference.
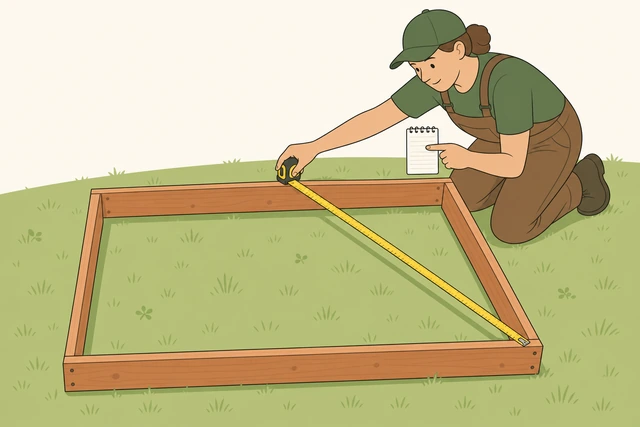
Knowing exactly how far off the diagonals are tells you whether a simple push will fix it or a board needs to be swapped out.
- Measure the first diagonal corner-to-corner.
- Measure the second diagonal the same way.
- Write down the difference between the two measurements.
You have both diagonal measurements written down and know the exact difference between them.
Loosen the screws at one corner if the rack is significant.
Back out the screws at one corner enough to let the frame shift.
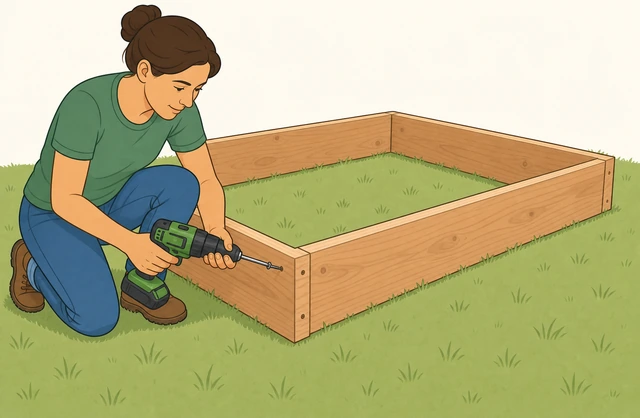
A fully screwed frame resists being pushed square, so loosening one corner gives the wood room to move without forcing or cracking a joint.
- Choose the corner that seems most out of alignment.
- Back the screws out partway, not all the way, so the joint can still hold loosely.
- Leave the other three corners fully fastened as anchors.
One corner's screws are loosened enough that the frame can shift slightly at that joint.
Push the frame corner-to-corner until diagonals match.
Push or pull on opposite corners until both diagonal measurements are equal.
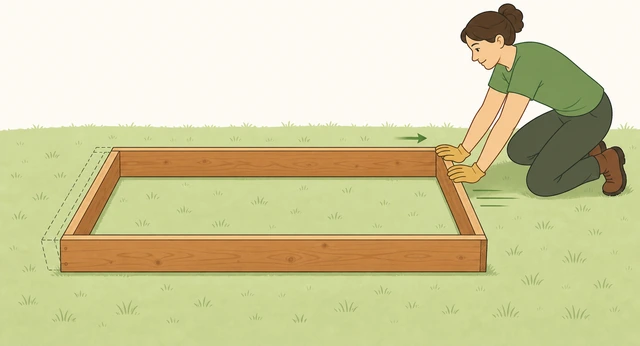
Pushing the frame toward the longer diagonal squares it up geometrically — this is the actual mechanical fix, not just a visual adjustment.
- Push on one pair of opposite corners while a helper measures the diagonals.
- Continue adjusting until both diagonals match within about 1/4 inch.
- Hold the position once they match instead of releasing it.
Both diagonals now match within about 1/4 inch while you hold the frame in position.
Brace the frame square before re-fastening.
Clamp or brace the frame in this position so it can't shift back.
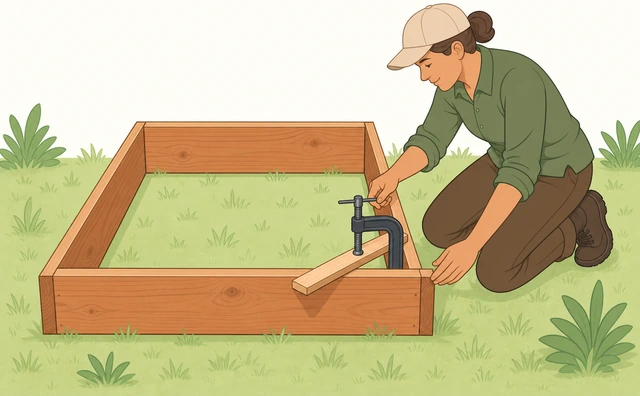
The frame will spring back out of square the moment you let go unless something holds it in place while you re-drive the screws.
- Clamp a scrap board diagonally across the corner you loosened, or have a helper hold the position.
- Confirm the diagonals still match with the brace in place.
- Keep the brace on until the next step is finished.
The frame is held square by a clamp, brace, or helper, and the diagonals still match.
Re-drive the screws and add a second fastener at that joint.
Tighten the loosened screws and add one more screw or a corner bracket.
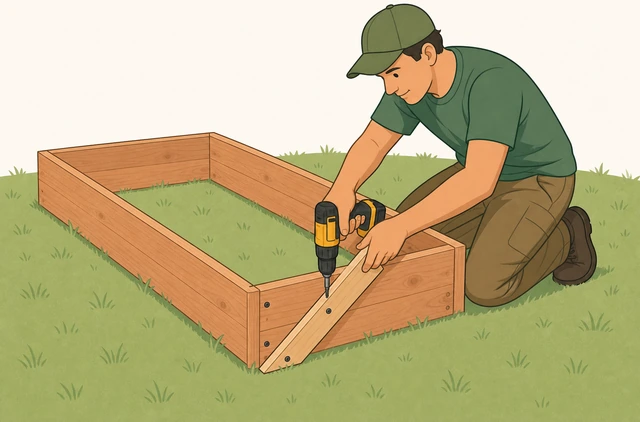
A joint that already racked once benefits from extra holding power, so a second screw or a bracket keeps it from working loose again under soil pressure.
- Re-drive the original screws fully at the loosened corner.
- Add one more screw through a new pilot hole, or attach a corner bracket for extra rigidity.
- Remove the temporary brace or clamp.
The loosened corner is re-fastened with an added screw or bracket, and the brace has been removed.
Recheck diagonals one final time.
Measure both diagonals again now that bracing is removed.
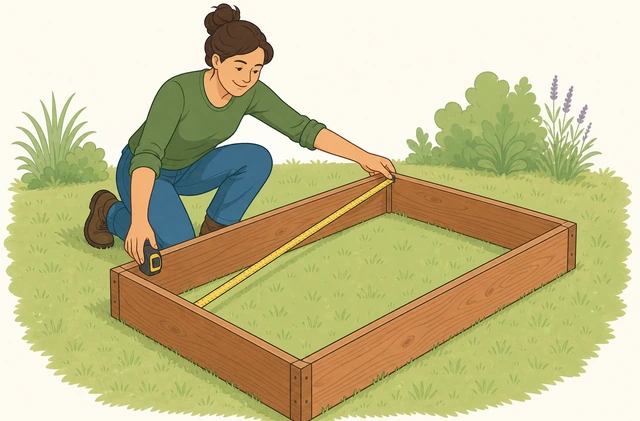
A last check with the brace off confirms the fix held on its own, instead of only while something was propping it square.
- Measure both diagonals once more with no clamp or brace in place.
- Confirm they still match within about 1/4 inch.
- If they've drifted again, repeat the push-and-brace steps before moving on.
Both diagonals still match within about 1/4 inch with no brace holding the frame.
A board itself is visibly warped or bows outward, not just the joint? Replace that board instead of continuing to force it — a bowed board keeps pulling the frame out of square.
Soil settlingSoil sinks or sinkholes appear after filling and watering
Identify the likely cause of the sinking.
Look at where and how the soil sank to narrow down the cause.
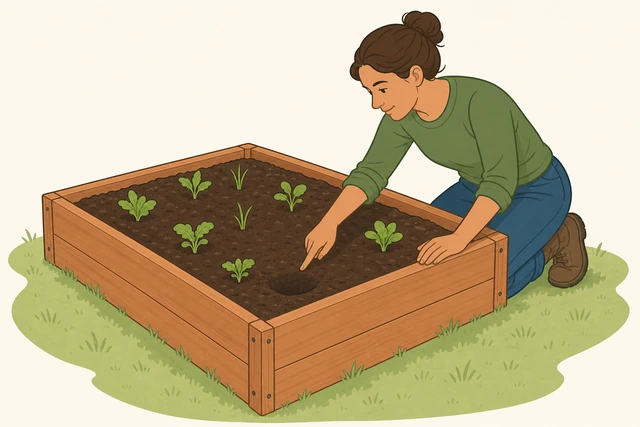
The fix is different depending on the cause — a general sunken surface usually means decomposition or dry pockets, while a sinkhole at one exact spot often means soil is escaping underneath.
- Note whether the sinking is spread evenly across the surface or concentrated in one spot.
- Check if it appeared slowly over weeks (likely decomposition) or suddenly (likely a void or escaping soil).
- Look at corners and edges first, since gaps in the weed barrier usually show up there.
You've identified whether the sinking is general settling or a localized sinkhole, and roughly why.
Top off low spots with more soil mix.
Add fresh soil mix to bring sunken areas back level with the rest.
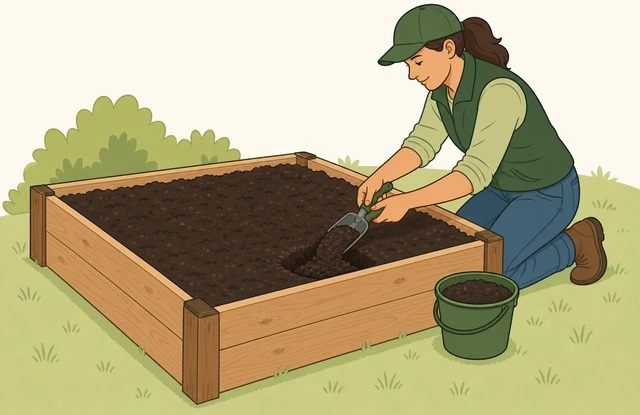
Topping off restores an even root zone and rooting depth for whatever you've planted or are about to plant.
- Mix a small batch of the same topsoil/compost/aeration blend used originally.
- Fill the low spot until it's level with the surrounding surface.
- Feather the edges so there's no sharp step between old and new soil.
Low spots are filled back to level with the surrounding soil surface.
Gently tamp and water again to resettle.
Firm the new soil lightly and water it in.
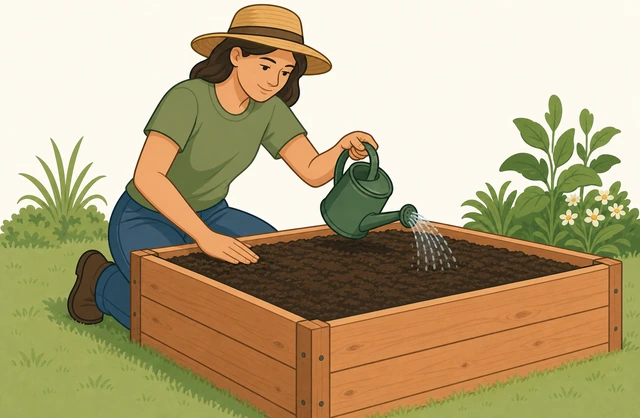
A light tamp and a good watering now settle the fresh soil the same way the original fill settled, so it doesn't just sink again in a few days.
- Press the new soil down gently with your hand or a light tamper — don't compact it hard.
- Water the topped-off area slowly until it's evenly damp.
- Let it sit a day and recheck the level.
The topped-off soil is lightly firmed, watered evenly, and holds its level after a day.
Check for a gap in the weed barrier at the edges.
Look under the edges for cardboard or fabric that has shifted or torn.
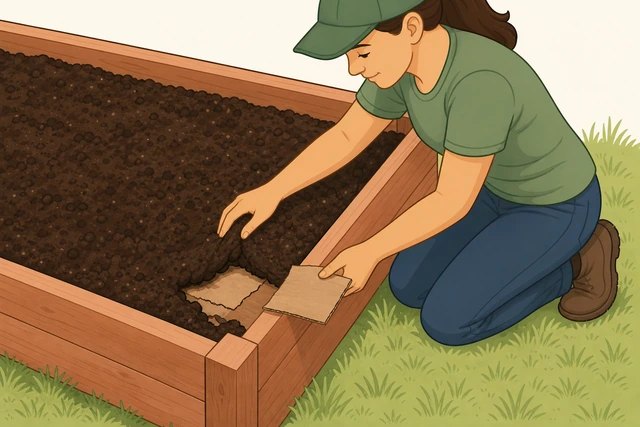
A gap in the weed barrier lets fine soil particles wash down into the ground underneath, which is a common cause of a sinkhole that keeps reappearing at one spot.
- Gently pull back soil near any recurring sinkhole to check the barrier underneath.
- Look for a tear, gap, or shifted seam in the cardboard or fabric.
- Patch the gap with an extra piece of cardboard or fabric before refilling.
Any gap in the weed barrier under a recurring sinkhole has been found and patched, or you've confirmed the barrier is intact.
Monitor over the next couple of weeks.
Check the surface again after a week, and plan a follow-up top-off.
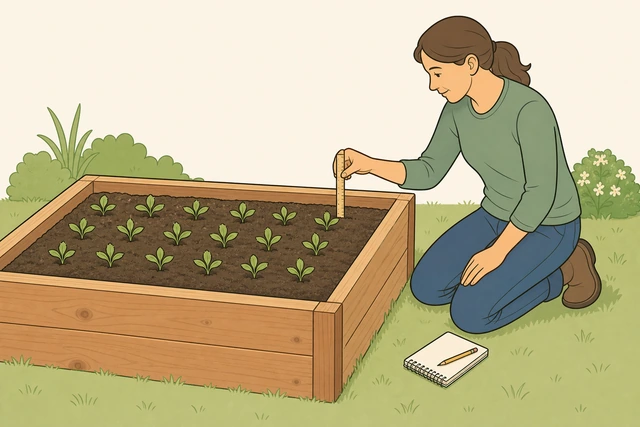
Raised bed soil commonly needs a second top-off after the first month as organic matter continues to break down, so one check isn't always the end of it.
- Check the surface level again about a week after topping off.
- Note any spots that are sinking again versus holding steady.
- Plan on one more top-off around the one-month mark, which is normal.
You've rechecked the surface after about a week and know which spots, if any, still need attention.
The same sinkhole keeps reopening in one exact spot? Check for a rodent burrow or a drainage gap under the frame at that location.
When to get help
- Ask someone to hold boards steady while you drive screws, or to help measure diagonals on a bigger frame.
- Slope drops more than about 6-8 inches across the bed's length? Consider a stepped or tiered bed, or a different site.
- A board itself is visibly warped or bows outward? Replace that board instead of continuing to force it.
- The same sinkhole keeps reopening in one exact spot? Check for a rodent burrow or a drainage gap under the frame.
- Any site with buried utility lines close to the surface should be checked with a local utility locator before digging.
When This Doesn't Work
- Very rocky or heavily rooted ground you can't clear by hand. Consider a slightly different spot, or build the frame taller and skip deep excavation, relying more on the fill depth.
- HOA or lease restrictions on permanent structures. Check local rules before building — some communities restrict raised beds or require them to be removable.
- Extremely small or oddly shaped yards. Scale the dimensions down (a 3x6 or 2x4 bed uses the same steps) rather than forcing a full 4x8 footprint.
- Beds wider than 4 feet. A center brace and stepping stones are needed for reach and support; consider two narrower beds instead.
Warnings
- Avoid older pressure-treated (CCA) lumber for beds growing edible plants. Use untreated cedar, redwood, or fir instead.
- Wear gloves and eye protection when cutting lumber and driving screws.
- Check for buried utility lines before digging into the site, even for shallow leveling.
- Never fill with plain bagged garden soil or straight yard topsoil alone — both drain poorly in a raised bed.
- Keep the finished bed's width at 4 feet or less so you can always reach the center without stepping on the soil.
Tips
- Buying bulk topsoil and compost by the cubic yard is significantly cheaper than bagged soil for a bed this size.
- A center brace across the middle of each long side keeps 2x lumber from bowing outward once it's under wet soil pressure.
- Corner brackets aren't required if your screwed corners are solid, but they speed up assembly and add rigidity on longer beds.
- Plan on a second soil top-off about a month in — this is normal, not a sign you did something wrong.
- Cedar's natural rot resistance means it can last 15-20 years without chemical treatment, well worth the extra cost over pine.
FAQ
What size should a beginner's raised bed be?
A 4x8-foot bed at least 12 inches deep is a common, forgiving default. Keeping the width at 4 feet or less lets you reach the center from either long side without stepping on the soil.
Do I need to use cedar, or can I use cheaper lumber?
Cedar, redwood, and fir all resist rot naturally without chemical treatment, which matters most for a bed growing food. Pine is cheaper but breaks down faster; avoid older pressure-treated lumber for edible beds.
Can I skip the cardboard or landscape fabric layer?
You can, but existing grass and weeds will likely grow up through the new soil if you do. A cardboard or fabric barrier is a small extra step that saves a lot of weeding later.
How much soil do I need for a 4x8 bed?
At 12 inches deep, a 4x8 bed needs roughly 32 cubic feet of fill. Buying topsoil and compost in bulk (by the cubic yard) is usually much cheaper than buying enough bags.
Why did my soil sink so much after I filled the bed?
Some settling is normal as air pockets close and organic matter breaks down. See the soil settling branch for how to top off and check for a bigger cause if it keeps happening in the same spot.



Comments
Questions, corrections, and what worked for you. Comments are reviewed before they appear.