How to Wash White Clothes
Wash white clothes so they come out bright, not gray or yellow — about 90 minutes including wash, dry, and a final inspection. Sort bleach-safe from no-bleach, pretreat stains, load loosely, dose detergent, bleach only when the whole load allows it, then dry and store apart from colors. Read one step at a time. Start with the preflight. Whole load looks gray or yellow? See grayed/yellowed load. One spot still there? See stain won't come out. Not sure an item can take bleach? See not sure about bleach.
Tips for reading this guide
- One step at a time. Read the green caption, the Why line, then the bullets.
- Move on when the green done line is true — then go to the next step.
- Sort first. Bleach-safe cotton/linen goes in one pile, delicate no-bleach fabric in another — never guess.
- Never mix bleach with ammonia or vinegar. That combination makes toxic gas. The vinegar rinse in this guide is for oxygen-bleach or no-bleach loads only.
- Whole load looks dingy, one spot won't come out, or not sure about bleach? Jump to the matching branch below.
- Need a helper? Ask someone you trust to check a care label with you or help sort a mixed pile.
Things You'll Need
- A sorting space to separate whites from colors, and bleach-safe from no-bleach fabric
- Regular laundry detergent, dosed per the package's guidance
- Oxygen-based (color-safe) bleach for bleach-safe loads only — never chlorine on a mixed load
- Stain remover, or a detergent/oxygen-bleach paste, for pretreating spots
- White vinegar for an optional brightening rinse (rinse dispenser only, never with chlorine bleach)
- Care labels checked on anything you're unsure about before choosing temperature or bleach
- A known-white reference — a fresh cotton ball or new packaging — for the final brightness check
- About 90 quiet minutes covering wash, dry, and inspection
Where are you stuck?
Follow Start here for a full whites wash from sorting to storage. Jump to a branch if a load looks dingy, a stain remains, or you're unsure about bleach.
- I want to wash white clothes from scratch Sort · pretreat · load loosely · bleach if safe · dry per label
- The whole load looks dingy, gray, or yellow Check for a hidden colored item · rewash with bleach · sun-dry
- One spot won't come out Identify stain type · matching treatment · rewash before drying
- Not sure this item can be bleached Separate load · detergent only · vinegar or baking-soda brighten
Start hereSort → pretreat → load loosely → detergent → bleach if safe → hottest safe temp → wash → dry per label → inspect → store apart
Preflight — sort whites and check bleach-safety before you start.
Pull whites from the pile · split bleach-safe vs. no-bleach · check any unclear labels.
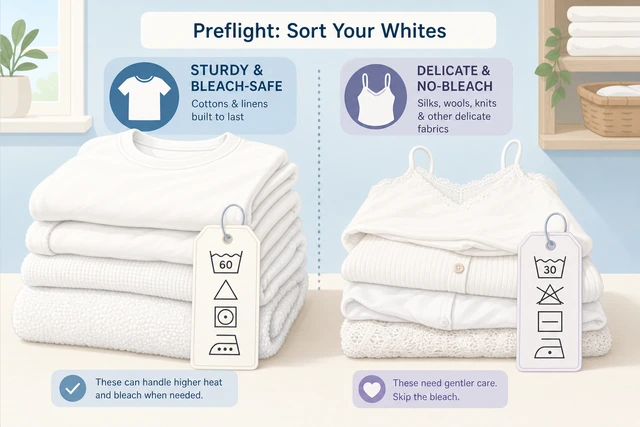
Sorting first prevents the two most common wash-day failures: a colored item bleeding into whites, and chlorine bleach ruining a delicate fabric that needed oxygen bleach instead.
- Pull every white item out of the mixed laundry pile into its own group.
- Within that pile, split bleach-safe cotton/linen/poly-cotton from no-bleach wool, silk, spandex, or flame-retardant sleepwear.
- Check the care label of any item you're unsure about for its safe water temperature.
You have two separate whites piles — bleach-safe and no-bleach — and every unclear label has been checked.
See a "do not bleach" symbol or a delicate fabric? → Not sure about bleach.
Empty pockets and close fasteners on every item.
Pockets empty · cuffs and socks unrolled · zippers and hooks closed · embellished items inside out.
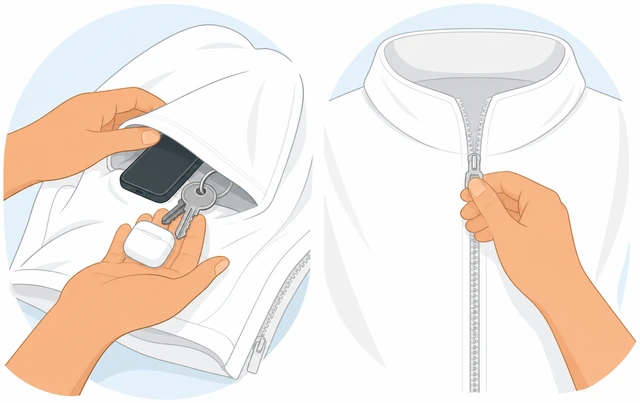
Loose objects and open hooks snag fabric and can leave rust or scratch marks on a white item that has nowhere to hide the damage.
- Empty every pocket and unroll cuffs and socks so no lint or tissue gets trapped.
- Close zippers, hooks, and clasps so they don't snag other fabric.
- Turn heavily embellished or printed items inside out to protect the design.
No pockets, cuffs, or fasteners are left unchecked, and delicate prints are turned inside out.
Pretreat visible stains before loading the washer.
Stain remover or detergent/oxygen-bleach paste directly on the stain · let sit 5–15 minutes.
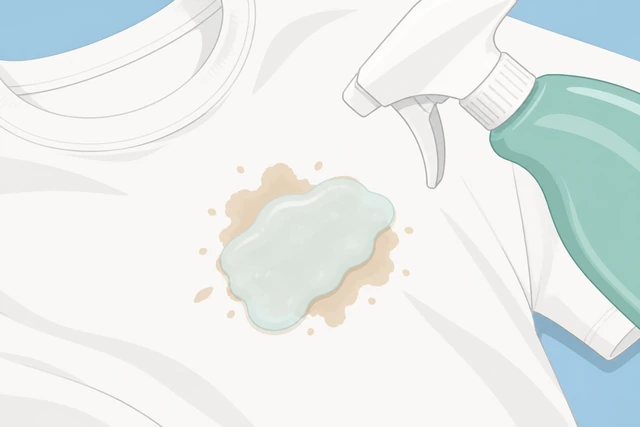
A stain that sits untreated through a wash-and-dry cycle often gets heat-set permanently, turning a fixable spot into a lasting one.
- Apply a stain remover, or a paste of detergent (or oxygen bleach) and water, straight onto each visible stain.
- Work it gently into the fabric so it fully covers the stained area.
- Let it dwell 5–15 minutes while you finish loading the rest of the wash.
Every visible stain is covered in pretreatment and still damp or paste-covered when you load the washer.
Load the washer loosely, not packed tight.
Drum about ¾ full at most · clothes should tumble freely with room to spare.
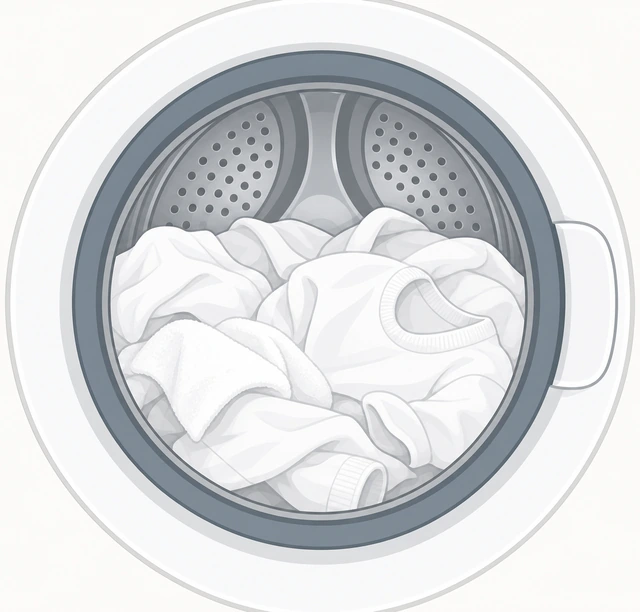
An overstuffed drum can't fully rinse detergent back out, and that leftover residue is what leaves whites looking dull or waxy even after a wash that "ran fine."
- Load clothes so the drum is roughly ¾ full at most, not packed to the top.
- Give the top layer a nudge — items should shift and move freely.
- Add a few more pieces only if there's still clear room to spare.
The drum is loosely filled and items move freely when you nudge them.
Add detergent per your load size and soil level.
Follow the product's dosing line · use more for hard water or heavy soil, never eyeball it.
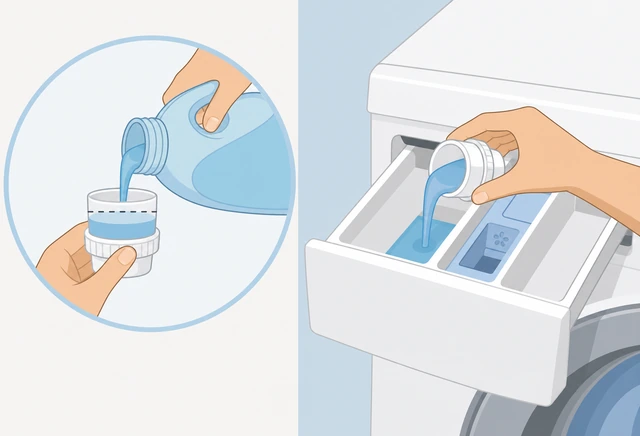
Under-dosing detergent is one of the quietest causes of whites getting progressively dingier wash after wash, even when nothing looks wrong in any single load.
- Check your detergent's dosing line or cap markings for this load size.
- Add extra per the package guidance if your water is hard or the load is heavily soiled.
- Add the measured detergent to the dispenser or drum per your machine's instructions.
Detergent is measured to the package's guidance for this load, not estimated by eye.
Add oxygen bleach only if every item is bleach-safe.
100% bleach-safe load → add oxygen-based bleach per its label · any no-bleach item → skip this step.
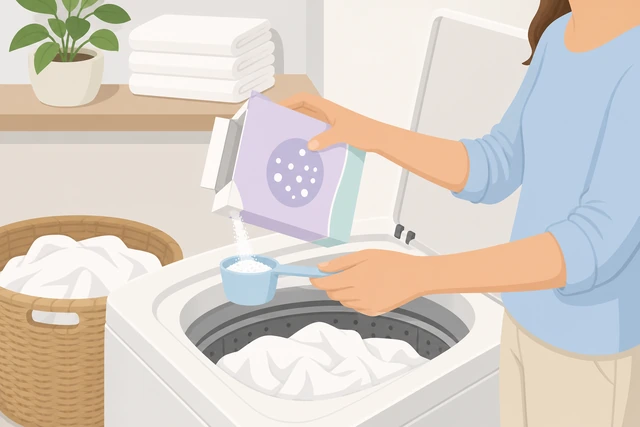
Chlorine bleach on wool, silk, spandex, or flame-retardant fabric causes yellowing or holes that can't be undone, so oxygen bleach is the safe default whenever a load mixes fiber types.
- Confirm every item in this load passed the bleach-safe check from preflight.
- If yes, add an oxygen-based (color-safe) bleach at its label's dose.
- If any item is no-bleach, skip this step entirely — add no bleach of any kind to this load.
Oxygen bleach was added only because 100% of the load is bleach-safe, or it was skipped because it wasn't.
Never mix chlorine bleach with an ammonia-based product or with vinegar/acid — the combination makes toxic chlorine or chloramine gas. This guide's optional vinegar rinse assumes oxygen bleach or no bleach at all, never chlorine.
Select the hottest water temperature the load allows.
Match the most delicate item's care label · often hot for sturdy cotton, warm for mixed fibers.
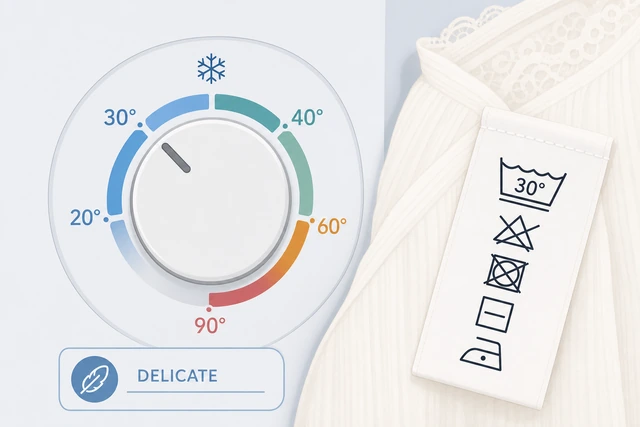
Hotter water cleans and brightens better, but the most delicate item in the load sets the ceiling — going hotter than its label risks shrinking or damaging it.
- Find the care label of the most delicate item in this load.
- Set the washer's water temperature to the hottest setting that label allows.
- Use warm instead of hot whenever the load mixes sturdy cotton with more delicate fibers.
The temperature dial matches the most restrictive care label in the load, not just the sturdiest item.
Select a cycle based on soil level and start the wash.
Normal cycle for light soil · heavy-duty for heavily soiled items · press start.
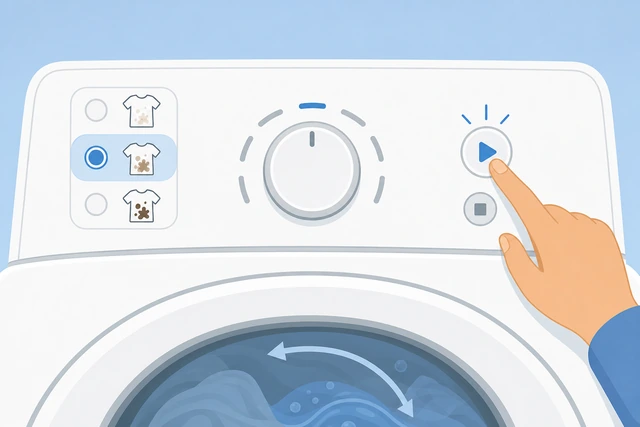
A heavy-duty cycle runs longer and agitates more, which helps release soil but also stresses fabric more than lightly soiled whites actually need.
- Choose a normal cycle for lightly soiled whites.
- Choose a heavy-duty cycle instead if the load is heavily soiled or greasy.
- Press start and confirm the machine is running.
A cycle matching the soil level is selected and the washer is running.
Optional: add a vinegar rinse for extra brightening.
About ½ cup white vinegar in the rinse dispenser · never mixed with chlorine bleach in the wash.
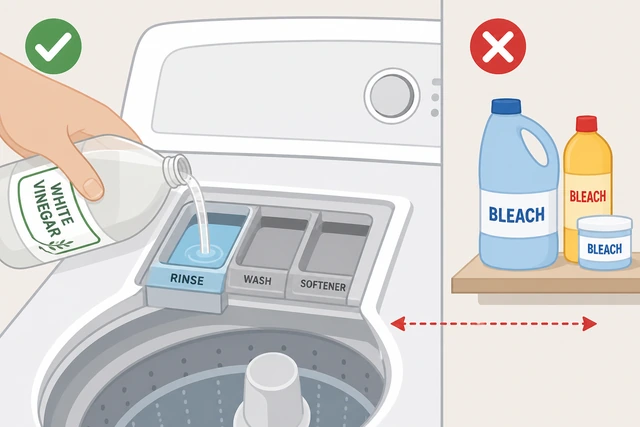
Vinegar in the rinse cuts leftover detergent and mineral residue for extra brightness, but it must only ever meet oxygen bleach or nothing — never chlorine bleach, which reacts with vinegar to make toxic gas.
- Add about ½ cup of white vinegar to the washer's rinse dispenser compartment.
- Use this only on loads using oxygen bleach or no bleach at all — never with chlorine bleach.
- Skip this step entirely if you're unsure which bleach chemistry is in this load.
Vinegar, if used, went into the rinse dispenser only and never into a load using chlorine bleach.
Never mix chlorine bleach with an ammonia-based product or with vinegar/acid — the combination makes toxic chlorine or chloramine gas. This guide's optional vinegar rinse assumes oxygen bleach or no bleach at all, never chlorine.
Remove clothes from the washer promptly when it ends.
Pull the load within about 30 minutes of the cycle ending — don't let it sit wet.
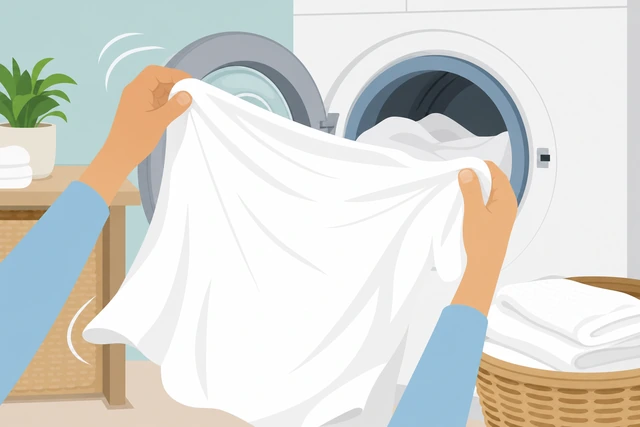
Wet whites left sitting in a closed drum can develop a musty smell and mildew spots that are much harder to remove than the wash was meant to fix.
- Listen or check for the cycle-end signal.
- Pull the load out within about 30 minutes of the cycle finishing.
- Give each item a shake to loosen wrinkles before drying.
The load is out of the washer within roughly 30 minutes of the cycle ending.
Dry each item per its care label.
Sturdy cottons → line-dry in direct sun for extra brightening · synthetics/blends → tumble dry at label's max heat.

Direct sunlight naturally helps bleach and brighten sturdy cotton and linen, while overheating synthetic or blended fabric can yellow or damage it instead of drying it safely.
- Check each item's care label for its allowed drying method.
- Line-dry sturdy all-cotton or linen whites in direct sun when possible.
- Tumble dry synthetics or blends at the label's maximum heat setting, not higher.
Every item is drying by the method its own care label allows.
Haven't confirmed a stain is fully gone yet? Don't dry that item — heat sets many stains permanently.
Inspect each item while still warm, before folding.
Check former stain spots and overall tone against a known-white reference like fresh cotton or new packaging.
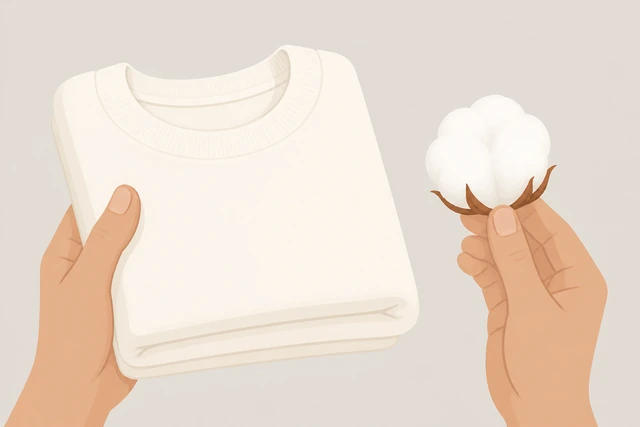
Checking now, while items are still warm and easy to see clearly, is your last chance to catch a lingering stain or an overall gray/yellow cast before it gets folded away and forgotten.
- Check each former stain spot closely for any remaining trace.
- Compare the overall tone against a known-white reference, like a fresh cotton ball or new packaging.
- Set aside anything that still looks stained, gray, or yellowed rather than folding it.
No visible stain residue remains, and brightness matches your white reference.
Whole load looks gray or yellow? → Grayed/yellowed load. One spot still visible? → Stain won't come out.
Fold and store whites separately from colors.
Whites go into their own stack or drawer, never mixed with colored laundry.

Storing whites next to colors invites dye transfer from a damp colored item or dark dye rubbing off in storage — the same risk you already sorted out of the wash.
- Fold each item once it has fully cooled.
- Place folded whites into their own stack, shelf, or drawer.
- Keep this stack physically separate from any colored laundry.
Whites are folded and put away in their own space, apart from colors.
Grayed/yellowed loadWhites come out dingy after a normal wash, even though nothing looked stained going in
Check for a hidden colored item in the load.
Look for a dark sock, new printed tee, or any non-white item · pull it out for future loads.
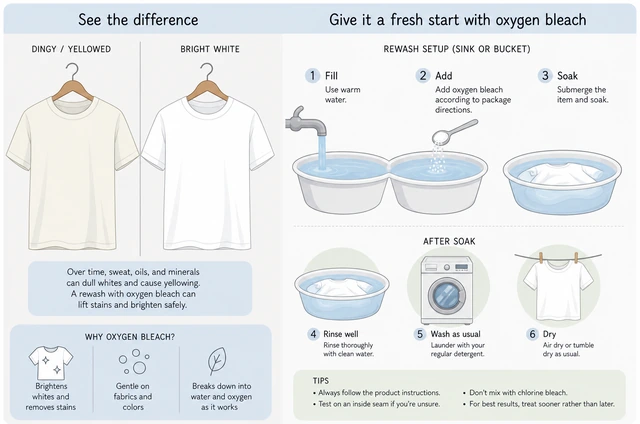
A single new dark or bright item bleeding dye is the single most common reason a whole load suddenly looks pink or gray, even when the wash itself ran normally.
- Go through the load and look for any dark sock, colored trim, or newly bought printed item.
- Pull out anything not actually white and set it aside from future white loads.
- If a new item is suspect, run a quick colorfastness test on it before washing it with whites again.
You've identified whether a hidden colored item caused this, and it's removed from future white loads.
Rewash with oxygen bleach and sunlight for extra brightening.
Rewash alone in hottest safe water with correctly dosed oxygen bleach · add water softener if hard water · line-dry in sun.

A dedicated rewash with properly dosed bleach and the hottest water the fabric allows tackles residue buildup directly, and sunlight adds a natural brightening boost a dryer can't.
- Rewash the load alone, in the hottest water its most delicate item's label allows, with correctly dosed oxygen bleach.
- If your water is known to be hard, add a water softener or laundry booster per package guidance.
- Line-dry in direct sunlight afterward, which naturally helps re-brighten cotton and linen.
The load has been rewashed with bleach in hot water and dried in direct sun.
Grayness or yellowing still there after two dedicated rewashes with an all-white load? Likely permanent oxidation or fiber aging — consider a commercial whitening soak, or accept the item is past reviving.
Stain won't come outA visible stain is still present after the full wash-and-dry cycle
Identify the stain type before treating it again.
Protein (blood, sweat) · oil/grease · tannin (coffee, wine) — each needs a different treatment.
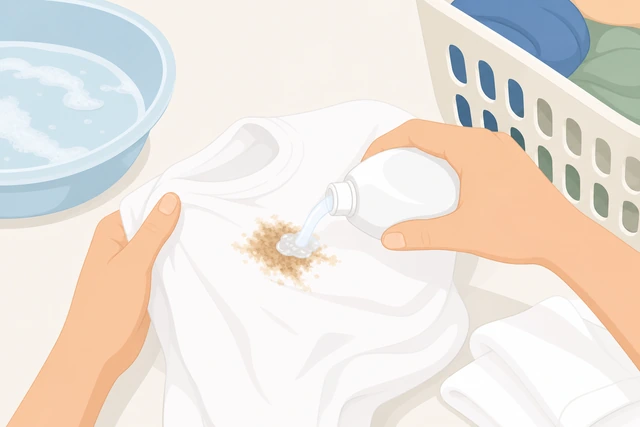
Each stain family responds to a different chemistry, and using the wrong one just wastes another wash cycle without touching the actual stain.
- Look at the stain's color and think back to what caused it.
- Protein stains (blood, sweat, food) need an enzyme-based pretreat.
- Oil or grease needs dish soap or a degreaser; tannin stains (coffee, wine) respond to an oxygen-bleach soak.
You've matched the stain to its type: protein, oil/grease, or tannin.
Apply the matching treatment, dwell, then rewash.
Fresh stain-type treatment · dwell 15–30 minutes · rewash on normal · confirm gone before drying.
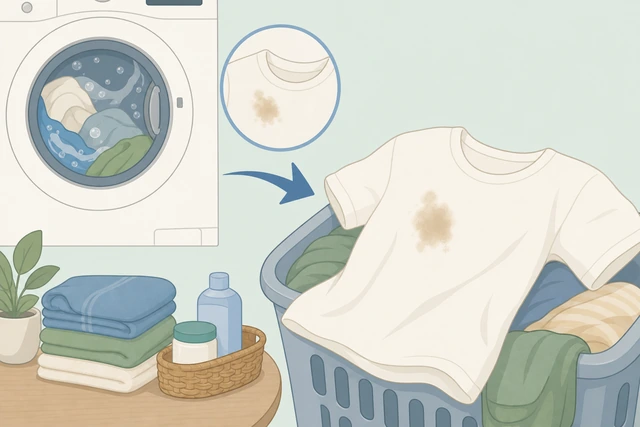
Giving the right treatment time to work, then checking before drying, avoids heat-setting a stain that a second attempt could have removed.
- Apply the treatment that matches the stain type identified in the last step.
- Let it dwell 15–30 minutes before loading the washer.
- Rewash on a normal cycle, and don't put the item in the dryer until the spot is confirmed gone.
The item has been rewashed and you've confirmed the stain is gone before considering drying it.
Stain unchanged after two targeted rewash attempts, especially an oil-based or set-in stain? Consider professional or dry cleaning rather than repeating the same treatment a third time.
Not sure about bleachAn item has a "do not bleach" label, is delicate, or you're unsure
Separate it into its own no-bleach load.
Physically pull the item out · wash alone or with other no-bleach whites · detergent only, no bleach of any kind.
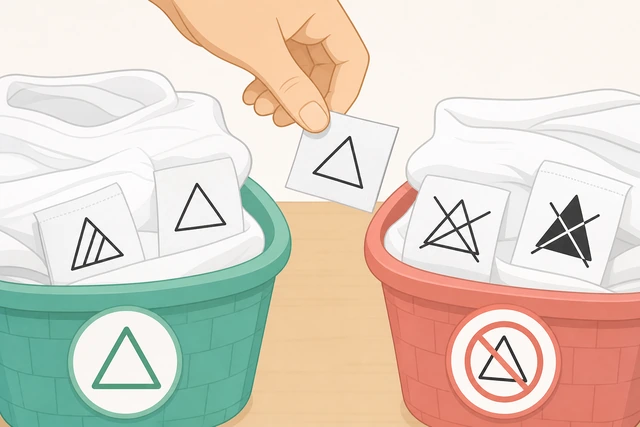
Guessing whether a delicate item can take bleach risks permanent damage, so physically separating it removes the guesswork entirely.
- Physically pull the uncertain item out of the bleach-safe pile.
- Group it with other wool, silk, spandex, or "do not bleach" items into its own load.
- Plan to wash this load with detergent only — no bleach of any kind.
The uncertain item is in its own no-bleach load, separate from the bleach-safe whites.
Wash gentle, then brighten without bleach.
Cool-to-warm water · gentle cycle · detergent only · vinegar rinse or baking-soda soak for brightening · dry per label.
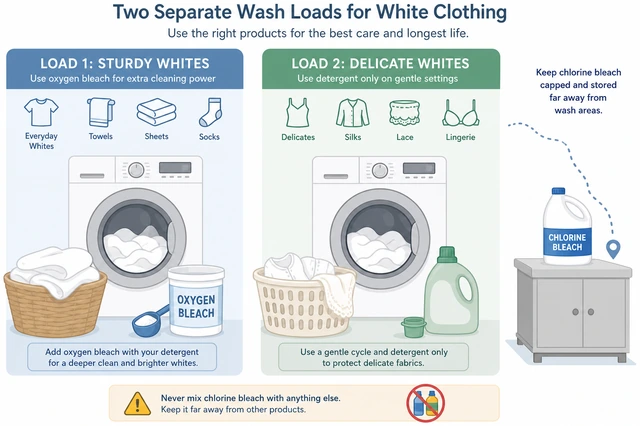
A gentler cycle and cooler water protect delicate fibers, while a vinegar rinse or baking-soda soak still gives a brightening boost without any bleach risk.
- Wash on a gentle cycle in cool-to-warm water with detergent only.
- For extra brightening, use a vinegar rinse or a short baking-soda soak instead of bleach.
- Dry in sunlight if the fabric allows, or per its care label otherwise.
The item is washed gently with no bleach and brightened only with vinegar or baking soda.
Fabric shows damage (holes, thinning, stiffening) even without bleach? The issue is heat/agitation, not chemistry — switch to hand-wash or a delicate-cycle mesh bag next time.
When to get help
- Ask a trusted person to help check a care label or sort a mixed pile if you're unsure.
- If you ever smell a strong chemical odor while doing laundry, stop, ventilate the room, and do not add any more product.
- Grayness or yellowing persists after two dedicated rewashes with bleach on an all-white load? Consider a commercial whitening soak or accept the item is past reviving.
- A stain is unchanged after two targeted rewash attempts, especially oil-based or set-in? Consider professional or dry cleaning instead of a third attempt.
- Fabric shows holes, thinning, or stiffening even without bleach? That's heat/agitation damage — switch to hand-wash or a delicate mesh bag next time.
When This Doesn't Work
- Item has a "do not bleach" symbol or is wool/silk/spandex-heavy. Skip this main path's bleach step entirely — see Not sure about bleach.
- Fabric is already permanently yellowed from years of storage. That's oxidation, not a wash failure — a commercial whitening soak may help, but heavy oxidation often won't fully reverse.
- A new colored item's colorfastness is unknown. Test it alone in water first, or keep it out of white loads entirely until you're sure.
- Fabric is delicate lace, sequins, or flame-retardant kids' sleepwear. Hand-wash or use a mesh bag on a delicate cycle — skip bleach and heavy agitation altogether.
- Well water with heavy iron staining. Household vinegar may only fade, not remove, severe iron staining — a whole-house water treatment addresses the root cause.
- Item was already chlorine-bleached and is now yellowed, weak, or holey. That damage is usually permanent — focus on protecting the rest of the load going forward.
Warnings
- Never mix chlorine bleach with an ammonia-based product or with vinegar/acid. The combination produces toxic chlorine or chloramine gas. Pick one bleach chemistry per load and rinse thoroughly before switching.
- Do not use chlorine bleach on wool, silk, spandex/elastane blends, or flame-retardant sleepwear — it can yellow, weaken, or hole the fabric permanently.
- Do not dry a stained item before confirming the stain is fully gone — dryer heat can set many stains permanently.
- Do not overload the washer — a packed drum can't fully rinse detergent out, leaving a dull gray or waxy film.
- Do not add bleach on top of a vinegar or baking-soda cleaning routine, or vice versa — pick one chemistry only.
- If you smell a strong chemical odor while doing laundry, stop, ventilate the area, and do not add any more product until it clears.
Tips
- Wash whites separately every time, even from light pastels — a single stray dark item can tint a whole load.
- Check new items' colorfastness before their first wash with whites by soaking a corner in water and watching for bleeding.
- Line-dry sturdy cottons in direct sun whenever weather allows — it's a free, natural brightening boost.
- If hard water is a recurring problem, a water softener or laundry booster pays off faster than buying more detergent.
- Store whites folded and separate from colors so no dye transfer happens after the wash is already done.
FAQ
Can I use chlorine bleach instead of oxygen bleach?
Only if every item in the load is sturdy, bleach-safe cotton or linen with a label that allows it. Never use chlorine bleach on wool, silk, spandex blends, or flame-retardant sleepwear, and never mix it with ammonia or vinegar.
Why do my whites still look dingy after washing?
Usually a hidden colored item, an overloaded drum leaving detergent residue, or hard-water mineral buildup. See the grayed/yellowed load branch for a targeted rewash routine.
How do I know if an item can be bleached?
Check its care label for a "do not bleach" symbol, and treat wool, silk, and spandex-heavy fabric as no-bleach by default. When unsure, wash it separately with detergent only — see the bleach-safety branch.
What removes a stain that survived the wash?
Identify the stain type first — protein, oil/grease, or tannin — then apply the matching treatment and dwell 15–30 minutes before rewashing. Don't dry the item until the stain is confirmed gone.
Can I add vinegar and bleach together for extra brightening?
Never with chlorine bleach — vinegar and chlorine bleach react to produce toxic gas. A vinegar rinse is safe only with oxygen bleach or no bleach at all, and it goes in the rinse dispenser, not the wash step.

Comments
Questions, corrections, and what worked for you. Comments are reviewed before they appear.