How to Make a Paper Airplane
Fold a classic dart paper airplane: center line, corners in, wings matched, then a gentle level throw. Read one step at a time. Start with preflight. Nosedive? Nosedive. Stall? Stall. Crooked? Crooked crease.
Tips for reading this guide
- One step at a time. Read the green caption, the Why line, then the bullets.
- Move on when the green done line is true — then go to the next step.
- One fold at a time. Caption → Why → bullets.
- Match left and right before the next fold.
- Nosedives? Nosedive.
Things You'll Need
- 1 sheet letter paper (8.5×11 in)
- Flat table
- Clear indoor throw lane
- Optional: ruler for sharper creases
Where are you stuck?
Start hereClassic dart — fold, match wings, throw, trim.
Preflight — one letter-size sheet (8.5×11), a flat table, and a clear indoor throw lane.
Letter paper · flat table · clear throw lane.
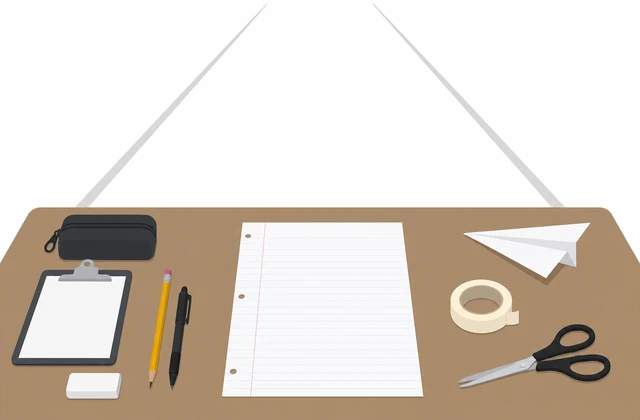
Wrinkled paper and obstacles make first flights fail for reasons that are not your folds.
- Use plain printer/letter paper (not cardstock for the first try).
- Clear a 10+ foot path indoors.
- Sit or stand at a flat table for folding.
Paper and a clear lane are ready.
Hold the paper portrait (tall). Fold in half lengthwise, crease hard, then unfold.
Portrait · fold lengthwise · sharp crease · unfold.
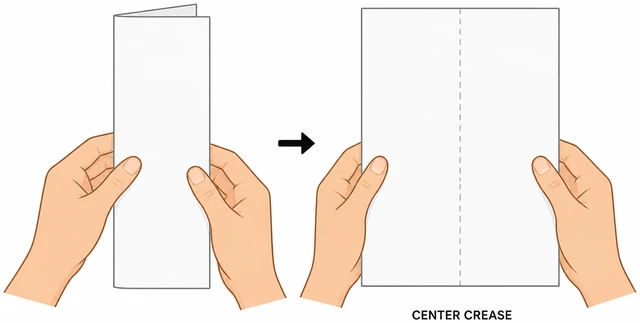
The center line is the dart’s spine — every later fold aligns to it.
- Short edge at the top.
- Bring left edge to right edge.
- Crease with a fingernail.
- Unfold flat so the center line shows.
- Crooked already? → Crooked crease.
A clear center crease runs top to bottom.
Fold the top-left and top-right corners down so their edges meet the center line.
Top corners to center · edges on the line · crease.
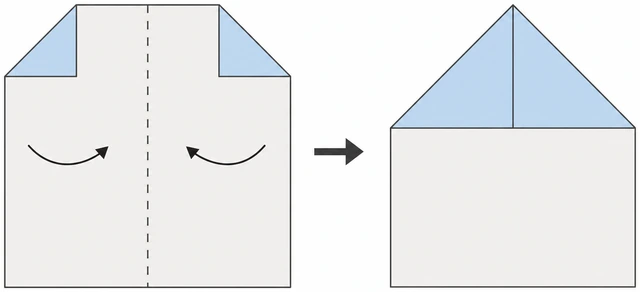
Even corners make a symmetric nose; uneven corners steer the plane sideways.
- Fold top-left corner to the center crease.
- Fold top-right corner to the center crease.
- Both long edges should sit on the center line.
- Crease firmly.
A neat triangular point sits at the top.
Fold the new left and right angled edges to the center line again for a steeper dart nose.
Angled edges to center again · narrower nose · crease.
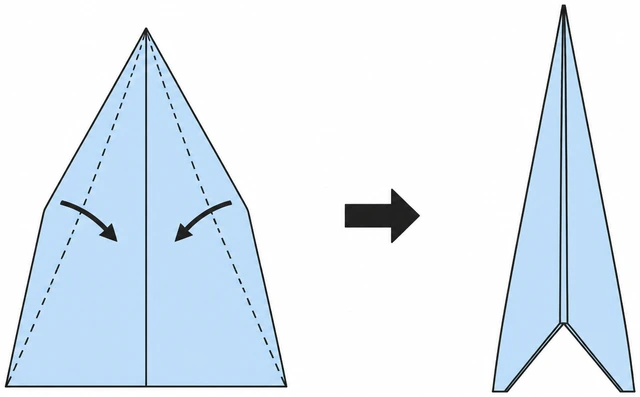
The second take-in thins the nose so the dart flies instead of floating like a napkin.
- Fold left angled edge to center.
- Fold right angled edge to center.
- Keep layers flat — do not wrinkle the tip.
- Crease hard.
Nose is a long, narrow triangle aligned on center.
Fold the plane in half along the center crease with the folds on the outside.
Fold in half on center · nose folds outside · crease the spine.
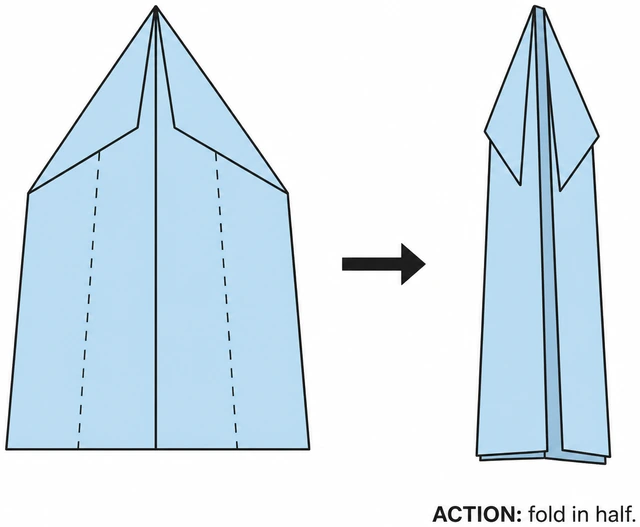
This stacks the wings so you can fold matching wing roots.
- Keep the pointed nose together.
- Fold along the original center line.
- Crease the whole spine.
- Wings are still unmade — just a thick dart body.
You hold a flat folded dart body with a sharp spine.
Fold the top layer down as a wing so the top edge runs parallel to the bottom spine, leaving about 0.5–1 inch of body.
First wing down · edge parallel to spine · ~0.5–1 inch body left.
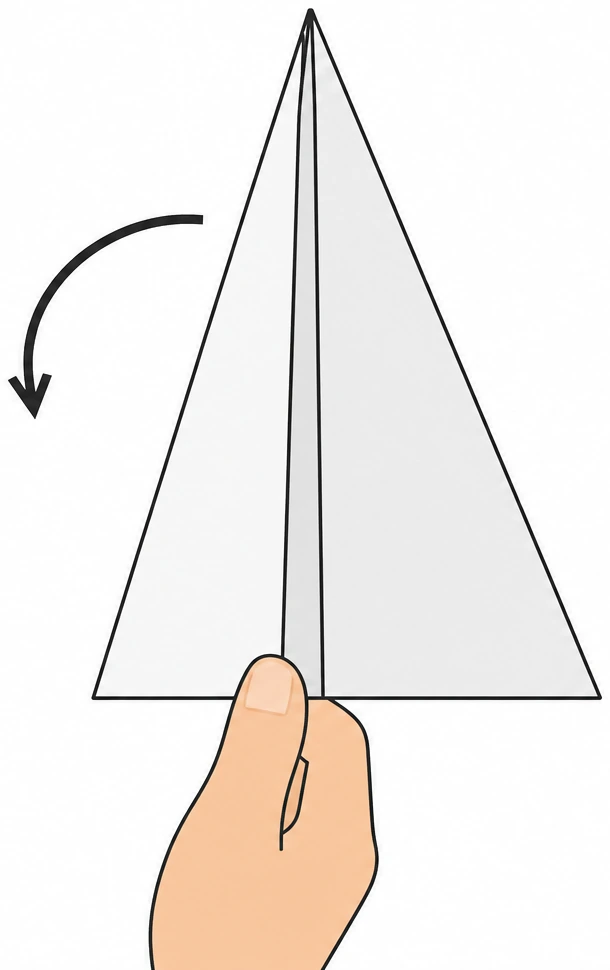
Parallel wing roots keep lift even; a slanted fold makes it roll.
- Keep the nose tip neat.
- Fold only the top layer down.
- Leave a finger-width body under the wing.
- Crease the wing root firmly.
One wing lies flat with a straight root crease.
Flip the plane and fold the second wing to match the first exactly.
Flip · second wing matches first · same body height.
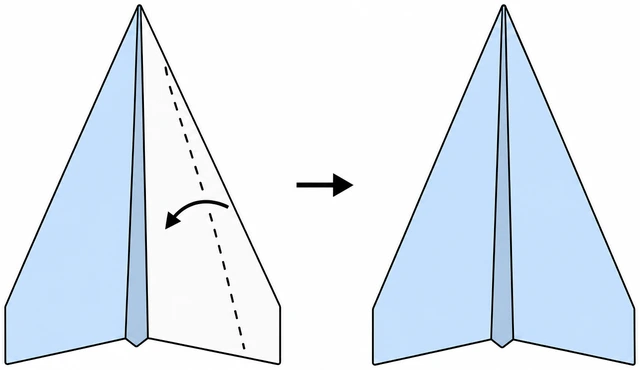
Mismatched wings are the #1 reason beginner darts spiral.
- Flip the plane.
- Fold the second wing to the same body height.
- Compare wing tips — they should align.
- Crease hard.
- Still mismatched? → Crooked crease.
Both wings match in size and angle.
Open the wings into a gentle V (slight dihedral) and pinch the body.
Open wings to gentle V · pinch body · wings not flat floppy.
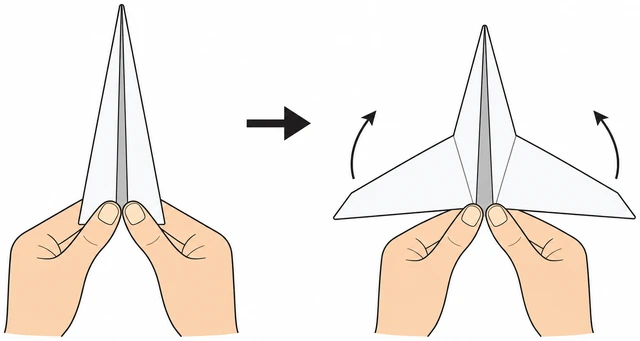
A little dihedral helps the dart self-correct; flat floppy wings roll over.
- Lift both wings up slightly.
- Aim for a shallow V, not a steep tent.
- Pinch along the spine so the body stays thin.
- Check symmetry once more.
Plane looks like a dart ready to throw.
Test throw: grip under the wings near the middle, release level with a gentle push — no hard upward snap.
Grip mid body · gentle level throw · watch the flight.
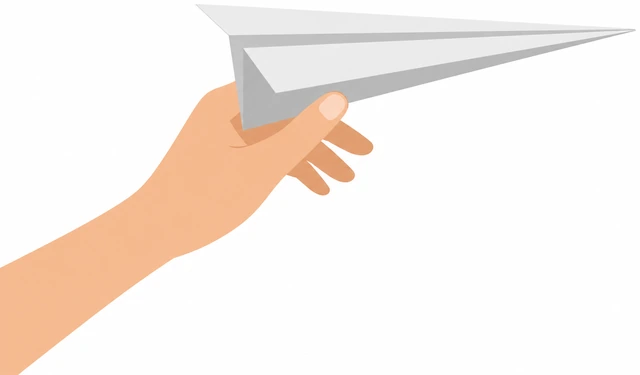
Hard upward throws stall; downward throws nose-dive even good folds.
- Hold under the wings near the balance point.
- Point slightly above level at most.
- Push forward smoothly.
- Watch: straight glide, dive, or stall?
- Nose-dives? → Nosedive.
- Climbs then falls? → Stall.
You have completed one honest test flight and noted the flight shape.
Trim with tiny trailing-edge bends only — one small change per test throw.
Tiny trailing-edge trim · one change · re-test.
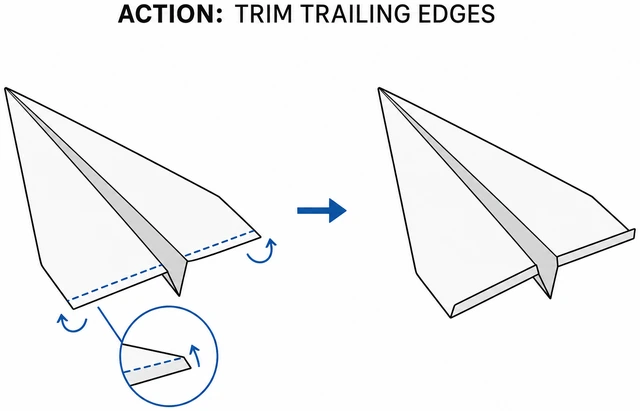
Big bends wreck the plane; small elevators fix dive/stall.
- If it dives: tiny upward bend on both trailing edges.
- If it stalls: tiny downward bend on both trailing edges.
- Change both wings the same amount.
- Throw again gently.
Flight is more level after at most a few tiny trims — or you know you need a branch.
Optional: write a name on a wing and store the plane flat so creases stay sharp.
Optional name · store flat · done.
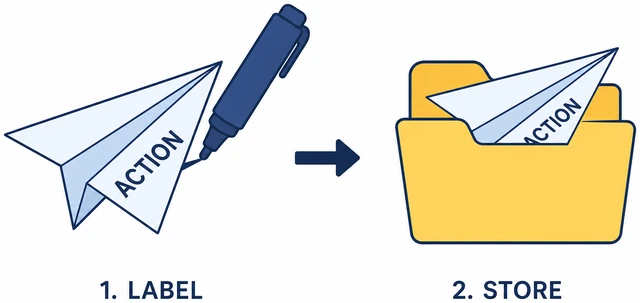
Crushing it in a backpack undoes your creases.
- Light pencil/pen on a wing.
- Store flat in a folder.
- Refold from Step 1 if it gets crushed.
You have a flyer you can keep or proudly throw again.
NosediveThe plane hits nose-first within a few feet.
Throw again level — do not aim at the floor.
Level throw path · no downward aim.
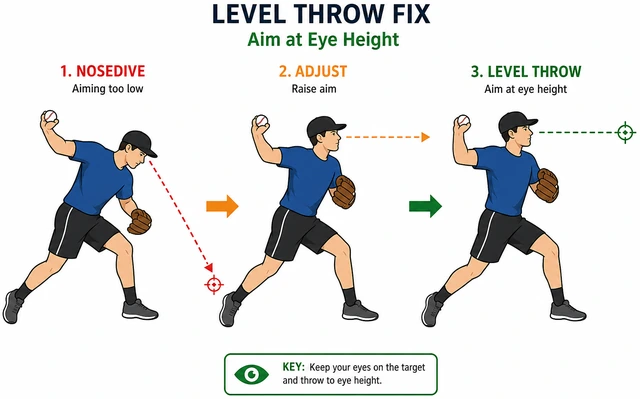
Throw angle alone can fake a “bad fold.”
- Reset stance.
- Aim at a far wall mark at eye height.
- Gentle push.
A level throw was tested.
Compare wing sizes and root heights — fix mismatches before more throws.
Wings must match · fix asymmetry.
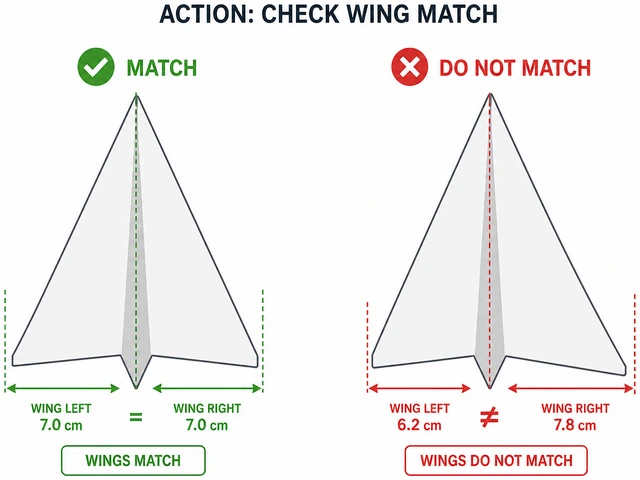
One heavy wing rolls the nose down and sideways.
- Hold spine up.
- Align wing tips.
- Re-crease the short wing.
Wings look matched.
Add a tiny upward bend on both trailing edges (elevator up).
Tiny up-elevator on both trailing edges.
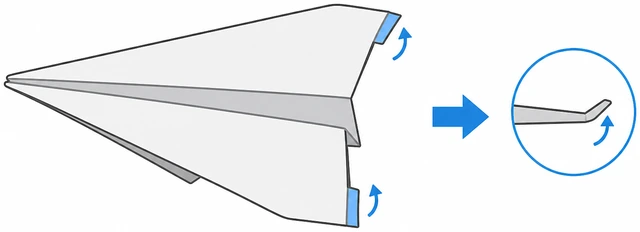
Up elevator lifts the nose in flight.
- Bend 2–3 mm only.
- Both wings equal.
- Re-test.
Dive is reduced or gone.
If the nose layers are hugely thick, unfold the last nose take-in once and re-crease lighter.
Lighten an overly thick nose if needed.
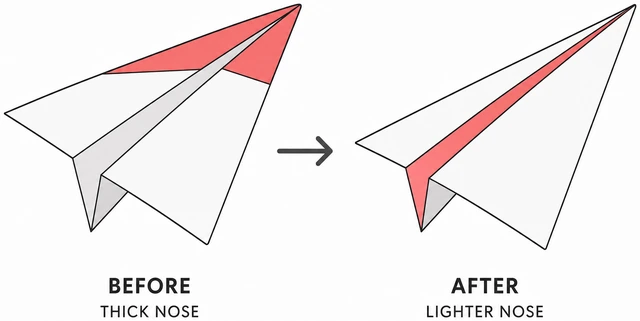
A brick nose pulls the dart into the carpet.
- Gently open nose layers.
- Keep center alignment.
- Re-throw.
Nose is not a heavy brick.
After three failed trims, start a fresh sheet — crumpled noses rarely recover.
Fresh sheet after three failed trims.
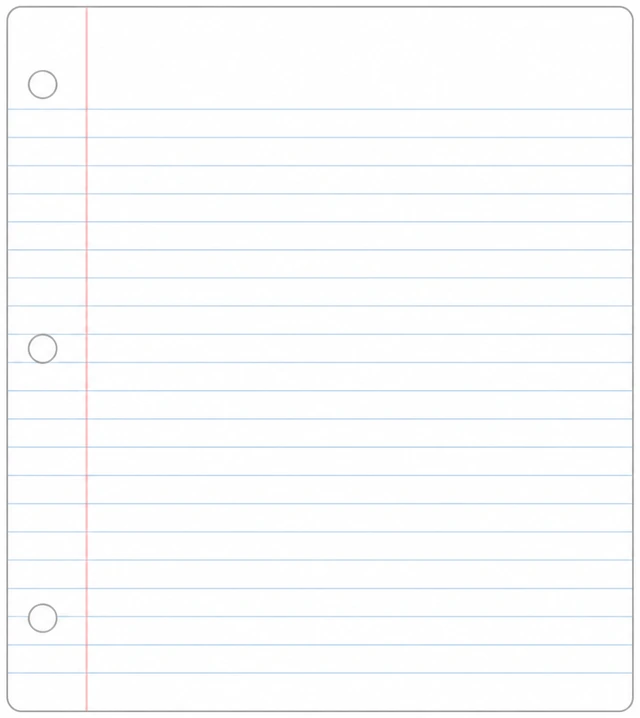
Fighting crushed fibers wastes time.
- New letter paper.
- Return to main Step 1.
- Keep this plane as a bad example.
You either fly or you restarted cleanly.
StallIt climbs, hangs, then falls tail-first or flutters down.
Throw softer and more level — less upward snap.
Softer · level · no upward snap.
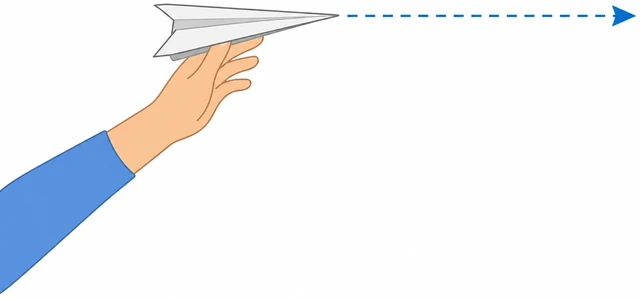
Extra speed + up angle is a classic stall recipe.
- Half the throw power.
- Level release.
- Watch again.
A soft level throw was tested.
Add tiny downward bends on both trailing edges.
Tiny down tabs on both trailing edges.
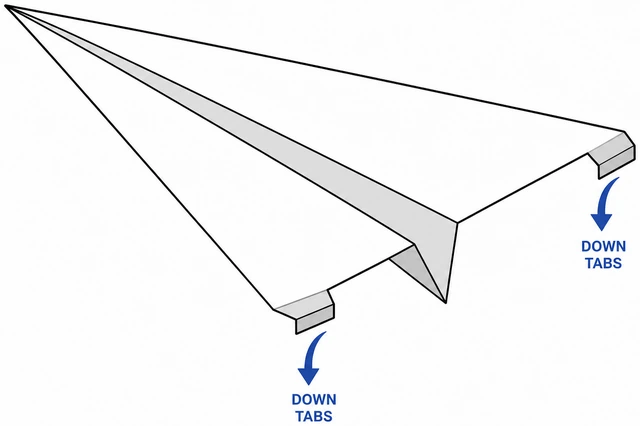
Down elevator lowers the nose enough to keep flying.
- 2–3 mm down.
- Both sides equal.
- Re-test.
Stall is reduced.
Check that wings are not angled steeply upward like a tent.
Flatten overly steep wing V a little.
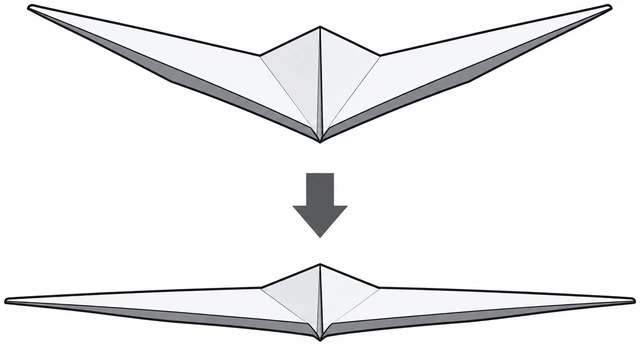
Too much dihedral plus up throw stalls easily.
- Lower wings toward a shallow V.
- Pinch spine.
- Throw soft.
Dihedral is shallow again.
If paper tears while bending, stop and use a new sheet.
Torn wing · new sheet.
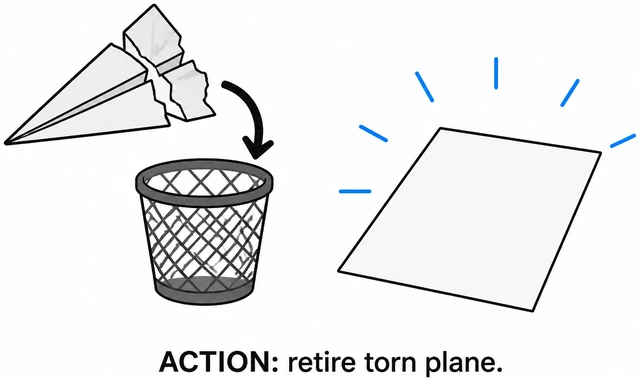
Tape fixes look bad and change weight oddly for beginners.
- Retire the torn plane.
- New paper.
- Main path Step 1.
You stopped forcing torn folds.
Confirm success with three gentle flights in a row.
Three gentle flights in a row.
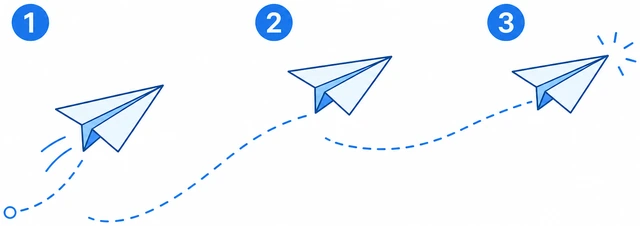
One lucky glide is not a stable trim.
- Throw three times.
- Same trim.
- Celebrate boring straight glides.
Flight is repeatably decent.
Crooked creaseLeft and right sides do not match — fix early.
Stop forward folds — unfold to the last straight center line.
Unfold to last good center line.
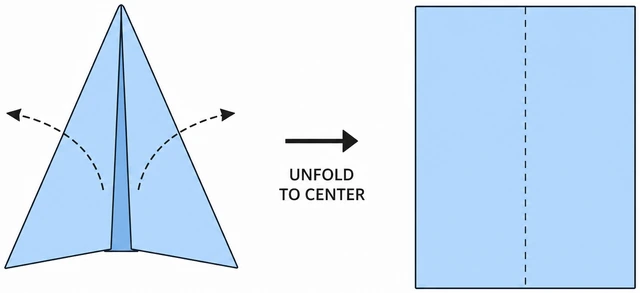
Stacking errors on a crooked spine locks in a spiral.
- Gently open folds.
- Find the true center crease.
- Flatten.
Paper is flat on a true center line.
Re-align edges carefully before creasing — pinch, then crease.
Align · pinch · then crease.
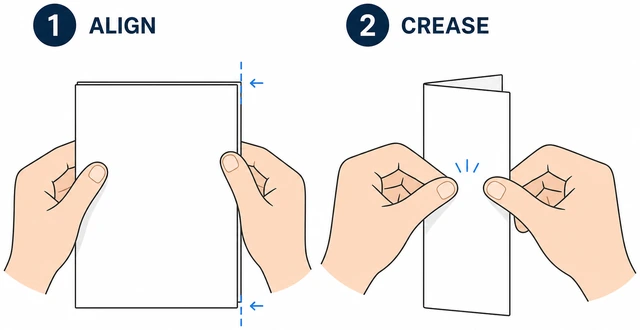
Creasing mid-slide permanently skews the fold.
- Match corners.
- Pinch lightly.
- Crease only when aligned.
New crease is straight.
Use a fingernail or ruler edge for a sharper, straighter crease.
Sharpen crease with nail or ruler edge.
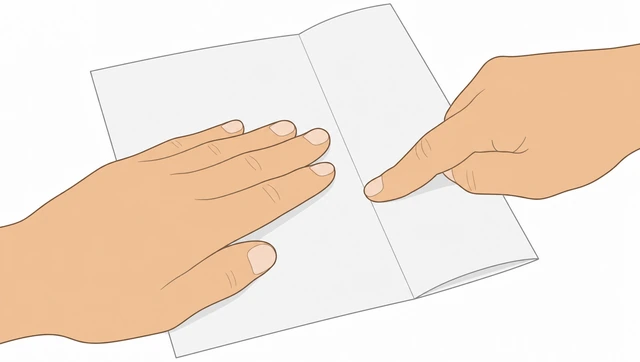
Soft creases drift when you add layers.
- Support on table.
- Run nail along fold.
- Check center again.
Crease looks sharp and centered.
If the sheet is crumpled or soft, start a new sheet instead of fighting it.
Crumpled sheet · start fresh.
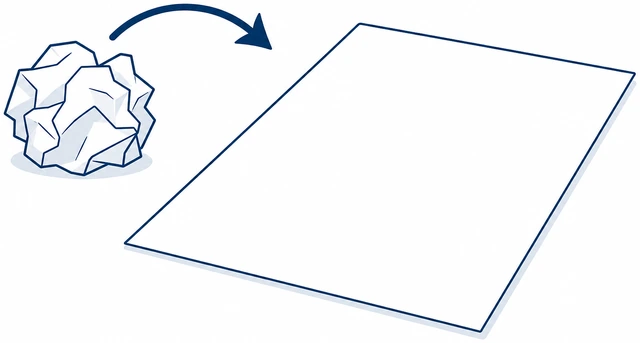
Fiber memory from bad folds fights every new crease.
- New letter paper.
- Return to Step 1.
- Keep room clear.
You are on clean paper or a fixed crease.
Resume the main path at the step after your last good fold.
Resume main path after last good fold.
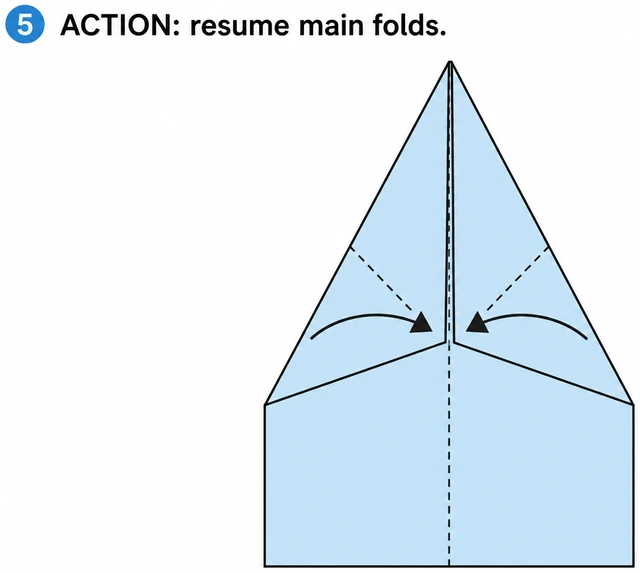
Re-doing everything is safer than guessing mid-stack.
- Identify last good step.
- Continue forward.
- Compare sides each fold.
You are back on the main path with matching sides.
When This Doesn't Work
- It always curves left or right — One wing is larger or one trailing edge is bent more. Match wings, then trim both trailing edges equally.
- It only flies two feet — Creases may be soft or the throw too weak/downward. Re-crease the spine and wings, then use a gentle level push toward a far mark.
- Kids crush every fold — Do Steps 1–4 for them, let them fold wings with a fingernail crease helper, and use thicker paper only after they succeed once.
Warnings
- Do not throw at people’s faces or eyes.
- Cardstock is harder for first-time folders — start with printer paper.
- Stop if paper tears badly — start a new sheet.
Tips
- Contest tip — For distance, keep the nose crisp and the throw smooth — power without aim just stalls.
FAQ
Printer paper or notebook paper?
Letter printer paper (about 20 lb) is ideal. Thin notebook paper works but bruises easier; cardstock is for later experiments.
Why not the fancy internet designs first?
The dart teaches symmetry and trim. Once it flies, other designs are easier to diagnose.
Comments
Questions, corrections, and what worked for you. Comments are reviewed before they appear.