How to Change a Tire
Read one step at a time — finish each before the next. Every step below has a short caption and one illustration. The rule that saves most roadside swaps: loosen lug nuts on the ground (Step 4) before you jack the car up (Step 6). Pick your problem under What's the problem? if a lug, wheel, or spare stops you.
How to read this guide
- One step at a time. Read the green caption, the Why line, then the bullets.
- Move on when you finish the bullets — then go to the next step.
- On your phone? Tap Jump to section or use the sidebar to skip ahead.
- Stuck? Don't repeat the same step — open the matching branch (lug, wheel, or no spare).
- Ask for help if the shoulder feels unsafe — see when to call a tow.
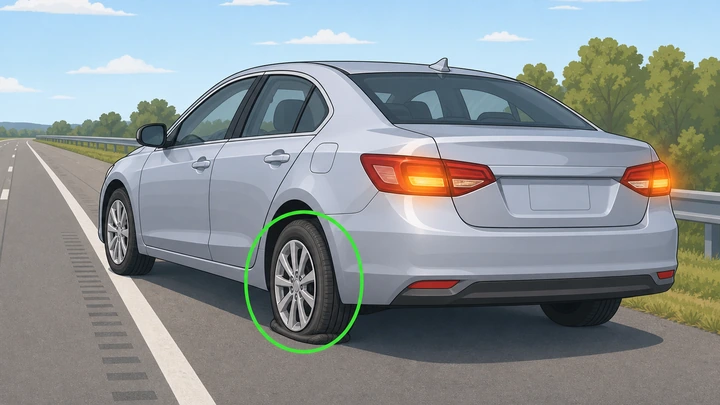
Things You'll Need
- Spare tire (donut or full-size)
- Scissor jack and lug wrench from trunk
- Wheel chock or a large rock
- Owner's manual jacking diagram (optional)
- Penetrating oil (optional, for stuck lugs)
What's the problem?
Standard flat? Start at Before you start, then Steps 1–12. Each step has one picture. Branches cover the three blockers that repeating a step won't fix.
First: sedan pinch-weld or truck frame?
- Sedan / small SUV (Camry, Civic, RAV4) — jack the pinch-weld notch behind the wheel (Start here Step 5).
- Truck / body-on-frame — jack the frame rail, not plastic trim — check the manual diagram first.
- Donut spare — 50 mph / 50 miles max after the swap; full-size spare has no speed cap but get the flat repaired soon.
Start hereStandard flat tire — twelve steps on the shoulder
Three checks — all YES before Step 1.
Flat hard ground · hazards on · spare and tools ready.
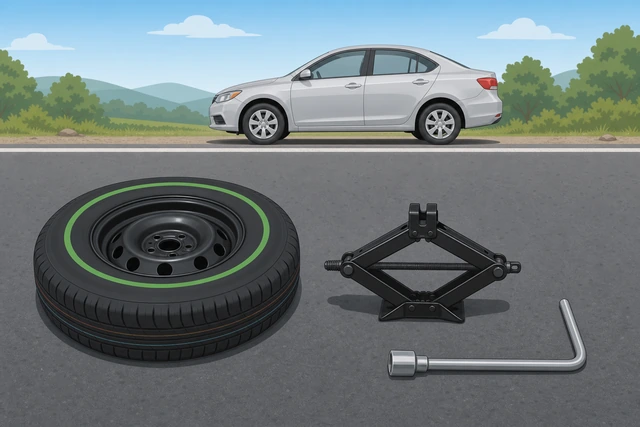
A soft spare or soft shoulder wastes the next half hour once the car is on the jack.
- Park on hard flat ground — fully off the travel lane.
- Hazards on · parking brake set.
- Spare feels firm · jack and lug wrench in hand.
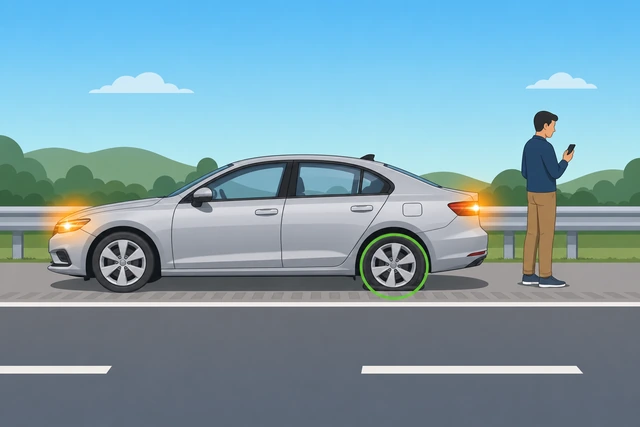
Park on flat ground and turn on hazard lights.
Hazards on before you open the door.
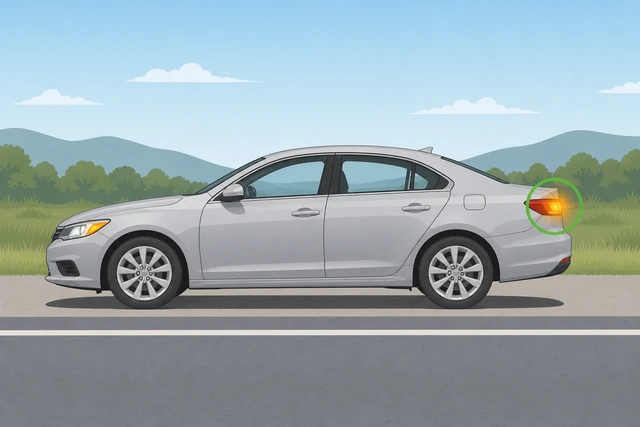
Hazard lights warn traffic before you open the door into the lane.
- Pull onto the shoulder — not soft grass or a slope.
- Turn on hazard flashers.
- Stay aware of passing traffic.
Chock the wheel diagonally opposite the flat.
Block the wheel diagonal from the flat.
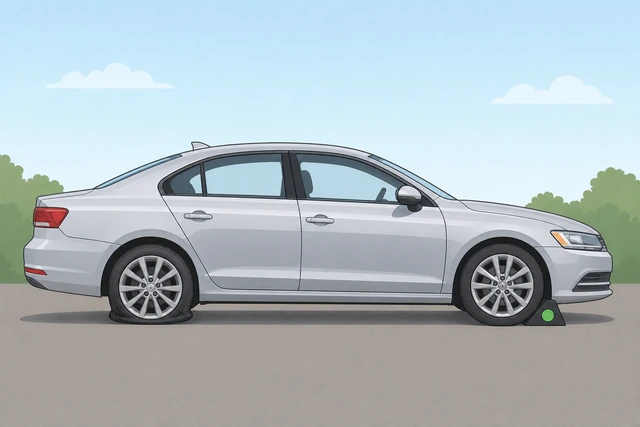
The wheel diagonal from the flat is the only one that could roll if the car shifts.
- Place chock behind the tire opposite the flat.
- A large rock can substitute for a chock.
Pull spare, jack, and lug wrench from the trunk.
Confirm the spare holds air before you jack.
Finding a flat spare after the car is in the air leaves you with nothing to mount.
- Lift trunk floor — pull out spare, jack, and L-wrench.
- Press the spare — it should feel firm, not squishy.
Soft spare? → No spare / flat spare.
Loosen each lug nut half a turn — tire still on the ground.
Half turn each lug — counterclockwise — tire still down.
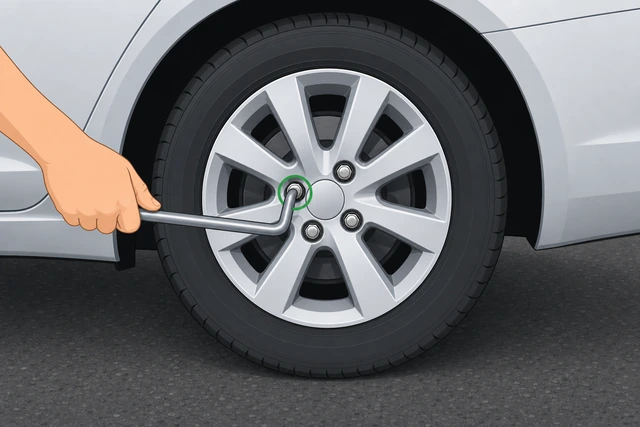
On the ground the wheel cannot spin, so the wrench can actually break lug torque.
- Fit the wrench — turn counterclockwise.
- Break all five lugs about half a turn.
- Do not remove nuts yet · do not jack yet.
Won't budge? → Lug won't budge.
Set the jack in the metal pinch-weld notch.
Jack in the metal notch — not plastic trim.
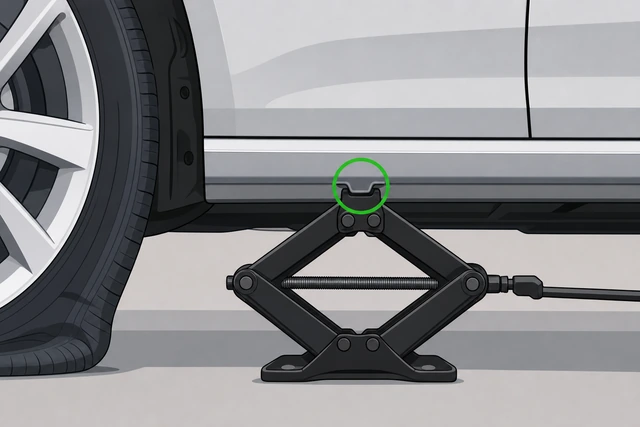
Plastic rocker trim crushes — the metal pinch-weld notch is rated for the car's weight.
- Find the pinch-weld notch behind the flat tire.
- Set the jack saddle in metal — not on rocker plastic.
Jack up until the flat tire clears the ground about one inch.
About one inch of clearance — lugs still on.
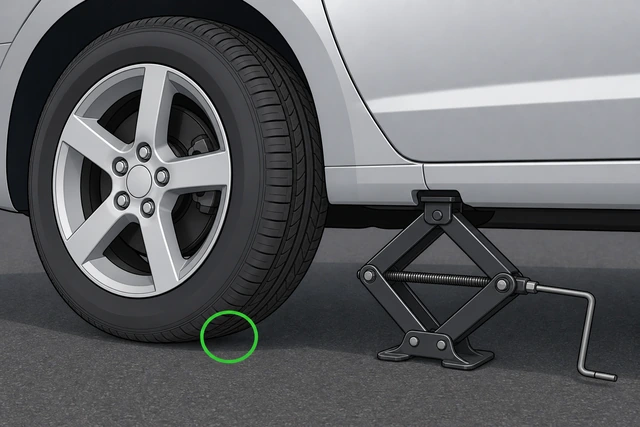
About an inch of lift is enough to swap the tire without the car teetering on a tall jack.
- Raise slowly until the flat clears the ground.
- Stop at roughly one inch — all lugs still threaded.
Remove all five lug nuts and set them in the hub cap.
All five lugs off — keep them in the hub cap.
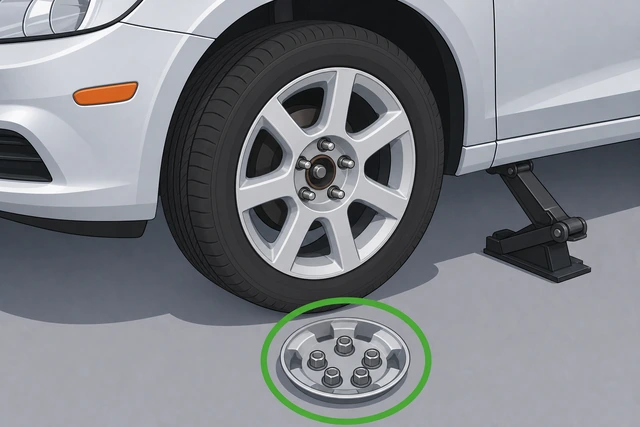
Lugs in the hub cap cannot roll into traffic or disappear in roadside gravel.
- Unscrew each lug fully — studs should show.
- Wheel still rests on the hub until Step 8.
Pull the wheel straight off the hub.
Pull straight off — lay the wheel under the car.
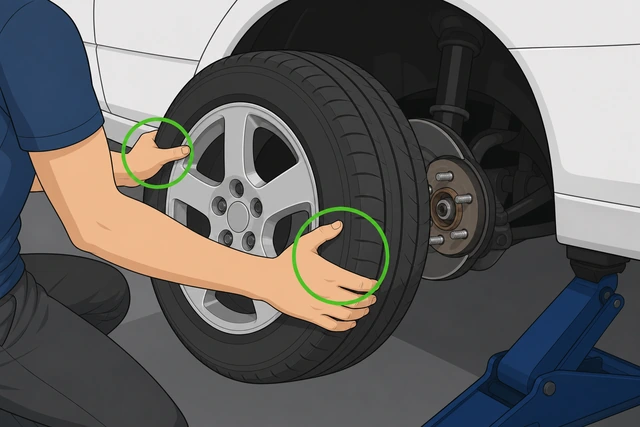
Pulling straight off avoids bending studs; the old wheel under the car catches it if the jack slips.
- Pull the wheel straight toward you.
- Lay it flat under the car as a safety block.
Won't pull off? → Wheel stuck on hub.
Slide the spare onto the studs and hand-start all lugs.
Spare flush on studs — hand-start every lug.
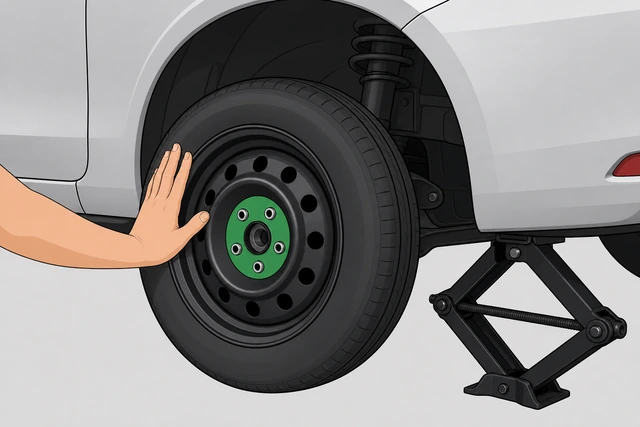
Hand-starting lugs prevents cross-threading — power tightening in the air strips studs easily.
- Line up holes — push spare flat against the hub.
- Thread each lug by hand — do not power-tighten in the air.
Lower the jack until the spare touches the ground.
Spare on pavement before final tighten.
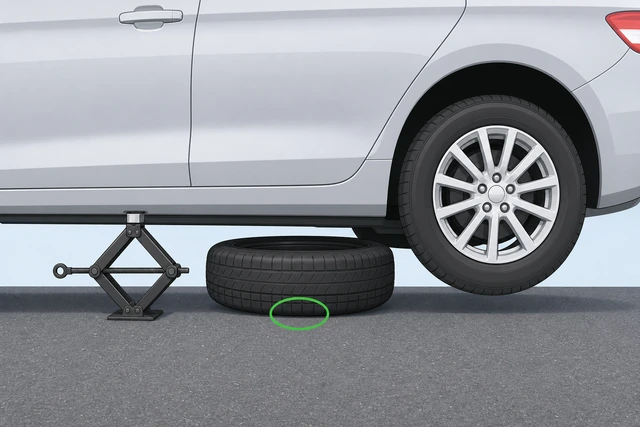
Final torque belongs on the ground — pavement stops the wheel from spinning while you tighten.
- Lower jack until the spare carries weight.
- Jack can stay in place as backup.
Tighten lugs in star pattern with body weight.
Star order: 1 → 3 → 5 → 2 → 4 — twice.
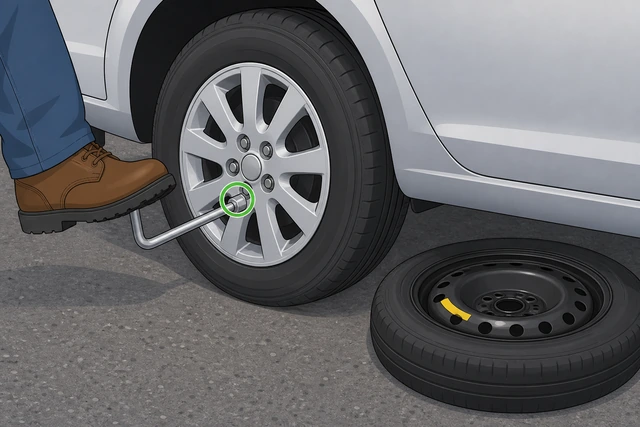
Star order pulls the rim flat evenly — tightening neighbors in a circle warps the wheel.
- Tighten in a star pattern — skip adjacent studs.
- Go around twice with body weight on the wrench.
Stow flat tire, jack, and wrench in the trunk.
Donut spare: 50 mph · 50 miles max.
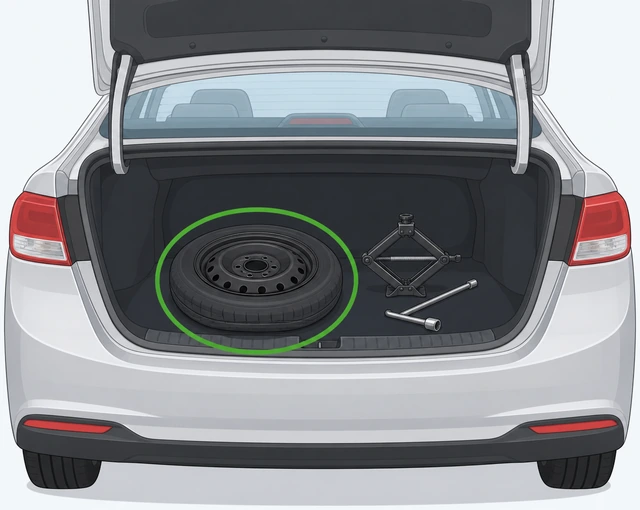
Clearing the lane and knowing donut speed limits keeps the next miles safe.
- Stow flat, jack, and wrench in the trunk.
- Drive slowly on a donut — get the flat repaired soon.
If a lug nut won't budgeWrench slips or nut feels welded on
Use this at Step 4 when the factory L-wrench won't crack a lug loose — tire still on the ground.
Keep the tire on the ground — never jack first for stuck lugs.
Tire on asphalt — never jack first for stuck lugs.
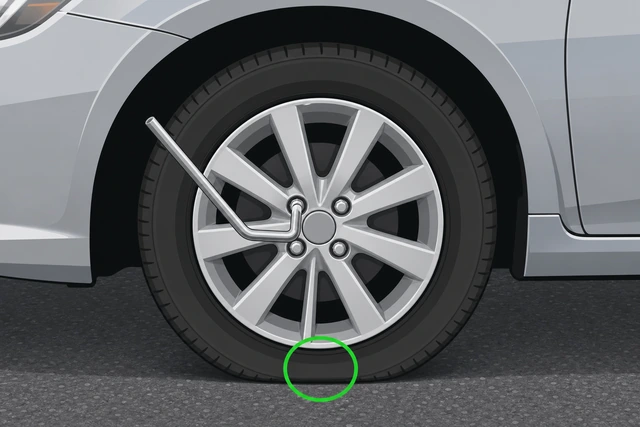
In the air the wheel spins freely — you cannot break rusted torque without ground contact.
- All five lugs still on · tire firmly on the ground.
- Jack in the air = wheel spins — wrench cannot break torque.
Spray penetrating oil and wait ten minutes.
Soak threads — wait ten minutes.
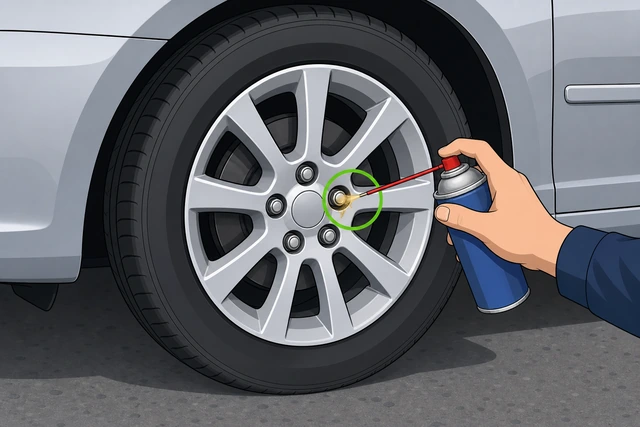
Oil needs time to creep into rusted threads — rushing the wrench rounds the nut.
- Spray penetrating oil where lug meets rim.
- Wait 10 minutes before trying again.
Lock nut: European cars may have one locking lug — find the key socket in the glove box before you strip the nut.
Stand on the wrench bar or use a breaker bar.
Body weight on the wrench bar.
Body weight on a long wrench multiplies force without stripping a short factory handle.
- Stand on the bar carefully — hold the car for balance.
- Each lug half a turn loose → continue main guide at Step 5.
Rounded nut? Stop — call a tow.
If the wheel won't come off the hubAll lugs off but the rim is frozen
Use this at Step 8 when the wheel won't pull straight off the studs.
Leave two lugs barely threaded as safety hands.
Two lugs loose on the studs — safety catch.
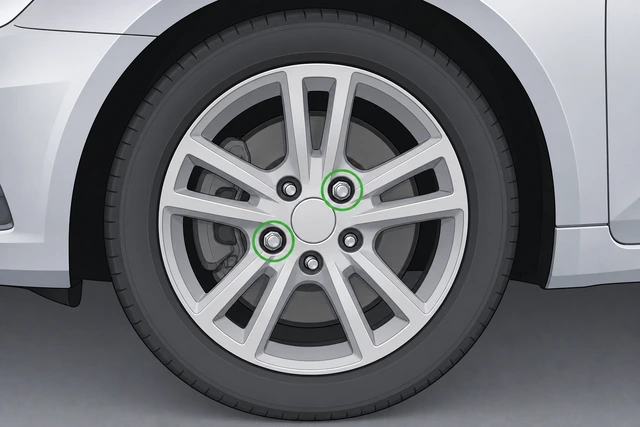
Two loose lugs catch the rim if rust bond snaps suddenly — bare studs mean the wheel can fly off.
- Thread two nuts back three turns.
- They catch the rim if it pops free suddenly.
Kick the sidewall firmly while pulling.
Kick the sidewall — pull at 9 and 3.
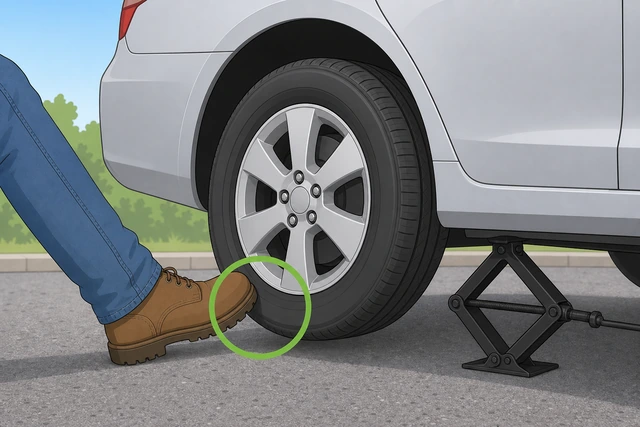
Rust binds metal to metal — a kick breaks the seal where hands alone cannot.
- Kick the rubber sidewall inward — not the tread.
- Pull with both hands at 9 and 3 o'clock.
Rock the car an inch with loose lugs as a last resort.
Roll one foot forward and back — last resort.
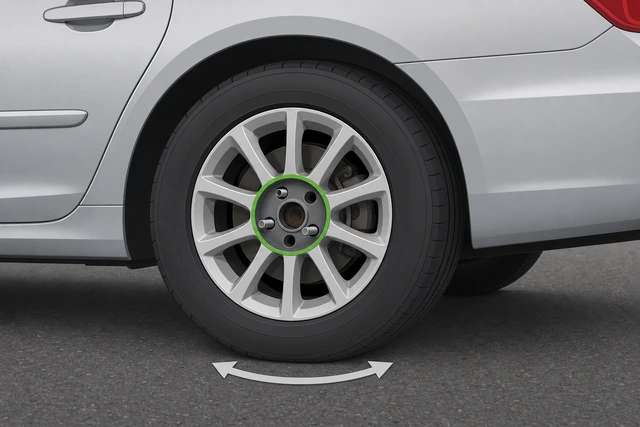
A tiny roll shifts weight on the studs and cracks corrosion without a hammer.
- Park + e-brake on · lugs loose but threaded.
- Rock the car an inch to break rust — then pull wheel off.
If there's no spare or it's flatDonut soft, missing, or sealant-only kit
Use this at Step 3 when the spare won't hold air or the trunk has no wheel.
Press the spare with your thumb — it should feel firm.
Squishy donut = do not drive on it.
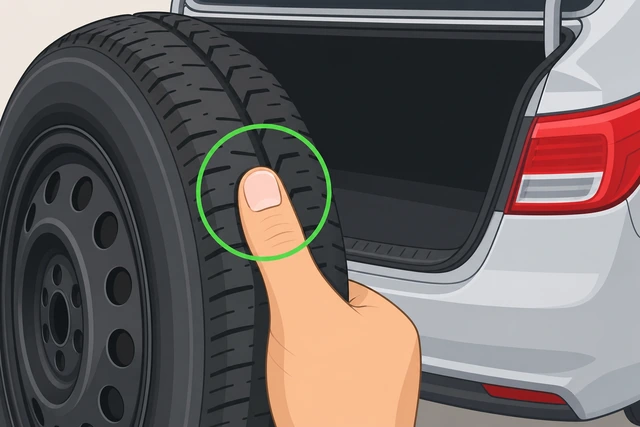
A squishy donut fails within miles — better to call for help before you jack up.
- Thumb-press the spare — it must feel firm.
- Below 40 PSI or soft? Call roadside assistance.
Target pressure is stamped on the spare sidewall — often 60 PSI for donuts.
Check for a sealant kit instead of a wheel.
Sealant-only trunk — no wheel to mount.
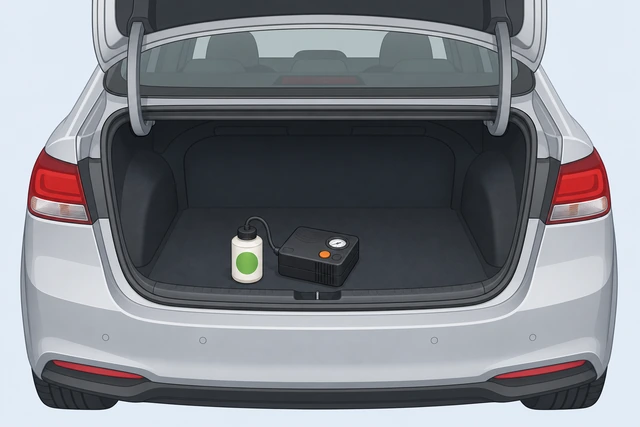
Many cars ship sealant instead of a spare — mounting a wheel that is not there wastes time.
- Look for inflator/sealant bottle instead of a tire.
- Follow kit label for tread punctures only.
EVs: This 12-step guide assumes a conventional spare in the trunk.
Call roadside assistance — don't improvise a jack without a spare.
No spare — hazards on and wait for tow.
Jack work without a mountable spare only risks injury — a tow is the safe call.
- Do not jack if you have nothing to mount.
- Call insurance roadside or manufacturer assistance.
When to call a tow instead of DIY
- Shoulder too narrow or traffic too close — don't change a tire in the travel lane.
- Spare is flat, missing, or you only have sealant kit (many EVs and newer sedans).
- Bent wheel stud or jack point crushed — driving risks wheel loss.
Warnings
- Never change a tire in the travel lane — move fully off the road first.
- Donut spares: 50 mph / 50 miles maximum until repaired.
- Never put hands or legs under the car while it is on the jack only.
Three rules that beat most flat-tire guides
- Loosen on the ground. Break every lug before the tire leaves the pavement — otherwise the wheel spins in the air.
- Tighten on the ground. Hand-start lugs in the air; final star-pattern torque only after the spare touches down.
- Metal jack point only. Pinch-weld notch on sedans — never the plastic rocker panel.
FAQ
Can I jack on grass or dirt?
Only on hard flat ground. Soft shoulder can let the jack sink and tip the car.
Why loosen lugs before jacking?
On the ground the wheel cannot spin. In the air the wheel spins and you cannot break torque.
Comments
Questions, corrections, and what worked for you. Comments are reviewed before they appear.