How to Plant a Tree
Plant a young tree with its root flare at soil grade, a hole that is wide rather than deep, and a clear first-week watering plan. One step at a time. Start with the preflight. If leaves droop, use the wilt branch; if roots circle the pot, open the root branch.
Tips for reading this guide
- One step at a time. Read the green caption, the Why line, then the bullets.
- Move on when the green done line is true — then go to the next step.
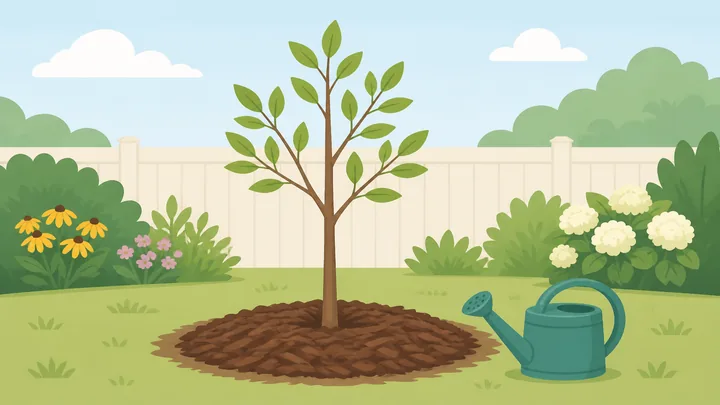
Things You'll Need
- Healthy nursery tree (container or balled-and-burlapped)
- Shovel and tarp for soil
- Hose or at least two large watering cans
- Bark mulch (2–3 inches)
- Utility knife (container trees)
- Gloves and sturdy shoes
- Optional: stakes and soft ties for windy sites
What's going wrong?
Planting today? Use the ten-step path. Drooping leaves or circling roots? Open the matching branch.
Start hereSafe site · flare at grade · deep water
Preflight — have the site, water, tools, and tree ready.
Tree and tools ready · water reaches the site · planting conditions are suitable.
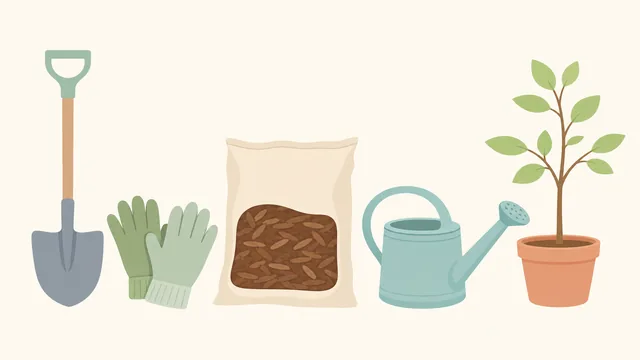
A prepared site prevents unsafe digging, unnecessary lifting, and a newly planted tree drying out while you search for supplies.
- Set out a shovel, gloves, a tarp for excavated soil, mulch, and a hose or filled watering cans.
- Keep the root ball moist and shaded until you are ready to set it in the hole.
- Choose a day when the ground is not frozen or waterlogged.
Your tools and water are at the site, and the root ball is moist.
All YES? Continue to Step 1.
Call 811 and check the tree's mature clearance.
Marked utilities below · open space above and around the future canopy.
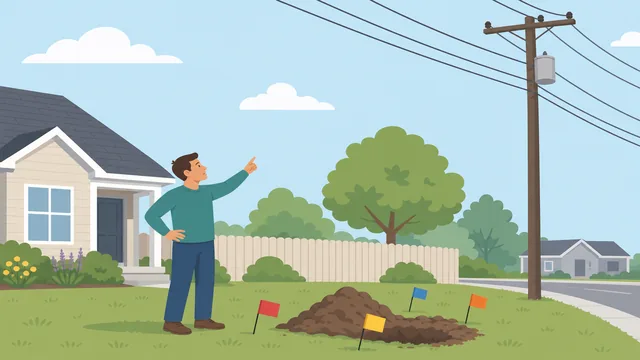
Digging before utilities are marked can cause severe injury, service loss, or costly damage. A tree also needs room at its mature size.
- In the U.S., call 811 or submit an online locate request before digging; wait for markings and follow their instructions.
- Read the tree tag for mature height and spread.
- Move the planting spot if mature branches would reach overhead wires, a building, or another tree.
Utilities are marked or cleared, and the mature tree will have adequate clearance.
Match the planting site to the tree's sun and drainage needs.
Observe the sunlight · avoid a spot that stays wet after rain.
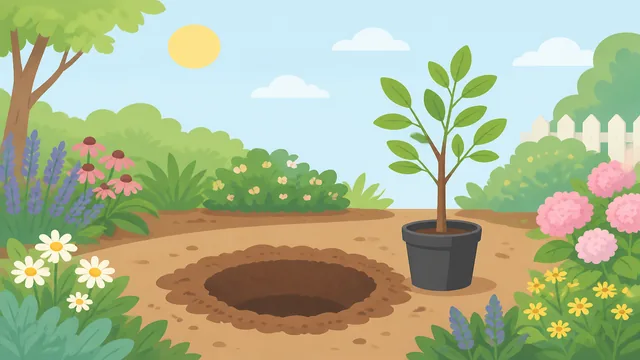
Correct planting technique cannot overcome a site with the wrong light level or chronically waterlogged roots.
- Compare the site's direct-sun hours with the light requirement on the tree tag.
- After rain or watering, avoid low spots where puddles remain for a day or longer.
- Choose a spot away from compacted traffic areas and with room for a mulch ring.
The site matches the tree's light needs and drains without standing water.
Dig a hole two to three times as wide as the root ball.
Wide sides for spreading roots · firm, shallow bottom.
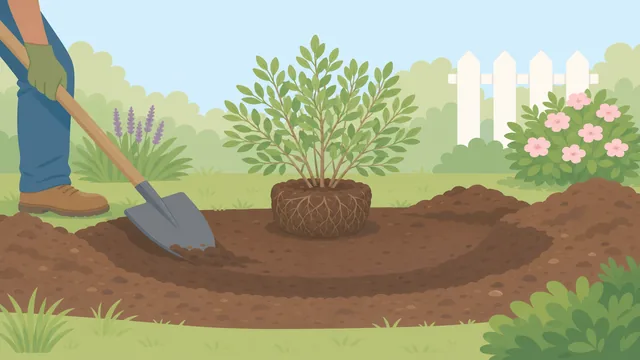
Roots establish faster in loosened soil around the ball. A hole dug too deep allows the tree to sink and buries the root flare.
- Measure the root ball's height and width.
- Dig a hole two to three times the root-ball width, keeping the sides broad rather than vertical.
- Stop at a depth no greater than the root-ball height; leave the bottom firm and pile the native soil on a tarp.
The hole is wide, shallow, and has firm soil at the bottom.
Expose the root flare and free any circling roots.
Trunk flare visible · container removed · roots directed outward.
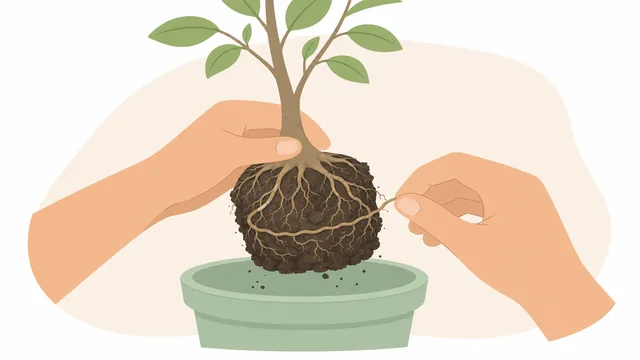
A buried flare can decline, while circling roots can later girdle the trunk instead of growing into the surrounding soil.
- Brush away loose soil from the top of the ball until you find the root flare, where the trunk begins to widen into roots.
- Remove the container. For balled-and-burlapped trees, remove or cut away string, wire baskets, and synthetic material from the top of the root ball.
- Loosen or tease out circling roots. If they are tightly pot-bound, use the circling-roots branch.
The root flare is visible and roots are no longer wrapped in a tight circle.
Set the tree with the root flare at or slightly above grade.
Flare at grade · straight trunk · root ball supported from below.
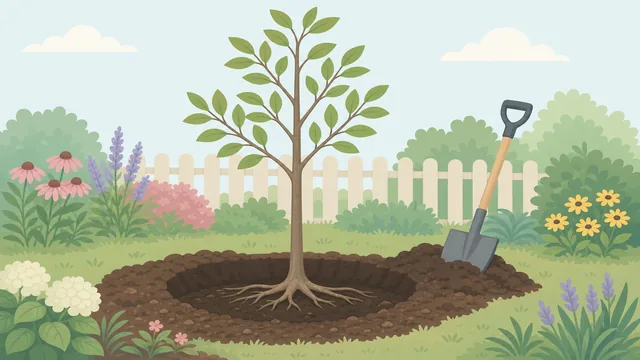
Setting the root flare at the final soil level protects the trunk base and gives roots the oxygen they need.
- Lower the tree by holding the root ball, not the trunk; get help for a heavy ball.
- Set it on the firm bottom and turn the best side toward the view.
- Check from two directions that the trunk is vertical and the flare is at or slightly above the surrounding soil.
The tree is centered and upright, with its root flare at the correct height.
Backfill with the excavated native soil.
Native soil returned around the root ball · flare stays visible.
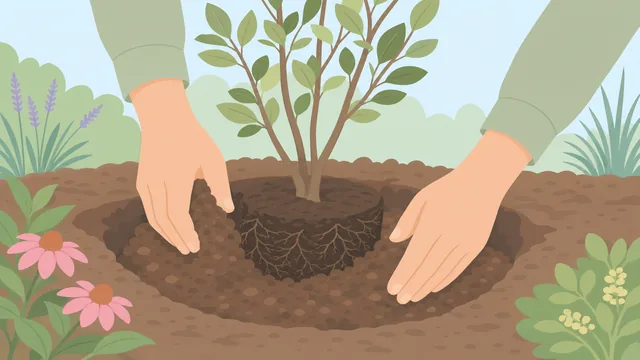
Native soil helps roots transition into the surrounding ground. Gentle firming removes large air pockets without compacting the root zone.
- Return the excavated soil around the ball in small amounts.
- Use your hands or the heel of a boot to firm lightly as you go; do not stomp hard.
- Keep checking that the root flare remains uncovered and the tree stays vertical.
Native soil reaches the surrounding grade, with no large gaps and the flare still visible.
Water deeply to settle the soil around the roots.
Slow soak · water reaches the root ball · soil settles naturally.
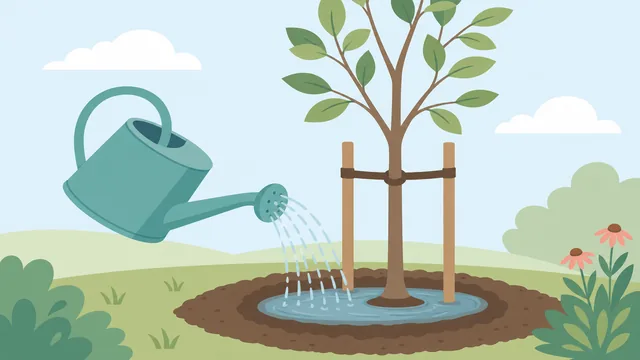
A slow, deep watering settles soil against the roots and moistens the entire root ball, which may be drier than the surrounding soil.
- Run water slowly over the root zone so it soaks in instead of running away.
- Pause if water pools, then continue once it drains.
- After the soil settles, add native soil to any low spots without covering the flare.
Water has soaked into the root zone and the settled soil is level with the surrounding grade.
Spread a wide mulch ring, clear of the trunk.
Two to three inches deep · wide ring · bare space at the trunk.
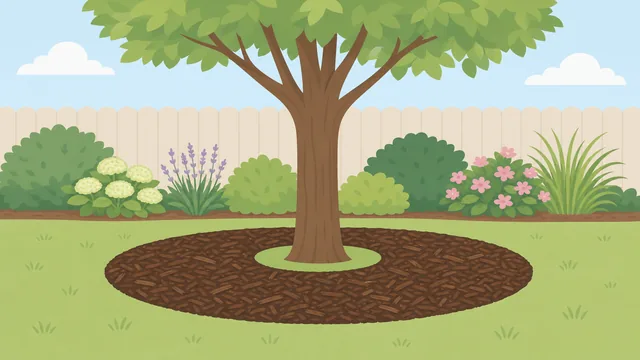
Mulch conserves moisture and limits weeds, but mulch touching the bark can encourage rot, pests, and roots growing in the wrong place.
- Spread organic mulch two to three inches deep in as wide a ring as practical.
- Pull mulch back to leave a two- to three-inch bare circle around the trunk.
- Keep the mulch layer even; do not build a mulch volcano.
A level mulch ring covers the root zone while the trunk base remains clear.
Stake only if the tree cannot stand securely on its own.
Use only when needed · loose ties · trunk can still flex.
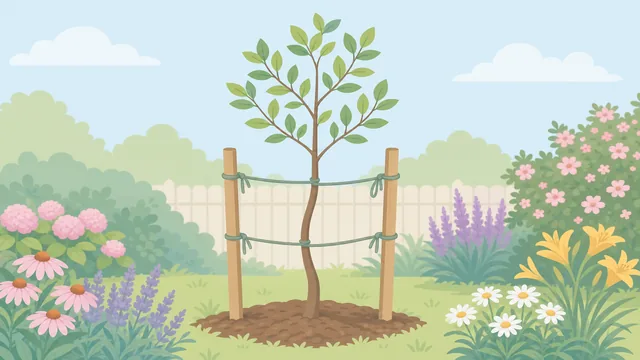
Most trees establish stronger trunks without stakes. Temporary support is useful only when wind or a tall, narrow tree makes the root ball unstable.
- Gently push the trunk; leave it unstaked if the root ball does not shift.
- If support is needed, use two or three stakes outside the root ball with wide, soft ties placed low on the trunk.
- Adjust ties so the trunk can move slightly, and plan to remove them after one growing season.
The tree stands stable, either unsupported or with loose, temporary ties.
Follow a first-week deep-watering check.
Check below the surface · deep soak when dry · avoid daily sprinkling.

New roots cannot yet draw water from a large area. Checking below the mulch prevents both drought stress and constantly soggy soil.
- For the first week, check the soil a few inches below the surface near the root ball each day or two.
- Deep-water slowly whenever those top few inches are dry; let excess water drain before watering again.
- If leaves droop in the first one to two weeks, use the wilt branch.
You have a repeatable soil-check routine and know when the next deep watering is needed.
Leaves wilt after plantingTransplant stress — moisture, temporary shade, and patience
Use when leaves droop in the first week but twigs still bend (alive).
Check root-zone moisture and give one slow, deep soak if dry.
Check below the mulch · soak only if dry · let water drain.
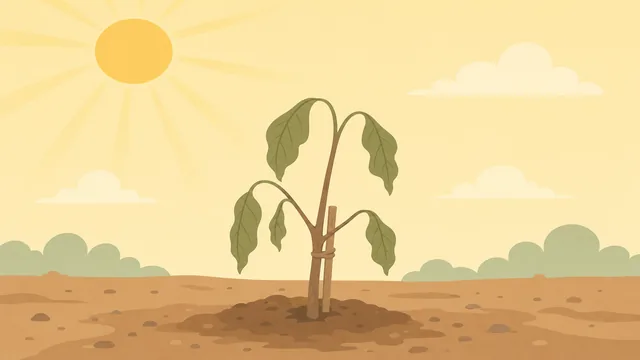
Wilt can be transplant stress, but both dry and saturated soil can make it worse. A root-zone check tells you whether watering is actually needed.
- Push a finger or trowel a few inches into the soil beside the root ball.
- If it is dry, water slowly until the whole root zone is moist; if it is wet, wait and improve drainage rather than adding water.
- Do not use fertilizer while the tree is stressed.
The root zone is moist but not waterlogged, and no fertilizer has been applied.
Reduce hot afternoon stress and watch for recovery.
Temporary afternoon shade · open airflow · check again tomorrow.
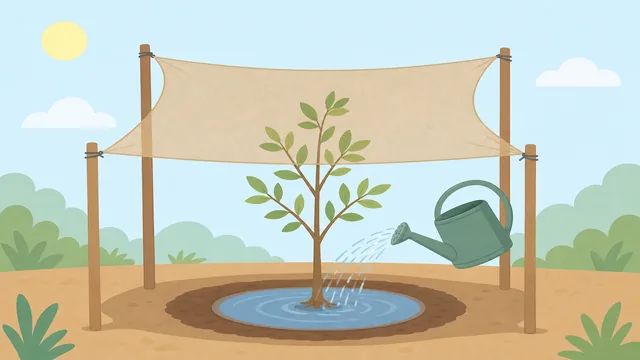
Recently disturbed roots may not replace water as fast as leaves lose it in heat and wind. Brief shade lowers that demand without changing the site permanently.
- On very hot or windy days, prop shade cloth so it blocks harsh afternoon sun without touching or enclosing the leaves.
- Keep the soil-check routine and remove the shade after three to seven days or once leaves recover.
- Contact the nursery or an arborist if twigs become brittle, the trunk is damaged, or wilt worsens despite correctly moist soil.
The tree has temporary heat protection, open airflow, and a clear point for seeking help.
Roots circle tightly around the root ballFree pot-bound roots before the tree goes in the ground
Use when roots form dense circles around a container-grown tree or hold the pot's shape after removal.
Loosen the outer roots and make shallow vertical cuts if needed.
Tease loose roots outward · cut only dense, circling outer roots.
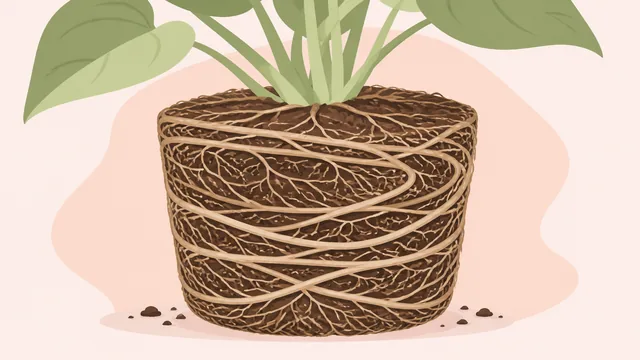
Roots left circling in the pot's shape can continue circling after planting and eventually constrict the trunk or fail to anchor the tree.
- With gloved fingers, pull loose outer roots away from the ball and point them outward.
- For a dense mat of circling roots, use a clean knife to make three or four shallow vertical cuts through the outer layer.
- Do not tear apart the entire root ball or cut large structural roots.
The outside roots are directed outward instead of forming an unbroken circle.
Spread freed roots outward and backfill without bending them back.
Roots radiate into native soil · flare remains at grade.
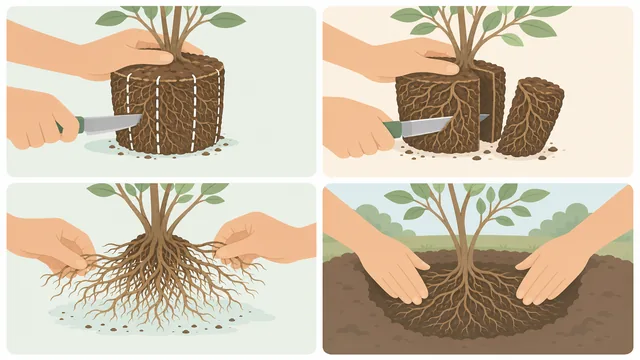
Outward-facing roots make direct contact with the surrounding soil, helping the tree establish beyond the original pot shape.
- Set the prepared ball at the correct depth, with the root flare at or slightly above grade.
- Gently fan freed roots into the surrounding soil where possible, without forcing or sharply bending them.
- Backfill with native soil and continue at Step 7: water deeply.
Freed roots point outward into native soil, and the tree is ready for final watering.
When to get help
- Hire planting help if digging clay or lifting a heavy root ball exceeds your safe lift.
- Call 811 (US) before you dig to mark buried utilities.
- Contact the nursery if the tree arrived with dry, broken, or circling roots you cannot free.
Warnings
- Call 811 before digging.
- Lift with legs, not back — get help with heavy balls.
- Do not plant in frozen or waterlogged soil.
Tips
- Water weekly in the first growing season during dry spells.
- Stakes only if wind rocks the root ball; remove ties after one year.
FAQ
Should I add fertilizer to the hole?
Usually no. Compost mixed lightly is enough; heavy fertilizer can burn new roots.
Burlap — leave it on?
Natural burlap on the bottom can stay; cut away the top and any synthetic wrap that won't rot.
Best season to plant?
Cool weather — early spring or fall — so roots grow before summer heat.
Comments
Questions, corrections, and what worked for you. Comments are reviewed before they appear.